 I see a lot of these floating around the internet and especially on sites like Facebook and Pinterest. Some are just ok and some seem so amazing I can't imagine not using them. I have scoured hundreds of lifehacks and compiled a list of the ones I think are the most amazing and seem like they would actually work. I say that because some have been debunked and I haven't tested most of these myself, so I can't give you my personal opinion. I have tried to give credit, but quite a few of these are on multiple sites, so who knows who came up with them first? Click on the sitename and it'll take you to the post and maybe even more lifehacks you'll want to test out. From dedalvs: 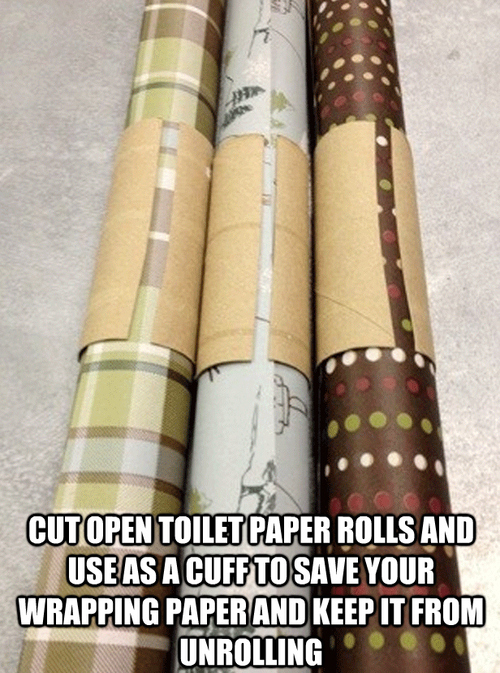 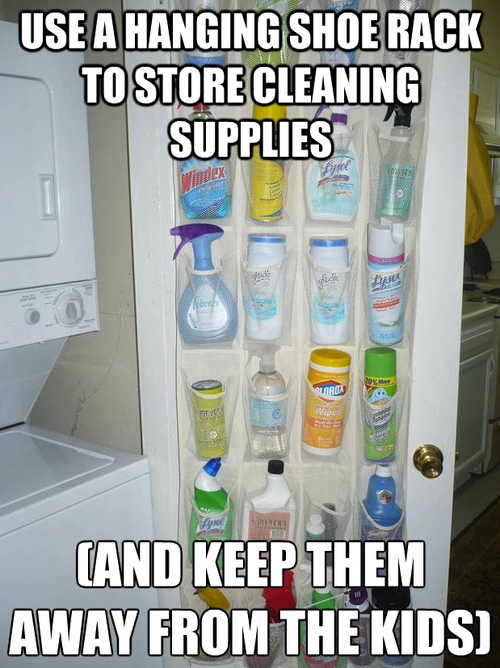 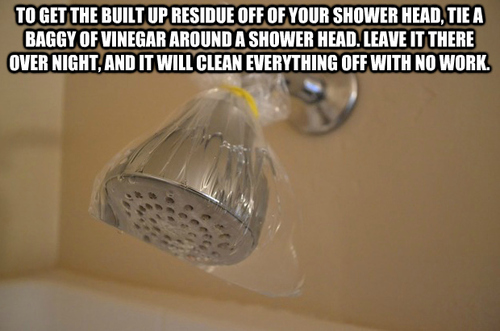 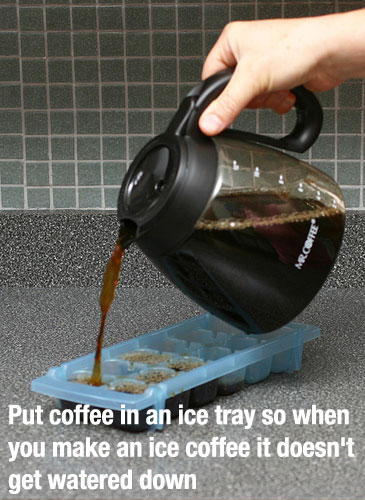 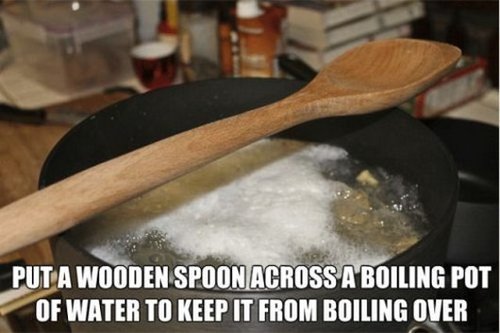 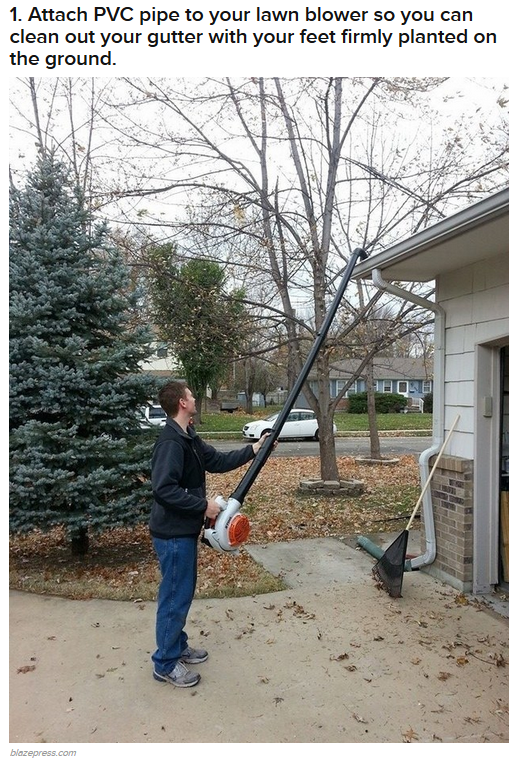 From Buzzfeed: 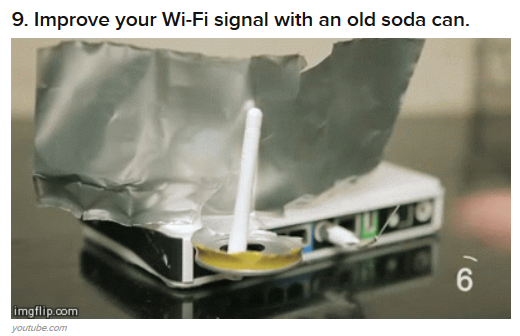 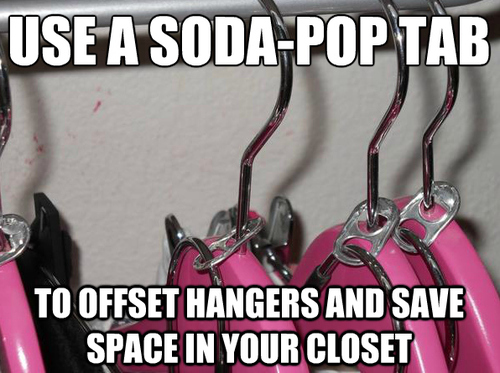 Click here for the how-to. This is absolute genius! I am totally doing this. From How to Nest for Less: 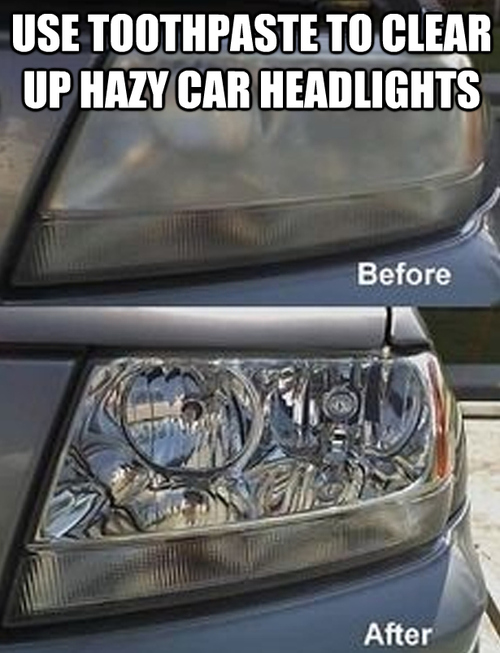 That's bloody brilliant, if you ask me! This lifehack is mentioned on most of the websites I visited. 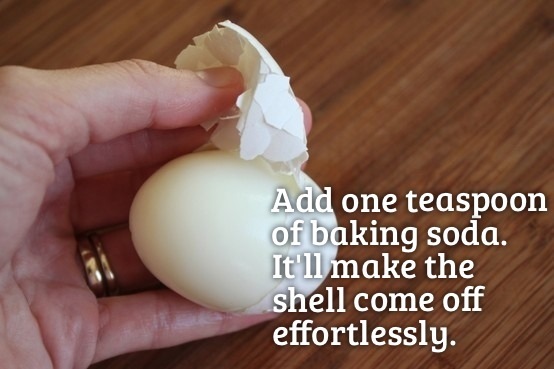 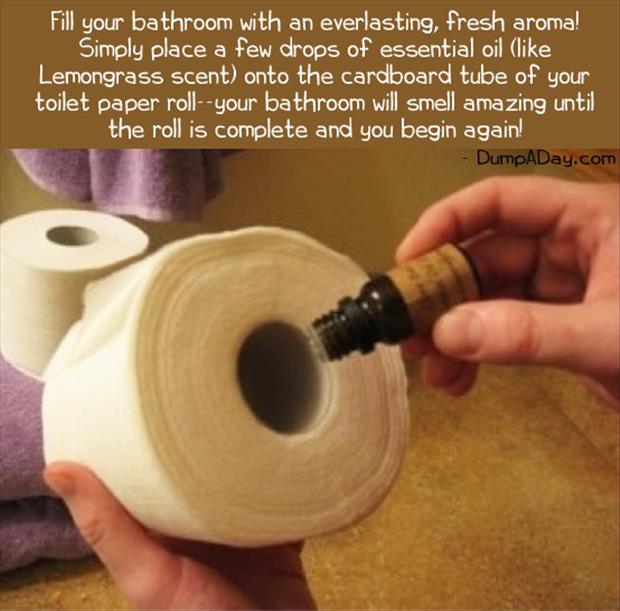 More from Buzzfeed: 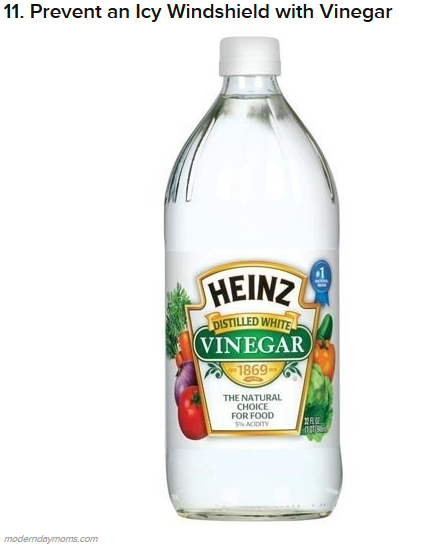 Click here for instructions. 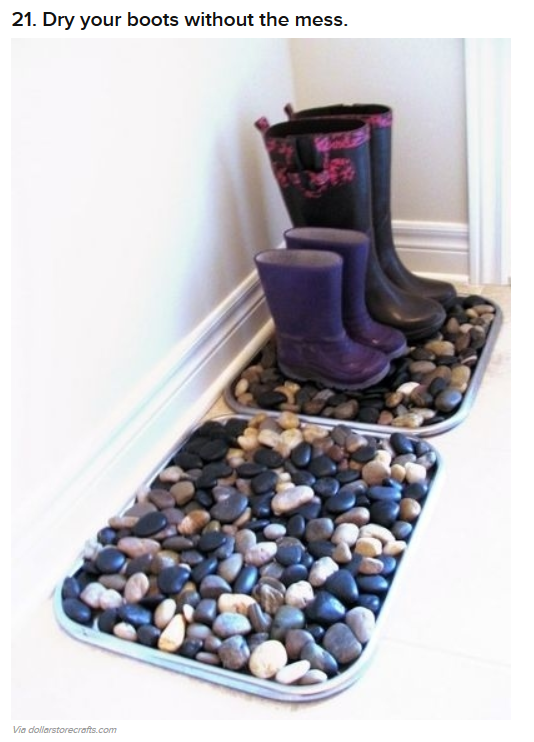 This looks really nice too. Most lifehacks are not visually appealing. Finally, from Life Hack: 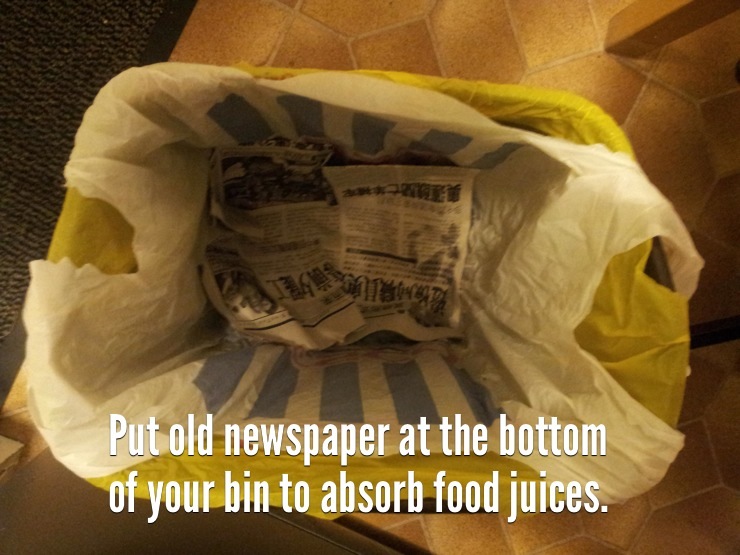 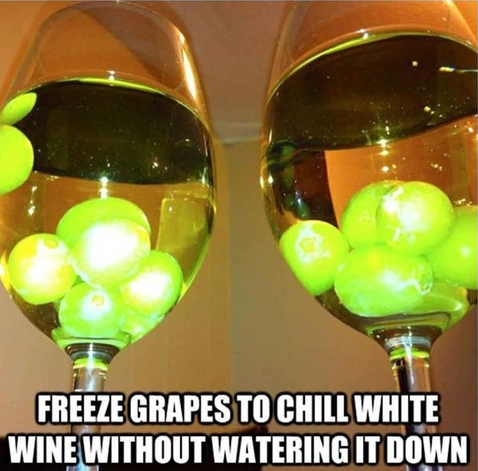 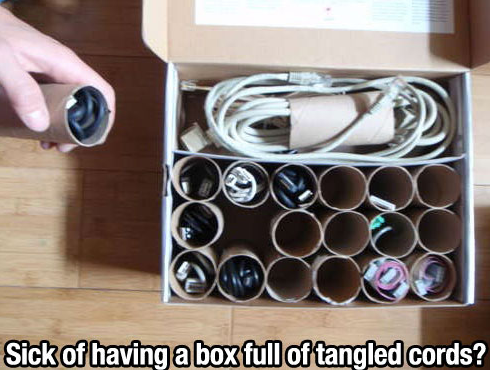 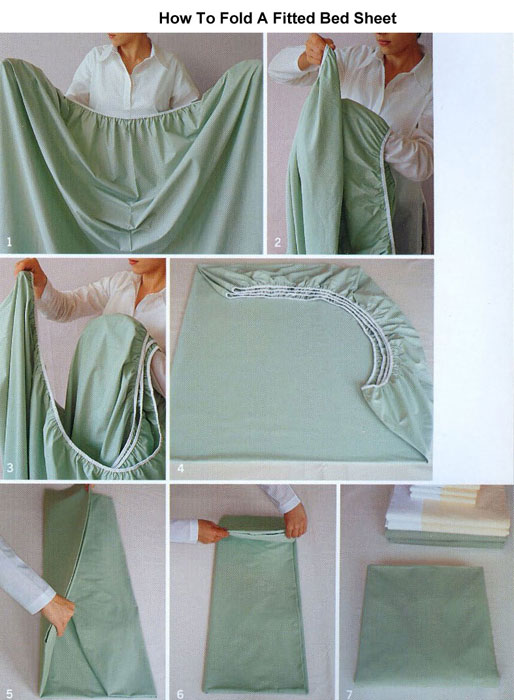 I have seen this many times on the net and on TV - truth be told, I can't do this. My sheets are kinda folded now, but nowhere near the perfection seen here.  Brilliant! I am so doing this from now on. So there are a few of the most interesting lifehacks I've found. I hope I've made your life a little easier :)
'Till next time... as usual you can leave comments below if you know of any great ideas.
0 Comments
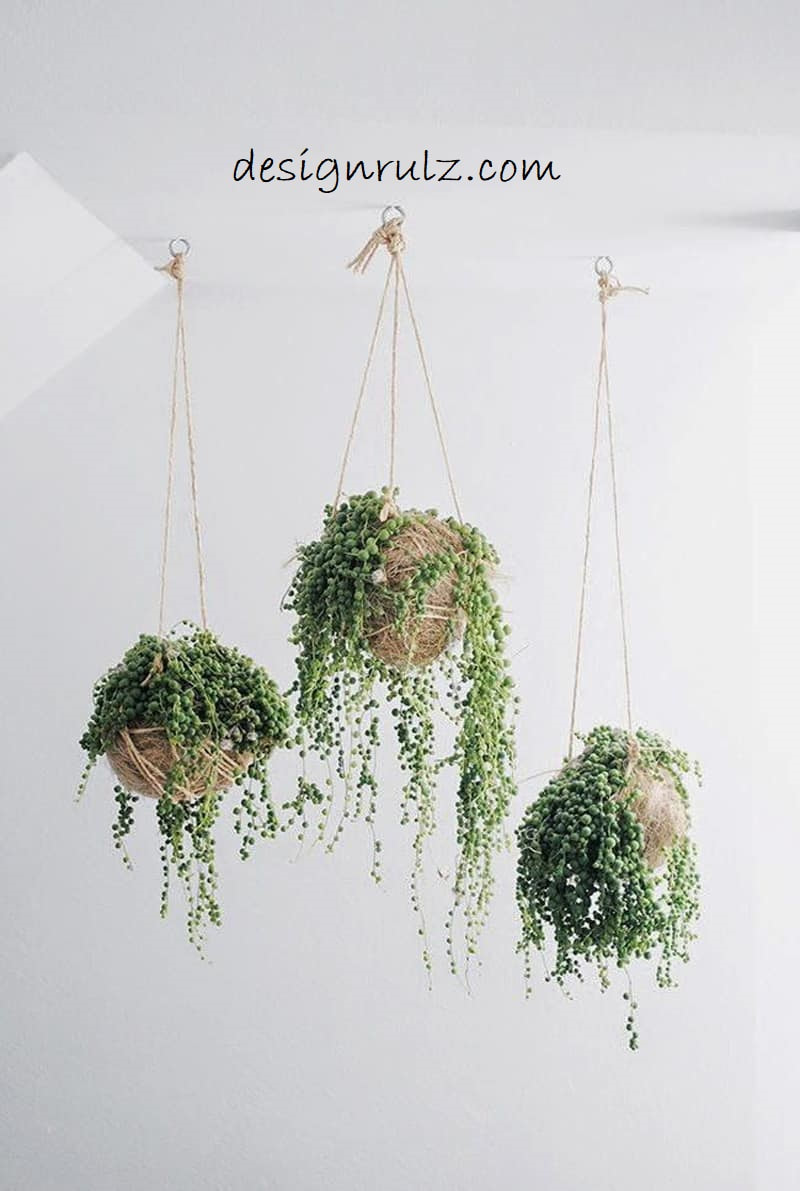
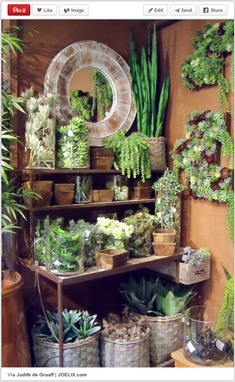 I mentioned in a previous post my recent addiction to Pinterest. Well, one of the boards that I pin to is decor ideas involving plants. I love plants and having them around. I only have a slightly green thumb - I kill a lot of plants, but I do have some survivors. I have a terrible habit of forgetting to water my plants and then way overdoing it. I'm hoping to change that behavior - I have put myself on a schedule, so I'm watering everything every Thursday. I really hope that helps and keeps everyone alive a little longer. Especially within the mini oasis I recently created. So, back to Pinterest. I was so inspired by this pin posted by Judith de Graaff that I decided I had to have something similar myself. I do not have the disposable income to recreate it exactly, but one night I had a lightbulb moment and remembered my old desk and thought maybe I could do something interesting with that.
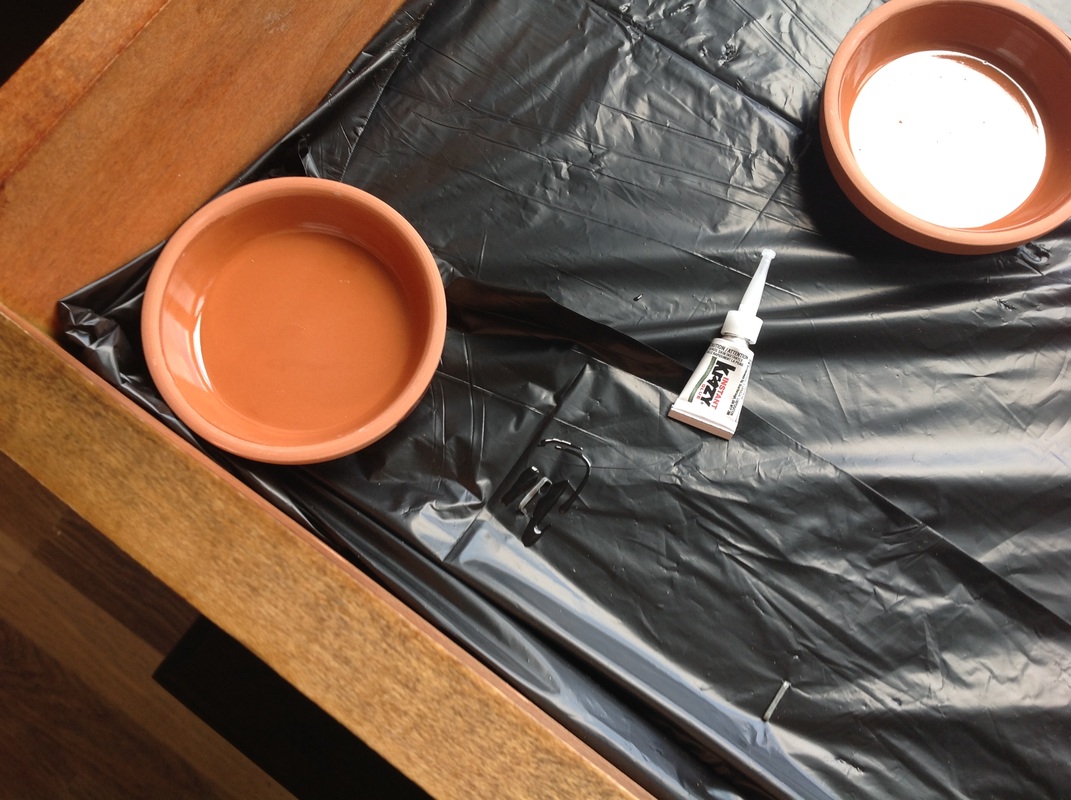
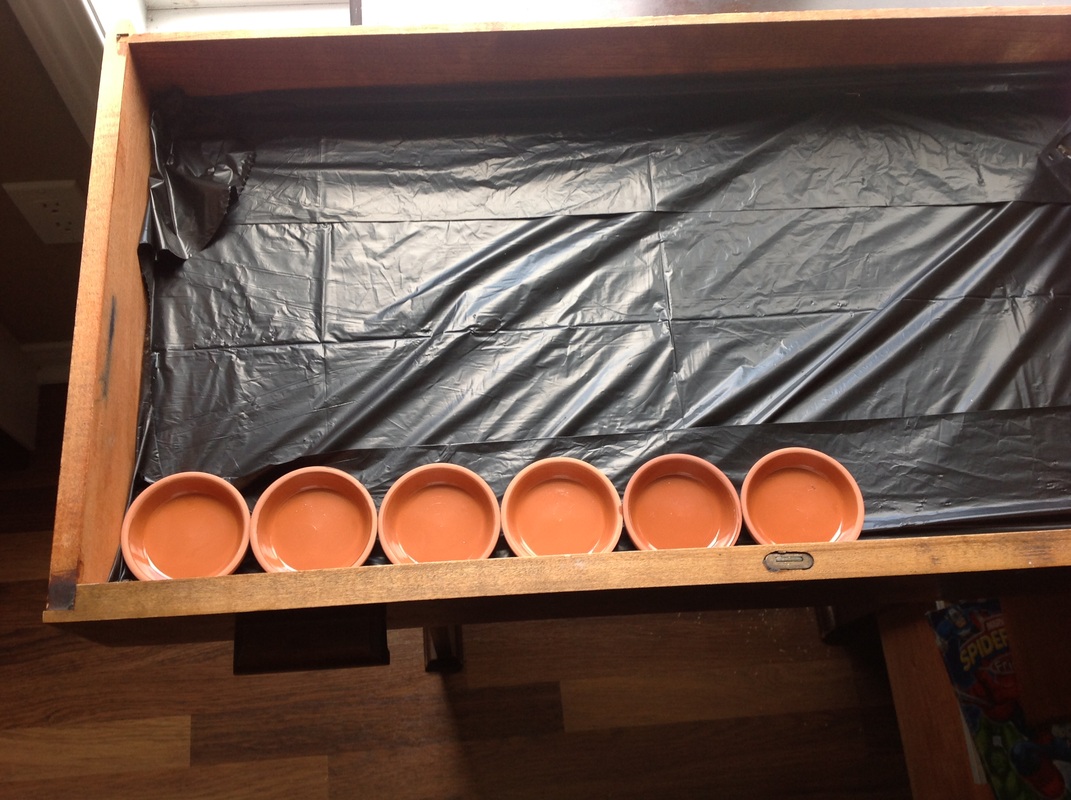
So I decided to turn my old desk into a planter. The irony is that all those beautiful succulents trailing down the wall and desk are what actually made me want to do this, and I was not able to find even one to add to my finished product.  Before - frontview - 23-09-14 - This is how sad and boring this corner looked. 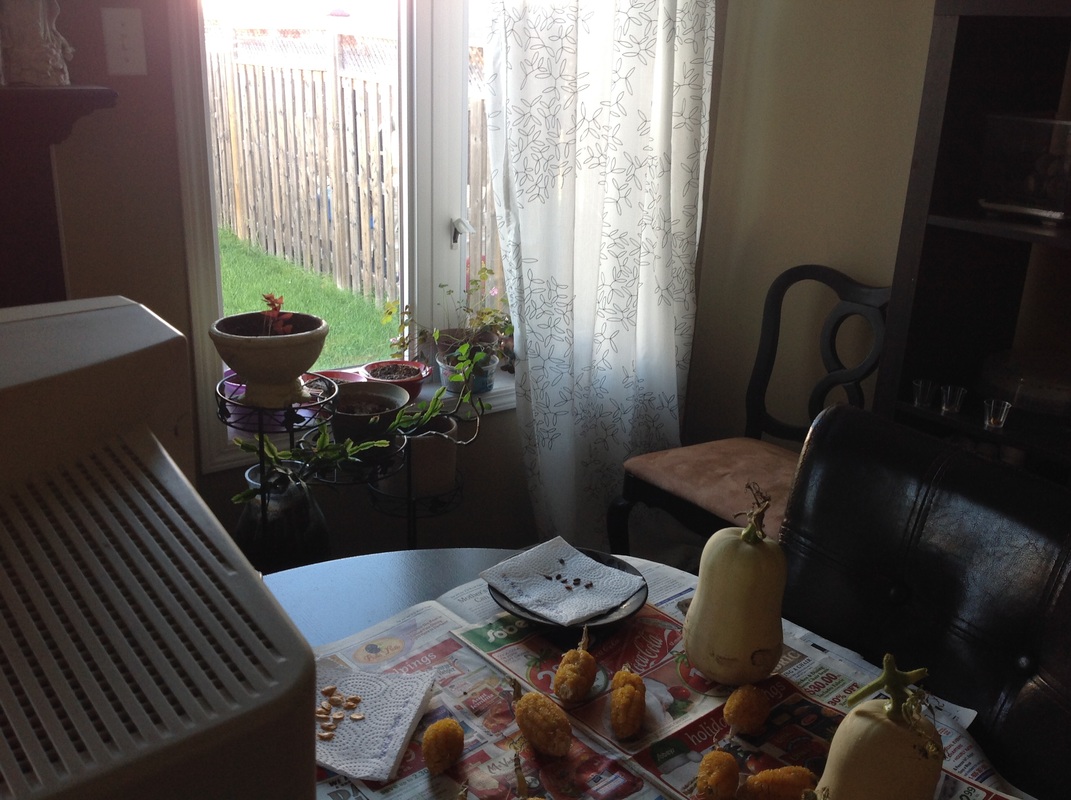 Before - diagonal view - 23-09-14 - ignore my various produce and seeds! 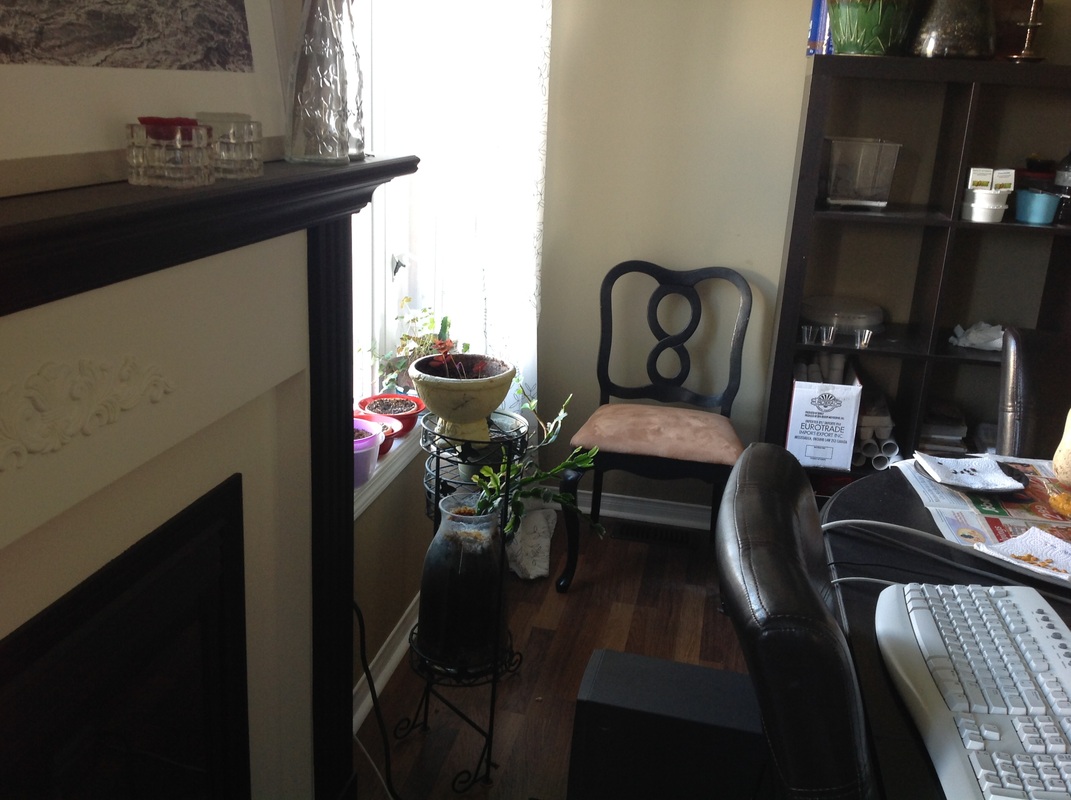 Before - sideview - 23-09-14 - again, very sad and boring. There are my before pictures. As you can see, the corner I was interested in sprucing up was super boring and very, very sad. Ready to find out what I did and how I did it? Here we go: 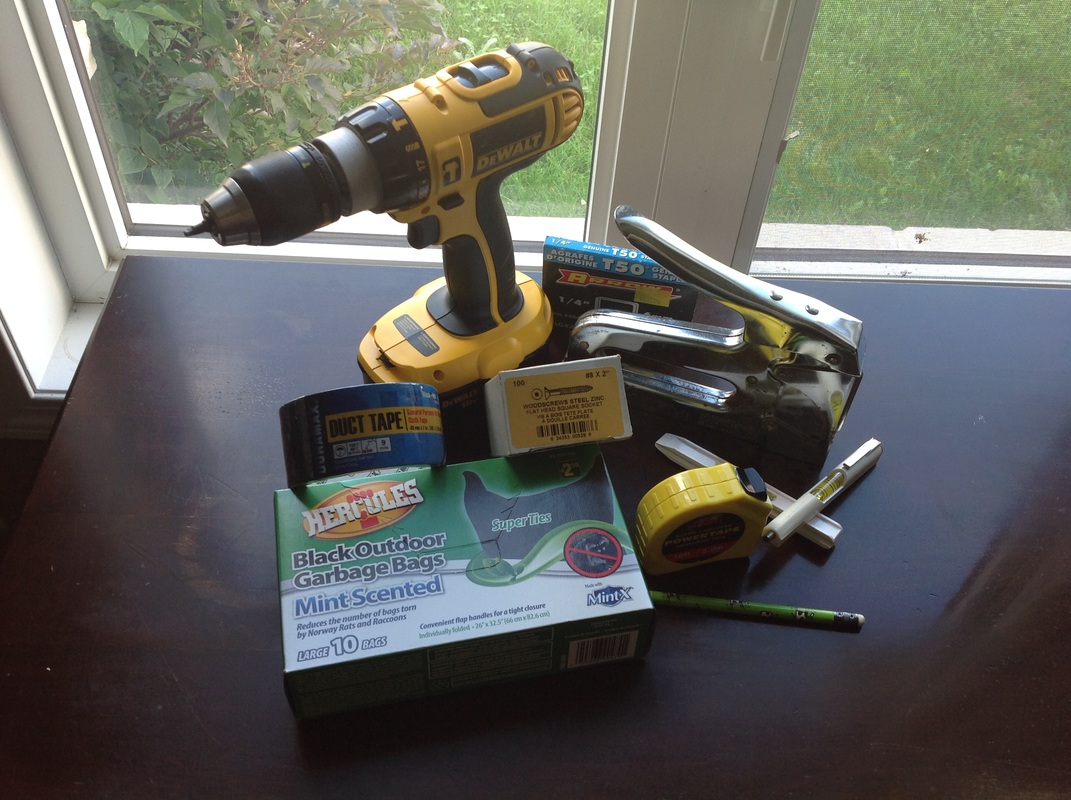 Here are the tools I used: A drill (with bits for screws and for making holes) A staple gun (with staples) Duct tape Measuring tape Level Screws Garbage bags (lol - mint-scented!) (the cow pencil was used for something else but really, really wanted to be in the photo) 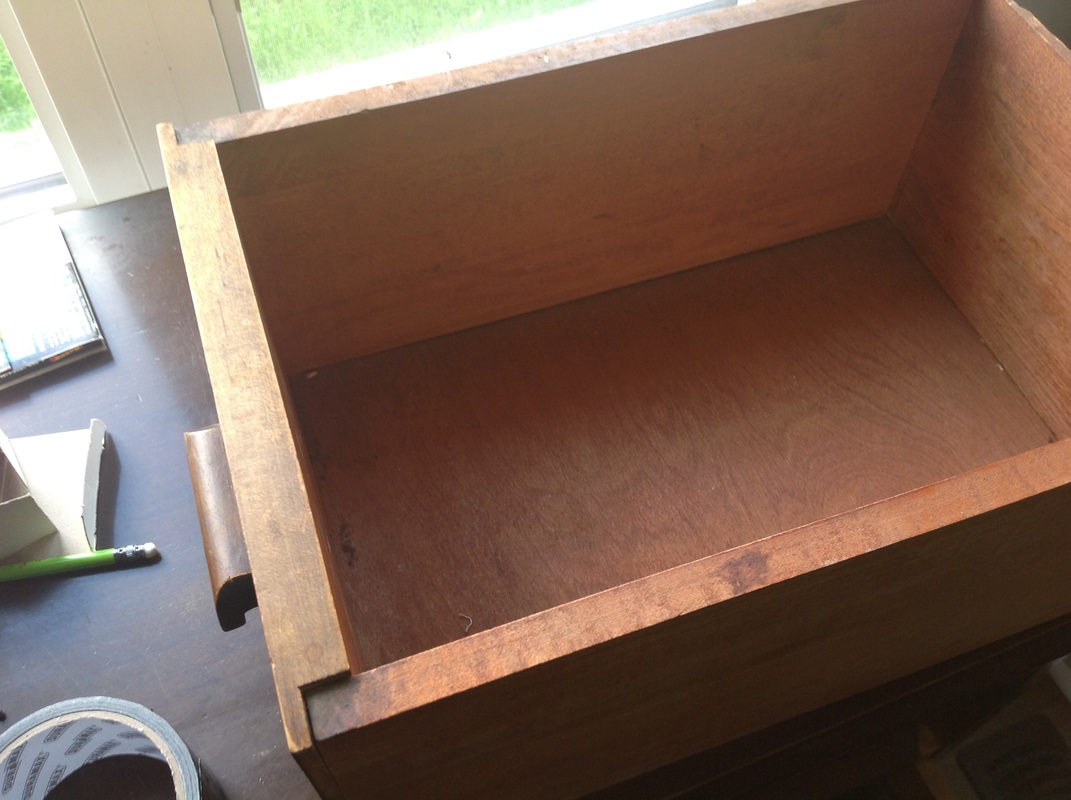 After lugging the desk and three drawers down the stairs (valuable tip: do not wear long yoga pants when moving heavy furniture down the stairs, they are just waiting to trip you to your death), I moved everything from the corner, put up my two guys and a hook to hold back the curtain (which I will paint another time, I didn't want to wait for it to dry), put the desk into place and got to work. Here is one of the drawers. I stapled and then duct-taped the black plastic garbage bags to the inside so that when I inevitably cause spillage when I'm watering the plants, it won't seep into the wood and rot and mold. 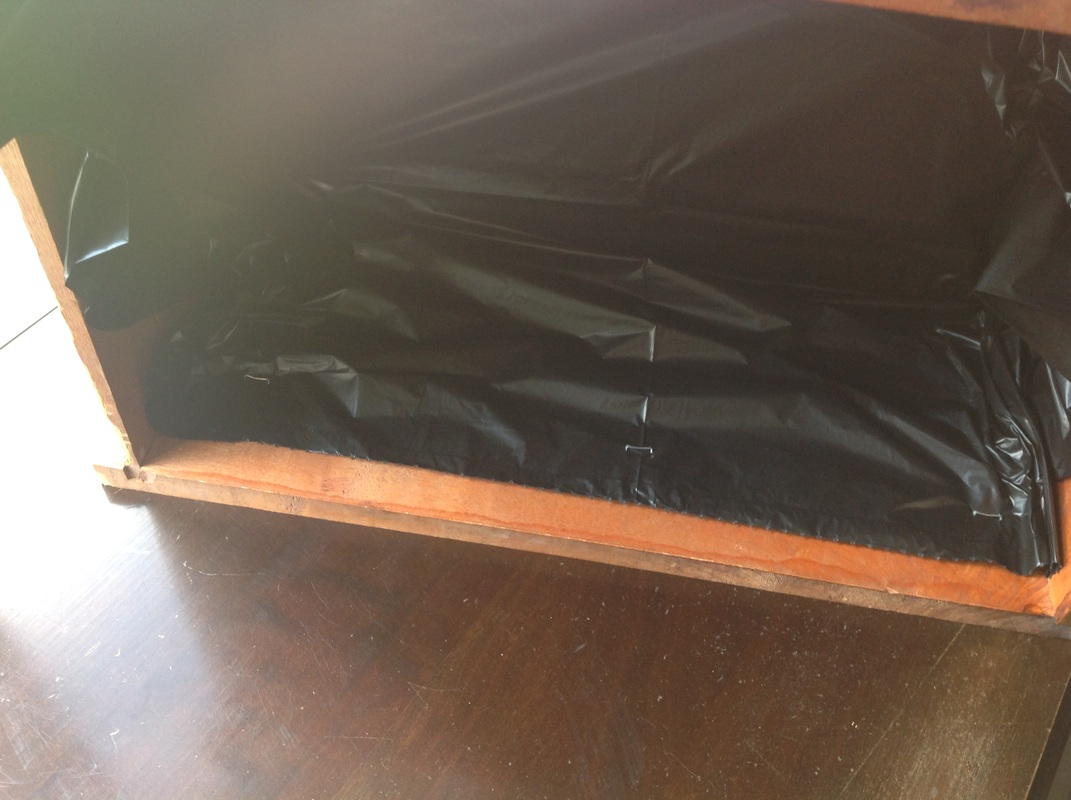 inside of the drawer with staples 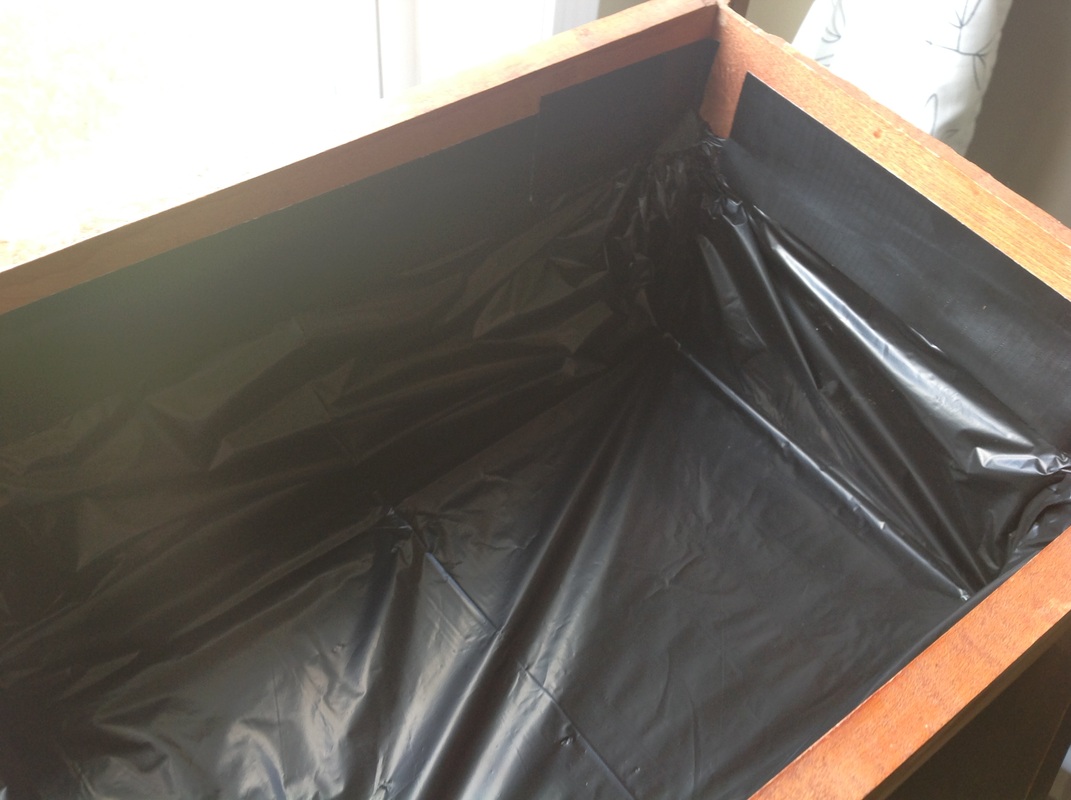 after adding the duct tape After I did this to all three drawers, I placed the lowest one into it's slot, sticking out as far as it would go without toppling over. 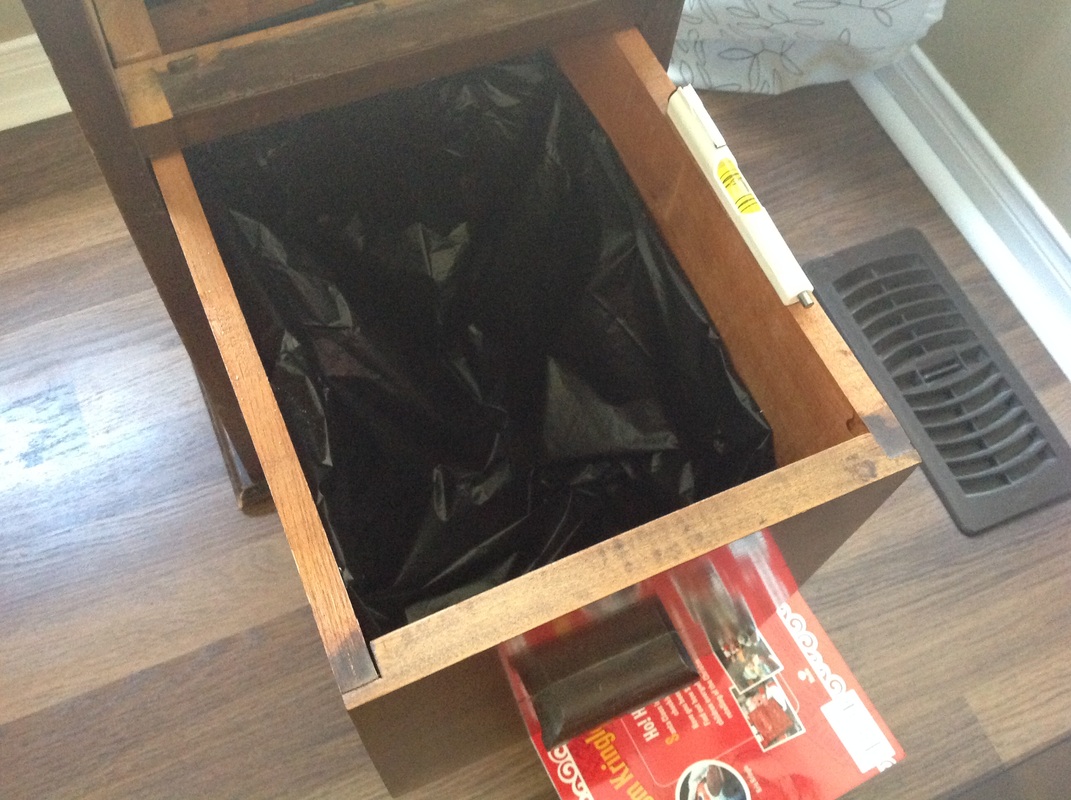 I placed a level on one side to help me out and stacked some books under until it was level. Here is where you'll use the measuring tape; measure both sides along the edge to make sure they're the same and your drawer is straight. I thought I took a pic of this, but I guess not and I'm sure you can picture it in your head right now, I have faith in you. 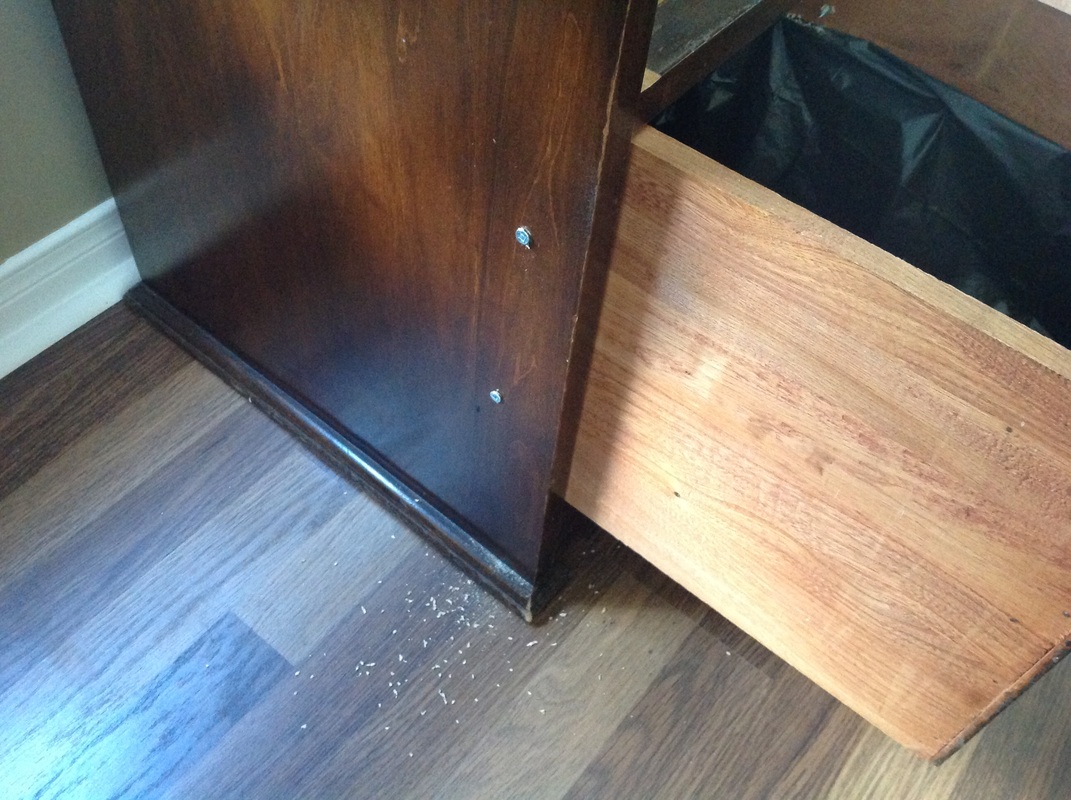 Once my drawer was nice and straight and level, I put four screws to hold it in place, two on each side. Before you start with the second drawer, I would suggest you place the container(s) that will house your plants in first. You may have a difficult time getting them in after. I shoved old newspaper and other packing materials in behind them, just to make sure that they stayed at the front and couldn't travel. I used a high vase and a glass jar that housed nuts in it's former life. It doesn't really matter what you use - the vessels won't be visible once it's done. 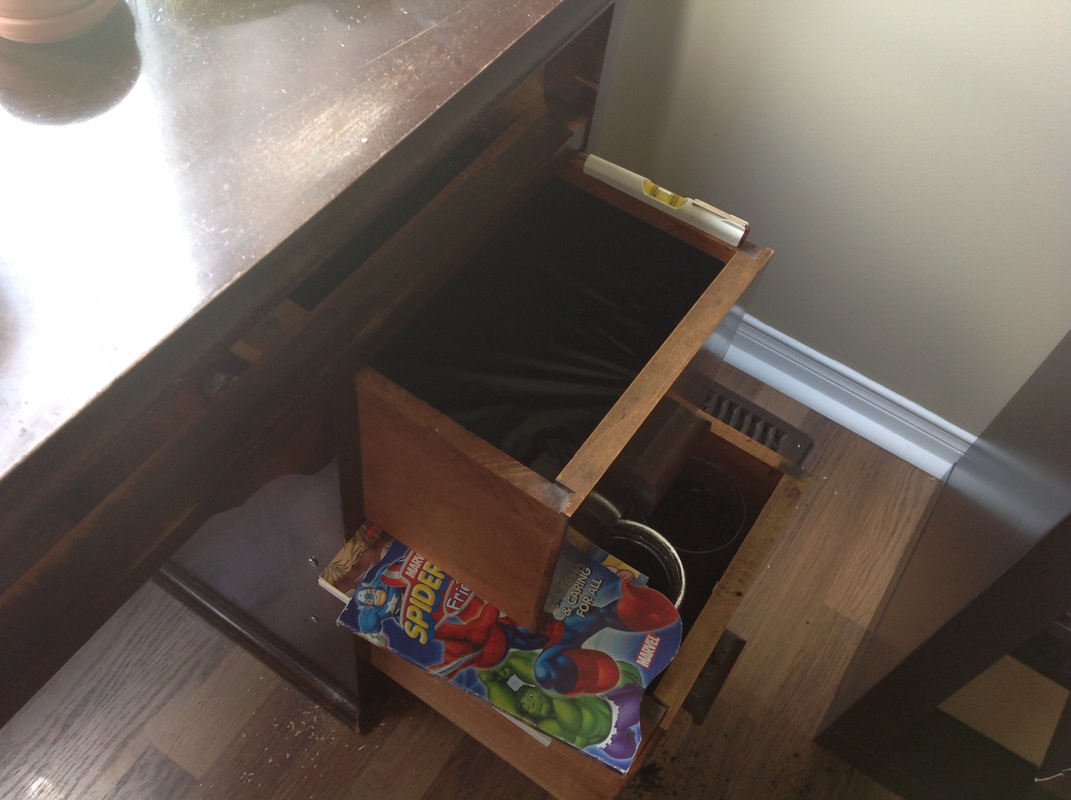 Follow the same process with the second drawer. Just make sure you don't pull it out all the way. Leave as little space as possible for the bottom plants. These drawers were smaller than I expected. 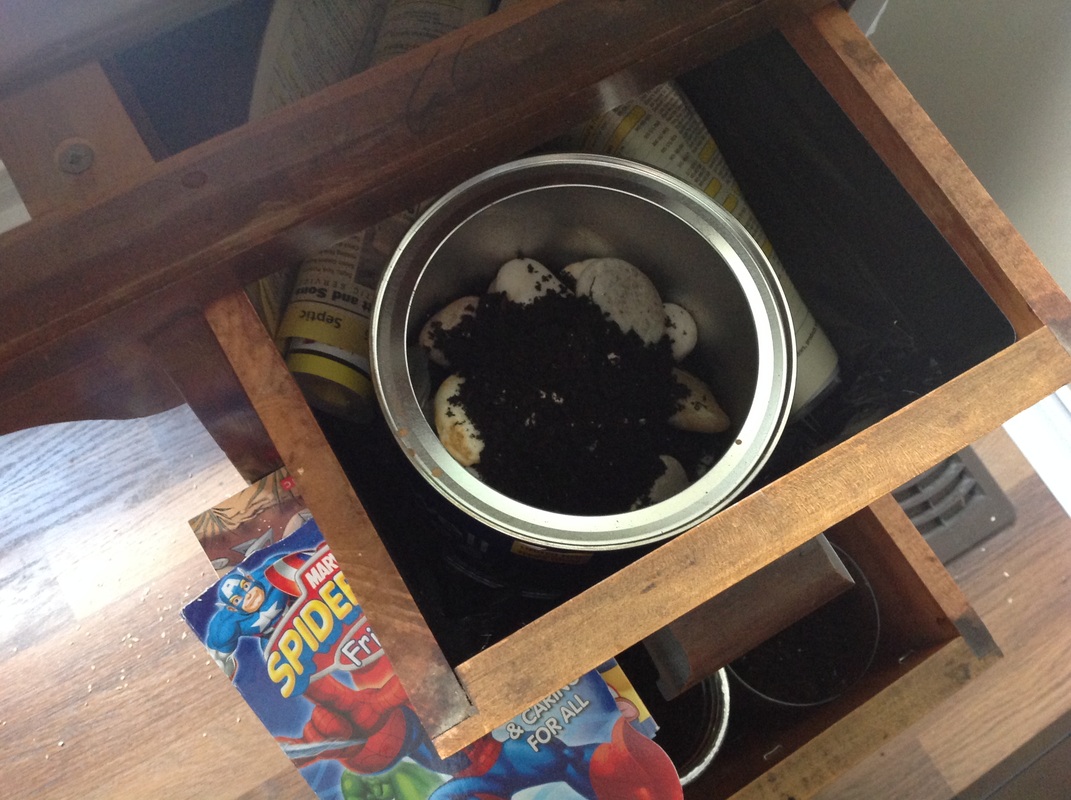 I used an old coffee container, it just happened to be the perfect height and shape. A word of caution: I would suggest you place your container into this drawer before you screw it in. There is less space to work with than the bottom. I almost couldn't squeeze this container in. Then I would have had to unscrew it and pull it out further. I rolled up chunks of phone book and anchored it into place.
I put these little terra cotta pots in the bottom left hand corner of the top drawer because I wanted those drapey succulents to grow out of here and just hang down into the empty space. You know the ones I was talking about earlier? My whole inspiration... that I could not get my hands on. I didn't put anything on the right side because I figured I'd put a plant that grows upward in the middle drawer, and this would give it the space it needed to grow. I put a staple under each base and a little crazy glue, hoping this will keep them in place. Since this is the top drawer, I did not screw it into place. As it stands, this drawer will be closed until I find the perfect little gems I need. Then I'll only keep it open about an inch to let them grow out and leave space for the other plant below it. 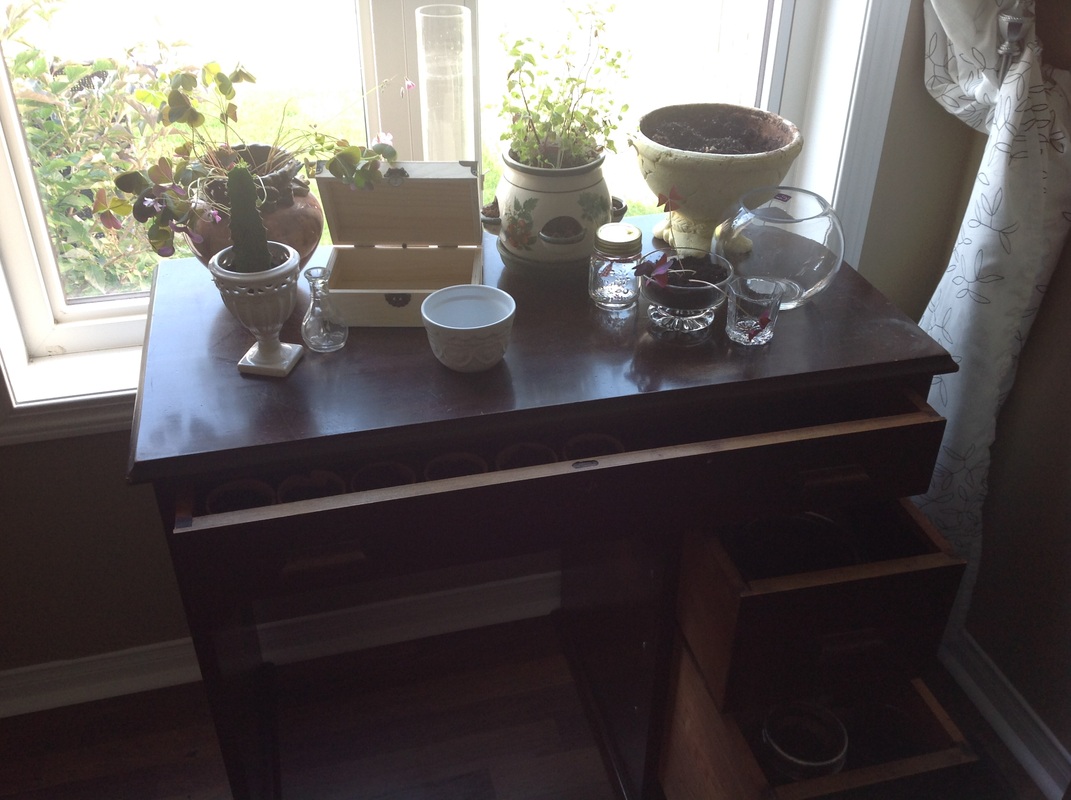 So here's the end of day one. It's pretty much put together and I even had some plants to add. I made a trip to the dollar store and picked up some random things to plant in, including the box. I wanted different heights and sizes and foliage to make this look interesting. 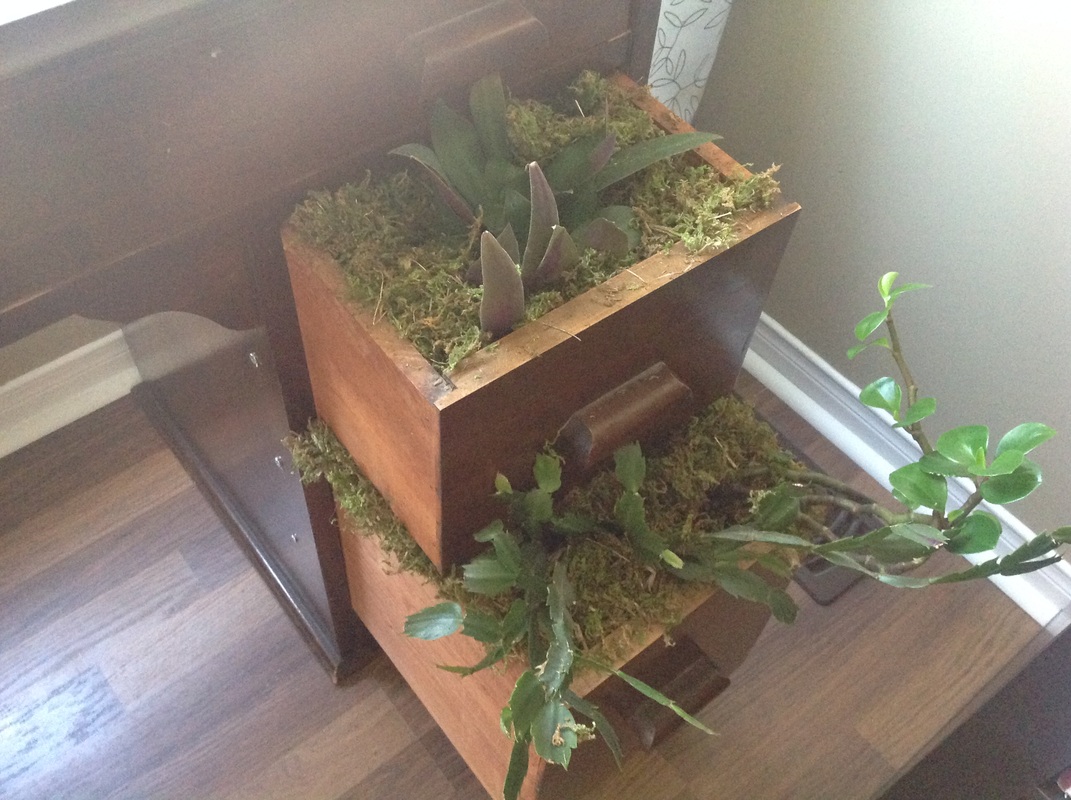 So day two was really just about finishing touches. I went back to the dollar store and bought some decorative moss to cover the tops of the bottom drawers, I think it turned out great, I'm so happy with the result. You'll have to forgive the poor quality of my after pictures. Unfortunately the sun and light did not want to work with the ipad, which is how I take these pictures. Each one was either dark or grainy, so please bear with me! 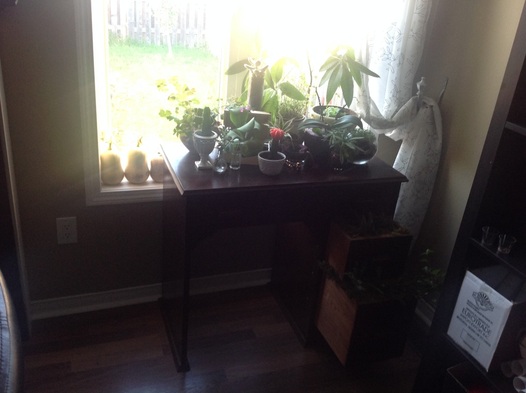 After - frontview - 26-09-14 - Crappy lighting! This corner is definitely improved. 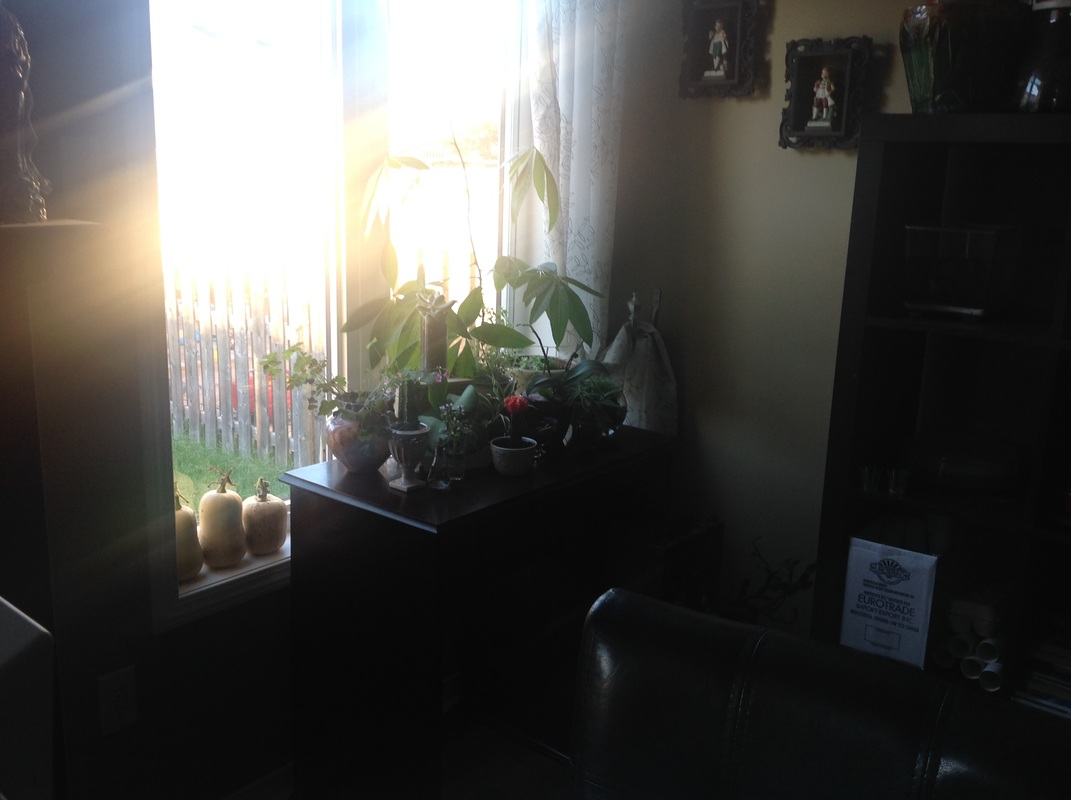 After - diagonal view - 26-09-14 - Let the light shine in! I also took the extra leaves out of my dining table, so there's more space. 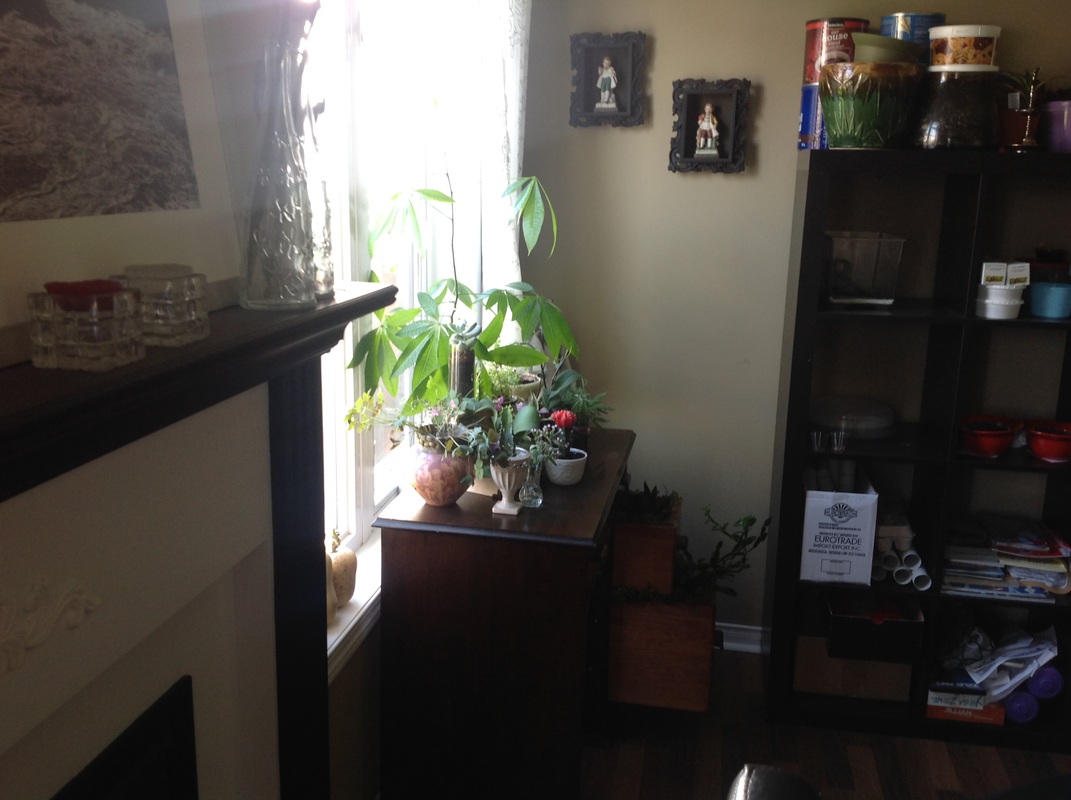 After - sideview - 26-09-14 - at least you can get an idea with this view. Just try to ignore all the junk that requires re-organizing on the right side! All in all, I had a great time re-purposing a forgotten desk that was collecting dust into a unique planter to spruce up a very boring corner of my dining room. I spent about $40 on new plants and maybe $25 at the dollar store for various supplies. Not a bad deal, I'd say. Feel free to leave me any comments... did you love it, hate it, wish the pics were clearer? Feel like trying something like this yourself and there was something I wasn't clear on? Meanwhile, I will leave you with more pics of the plants I used because they're so pretty and I am so happy I have them (except that bloody droopy succulent... I will find you!) 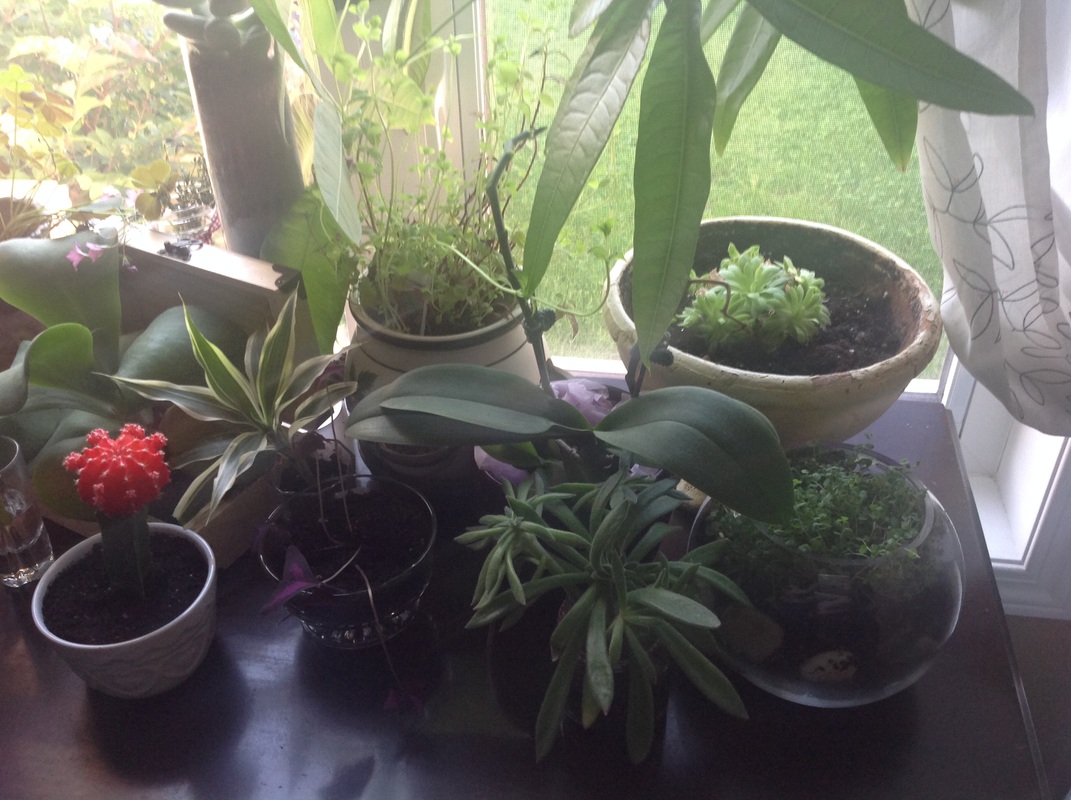 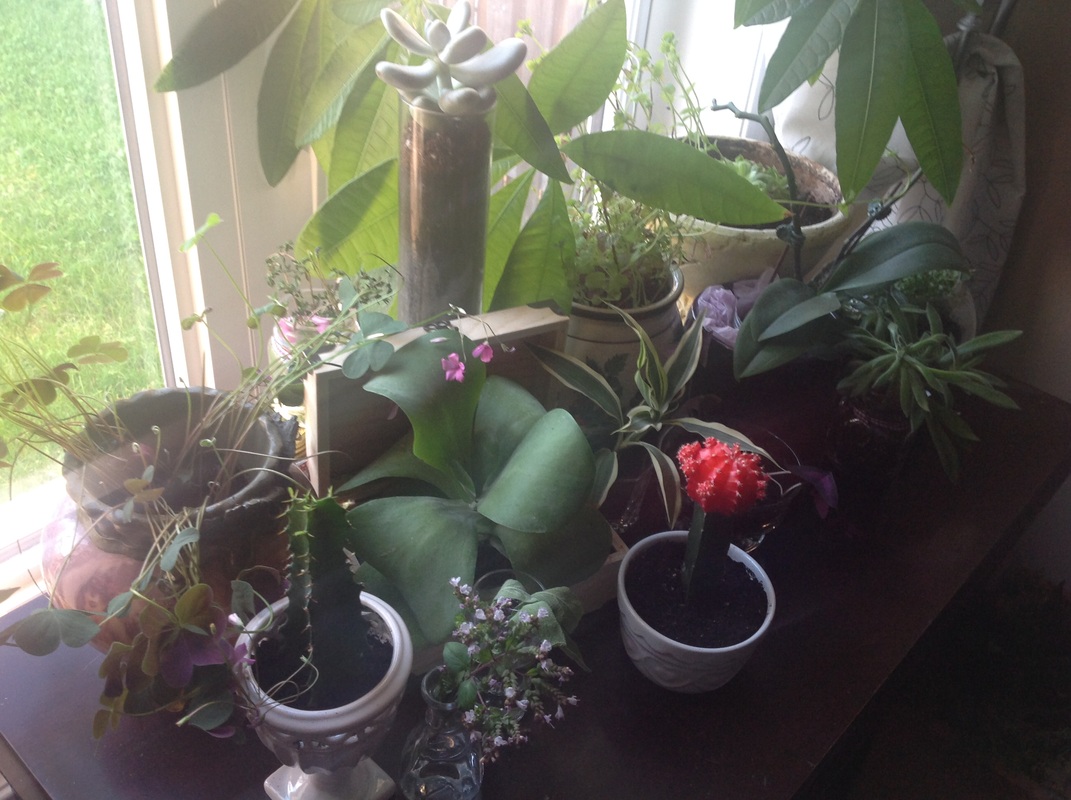 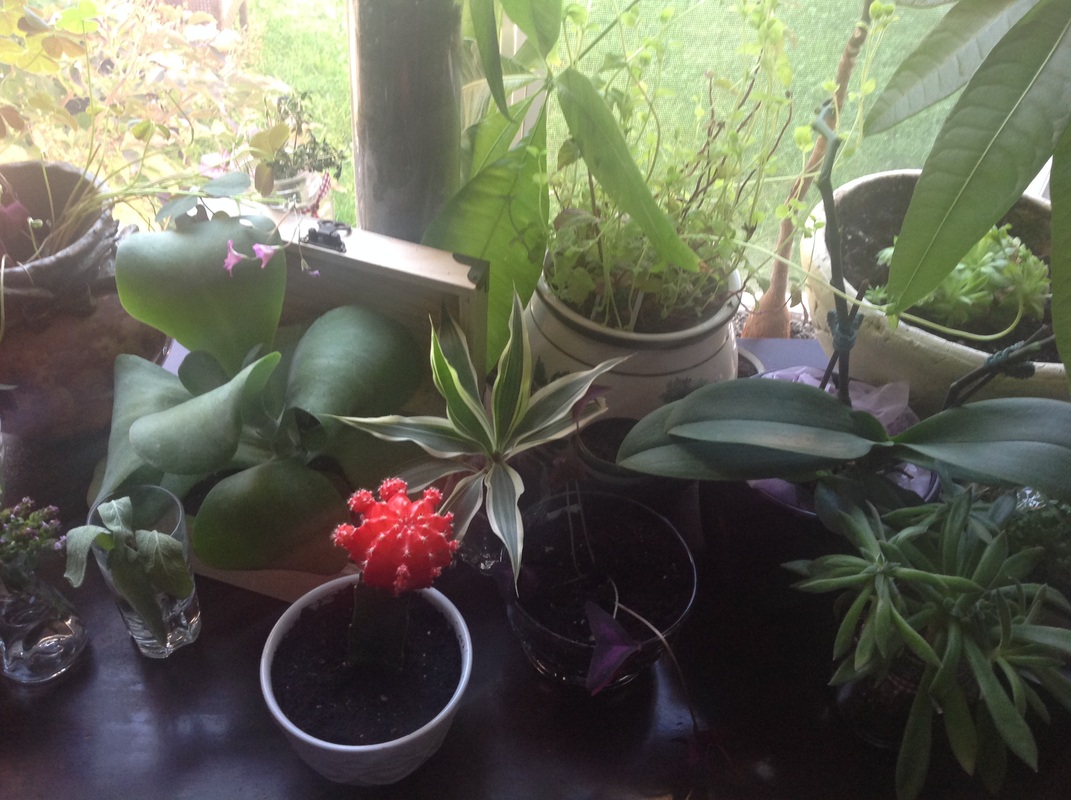 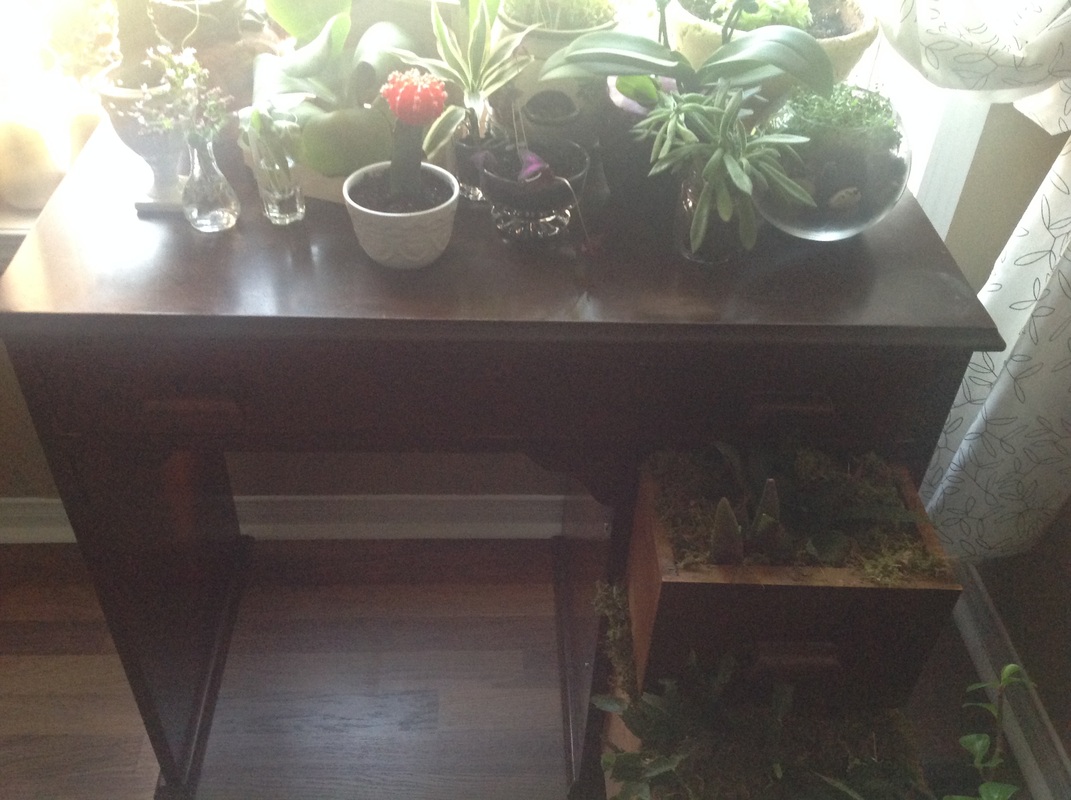 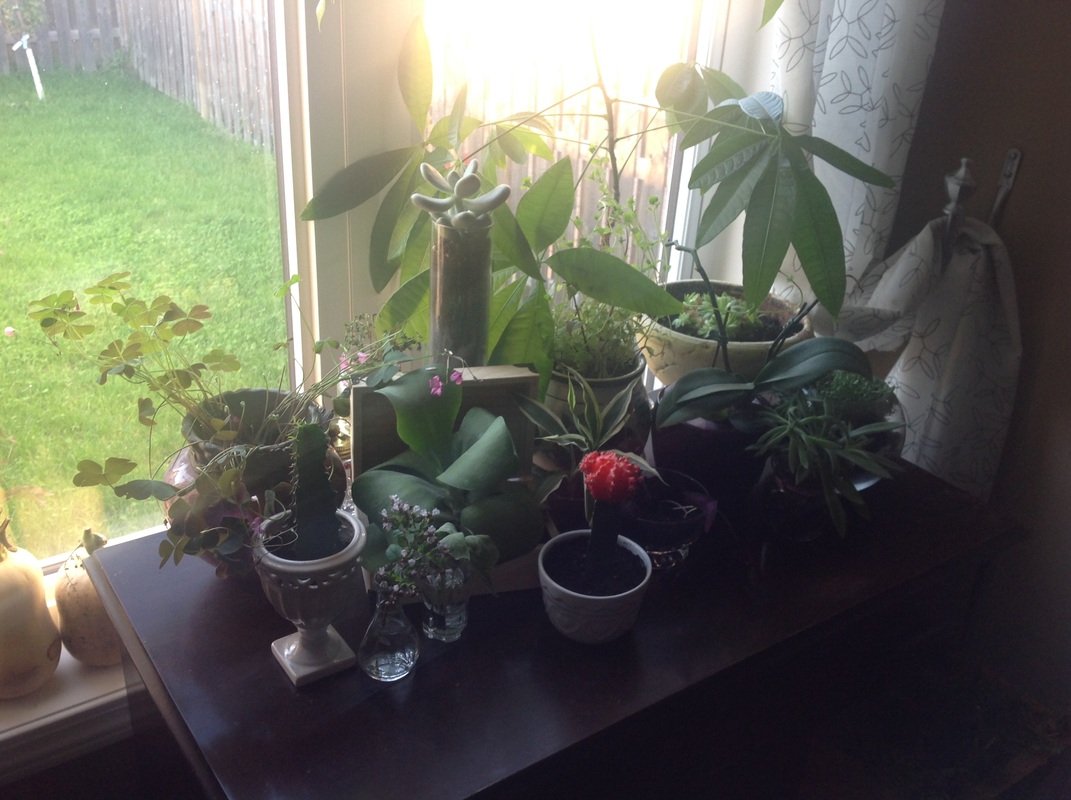 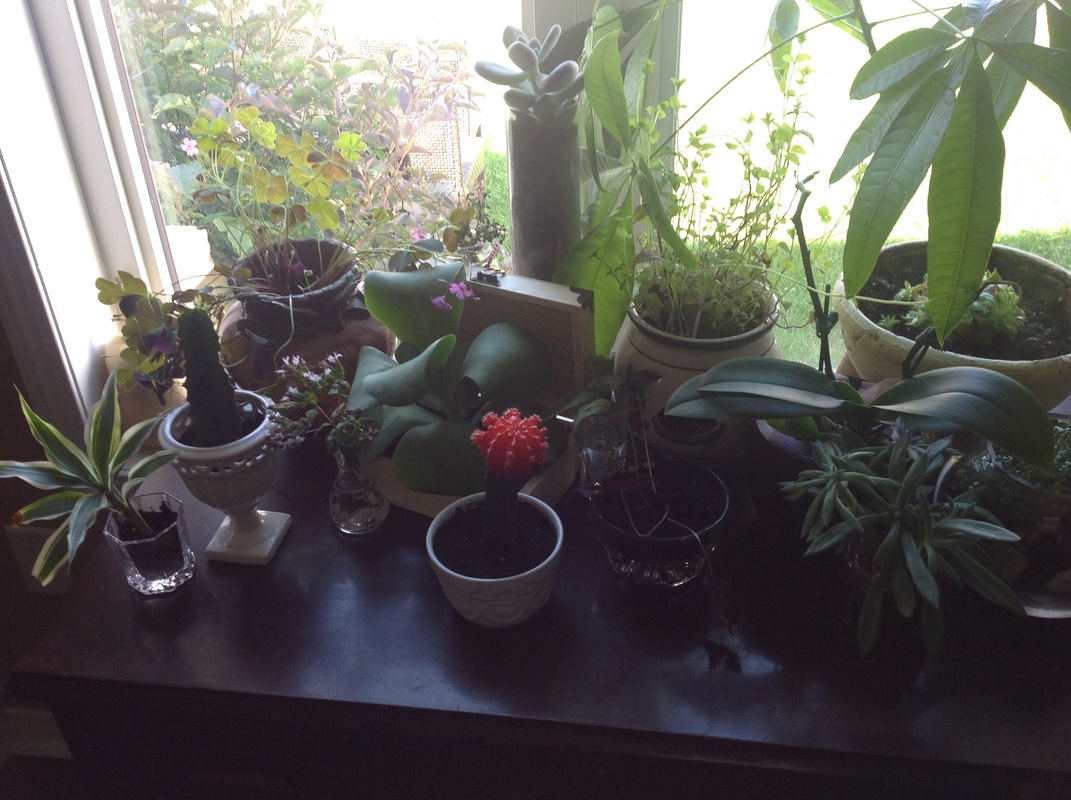 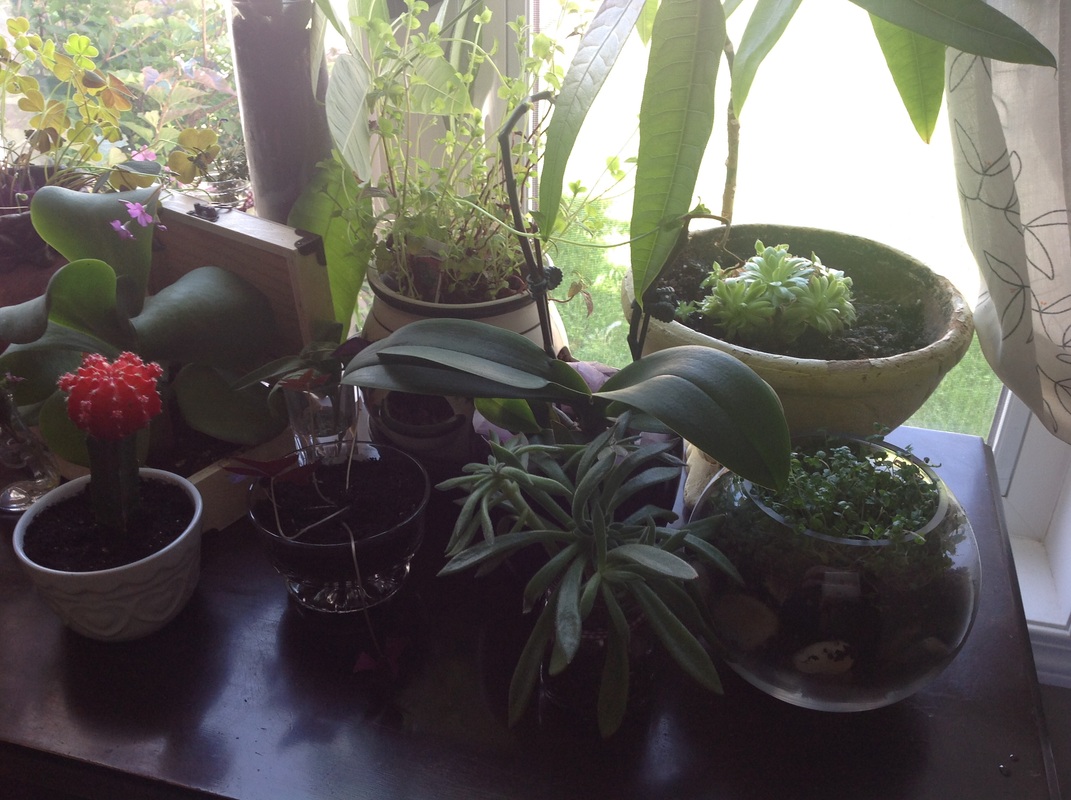
Any & all of my posts may contain ads and/or affiliate links.
I am not sponsored by any of them, and you will not pay anything extra by clicking on them or making a purchase through them.  I love coffee. I don't mean I like it a lot, I mean I LOVE it. So it's only fitting that I write an entry on things you can do with it, other than drink it. So here are some great uses for your grounds (mostly) and one for the whole bean: Used coffee grounds make great fertilizer. They’re full of nutrients such as nitrogen, calcium, magnesium and potassium that are great for plants that thrive in acidic soil. Collect them in a container and use them to fertilize rosebushes, azaleas, rhododendrons, evergreens, and camellias. Drip grounds from a standard coffee maker are richer in nitrogen than those from a percolator. Spread the grounds around your plants right on top of the soil to allow for a slow release of the minerals. Be sure you know which plants like the acid and which ones don't (hint: tomatoes don't). If you're looking to grow vibrantly blue hydrangeas, you're probably adding aluminum to the soil. Work coffee grounds in and they'll absorb the aluminum better and be even bluer! 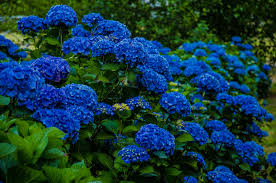 Used coffee grounds make a great composting agent. Mix your used coffee grounds (and even the filters) with lye to make a great composting agent. The grounds and bacteria on it are a food source for your worms and the grit helps them digest better. A theme in many posts is what goes in equates to what comes out. Better worms = better soil. Used coffee grounds make a great repellant. Coffee's strong odor helps to keep insects and animals away. Mosquitoes, ants, slugs and maggots all dislike the acidity of coffee and will stay away from areas where there is high concentration of acidic soil. To help keep cats from using your garden (plant or veggie) as a personal litter box, mix orange peels with coffee grounds and sprinkle around your plants.  Fresh coffee grounds make a great deodorizer. Make a sachet using cheesecloth or (unused!) pantyhose and ground coffee (not used) and leave it in the back of your fridge and freezer to help absorb strong food odors like onions, and makes it smell like fresh coffee. Fresh coffee grounds make a great steak rub. Toast fresh coffee grounds under a hot broiler for about 30 seconds, shaking often to prevent burning. Add the toasted coffee to other steak spices (try salt, pepper, garlic powder and dry mustard) and rub into the steak. Leave it in the fridge for a few hours and cook as desired. It'll give your steak a nice little kick. 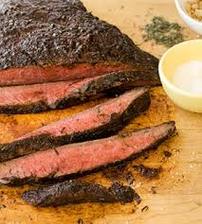 Whole coffee beans make a great breath freshener. Whole coffee beans can be used to freshen your breath! Keep a bag in your purse or desk drawer and pop a bean in your mouth after lunch. Sucking on it will quickly give you fresher breath without aspartame! Used coffee grounds help clean dishes. For grease and grime on your dishes, put a little bit of used grounds on a rag and use to clean your dishes instead of scouring pads and SOS pads. Rinse thoroughly. 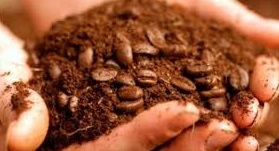 Used coffee grounds help clean hands. Rub a scoop of grounds between palms as an exfoliant to remove dead skin and help eliminate smells from foods like fish and garlic. Also helps get the capsaicin off your hands after chopping hot peppers. Here's a great recipe to make your own coffee ground soap: heart-hands-home Used coffee grounds help moisturize skin. Exfoliating with coffee grounds can help stimulate blood flow, promoting healthier and tighter skin. Just add mineral oil or vitamin E oil to old coffee grounds and apply it to your skin with a loofah. 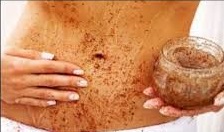 Fresh coffee grounds fight cellulite. All cellulite creams you buy contain caffeine - that's what's fighting the cellulite. You can use used grounds, but fresh has a higher concentration of caffeine, so if you're going to do it - take it all the way! Mix 1/4 cup warm grounds with a tbsp of oil (olive, almond or massage - pretty much anything but cooking oils) and apply to your cellulite zones. Wrap in plastic and wait about five minutes. Take off the plastic, brush off excess grounds and take a warm shower using a loofah. Here's a few great exfoliating recipes: natureshomespa Fresh coffee grounds can give you a facelift. Again - the wonder of caffeine. Mix 1/4 cup of fresh coffee grounds with one egg white, and then spread the mixture over your face. Once it is dry and flakey, rub the mask off and rinse your face. Your face will feel tighter - and no going under the knife or needles involved.  Used coffee grounds help your hair shine. Brunettes and dark redheads can benefit from rinsing their hair in coffee to rejuvenate their color. Just steep your used grounds in two cups of hot water and then rinse this through your hair. Blondes need not apply - this will stain your hair. Do you have any tips? Post in the comments below! Don't forget to follow me on Pinterest, Twitter, retweet my blogs (please!) and never miss a post by subscribing to RSS.
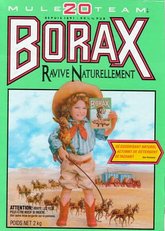
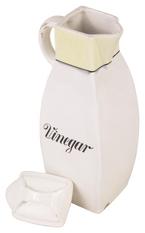
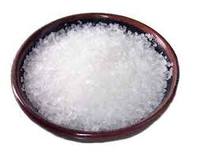
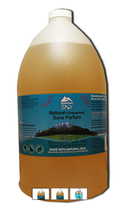
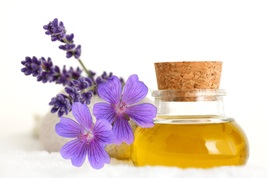
Thanks again for stopping by :) 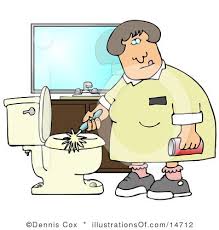 I'm always interested in ways to save money on and DIY recipes for everyday things. I also consider that we're surrounded by poisons and chemicals all day, so why not use more 'green' options to clean your home? Many people believe that if it isn't filled with things you can't pronounce, then it must be formulated especially to do a great job. And many of them do. Along with the fact of the chemicals and what they're doing to your surfaces (did you know that Magic Eraser is actually an abrasive eraser?), the environment and your health, I have a sensitivity to strong scents. Unless the room is ventilated really well, I can barely breathe when using things like Easy off, Windex and Tilex. So I've been using only plain vinegar mixed with water mostly to clean many things in my house. It does a great job, but it's not the correct thing to use for everything. So I did some research and found some great ideas for cleaning products you can easily make at home for pennies. This post will focus on cleaning your bathroom. First off, we'll start with a list of ingredients you'll need. Stock up on these few essentials and you'll never run out of cleaning supplies.
Now for the good stuff, here are some easy-to-make, effective cleaning products which are safe for your health and your home. Just make sure you head over to your local dollar store before starting to stock up on rags, sponges, spray bottles, jars, measuring cups/spoons and adhesive labels. 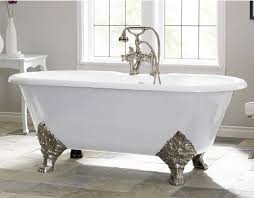 Shiny Surfaces (Tub, Tiles, Toilets, Sinks)
 Scouring Powders
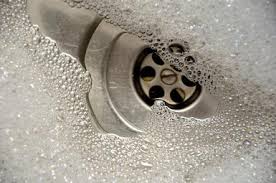 Drain Cleaners
 Soap Scum, Calcium and Lime Removers
 Mold and Mildew Removers
 So there you have it - a sparkling clean, wonderfully scented bathroom that didn't kill your wallet, brain cells or the environment!
If you have any suggestions for additions to the list, feel free to post in the comments. Till next time! |
AuthorHi! I'm Sonja and I'm glad you're here! I'm happy to share some recipes and gardening tips with you while I let you know about great (or not so great) products, services, and media I encounter. Visit my online shop at MysteriousDragonfyre.com
for Crystals, Herbs, Incense, and other Witchy things! Categories
All
Hey look! You're visitor #
Visit my online shop at MysteriousDragonfyre.com
for Crystals, Herbs, Incense, and other Witchy things! |