As promised, today's post will be all about the much anticipated questionnaires, or surveys, that are listed in the book. I'm not sure how much I'm infringing on copyright laws by giving you the questions, but I'm bringing you along for my ride, and I can't very well only show you my answers without you first knowing what I'm answering. If I do have to remove them, I'll let you know why they're gone, and I'll try my best to describe my answers in a different way.
It's been probably about a week now since I first told you about the book that inspired this series, Lose the Clutter, Lose the Weight by Peter Walsh. I hope you've ordered your copy, either through my special discounted link, through Amazon, or your nearest bookstore, and you've received your special package. If you have, from now on, when I'm speaking about something specific, I'll reference a page number and you can read along (like in school!). If you don't have a copy, don't worry! You do not need one to follow along, since my six week path is VERY different from the one in the book.

Ready? Here we go! On page 35 we get our first survey:
SAVING INVENTORY - REVISED (MODIFIED FORMAT). We're told to answer the questions thinking about how we felt and acted this past week. The scoring chart is pretty straightforward, but they do reverse the wording of some of the questions, so the actual addition at the end is a little tricky. I'll get to that at the end, though. My answer is BEFORE the question (in red) so you don't have to search for it. SCORING: 0=NONE ~ 1=A LITTLE ~ 2=A MODERATE AMOUNT ~ 3=MOST/MUCH ~ 4=ALMOST ALL/COMPLETE 3 - 1) How much of the living area in your home is cluttered with possessions? 3 - 2) How much control do you have over your urges to acquire possessions? 2 - 3) How much of your home does clutter prevent you from using? 1 - 4) How much control do you have over your urges to save possessions? 3 - 5) How much of your home is difficult to walk through because of clutter?
The next set has a slightly different scoring system, but still counts toward your total score.
SCORING: 0=NOT AT ALL ~ 1=MILD ~ 2=MODERATE ~ 3=CONSIDERABLE/SEVERE ~ 4=EXTREME
3 - 6) To what extent do you have difficulty throwing things away?
2 - 7) How distressing do you find the task of throwing things away? 3 - 8) To what extent do you have so many things that your room(s) are cluttered? 0 - 9) How distressed or uncomfortable would you feel if you could not acquire something you wanted? 3 - 10) How much does clutter in your home interfere with your social, work, or everyday functioning? Think about things that you don't do because of clutter. 0 - 11) How strong is your urge to buy or acquire free things for which you have no immediate use? 3 - 12) To what extent does clutter in your home cause you distress? 3 - 13) How strong is your urge to save something you know you may never use? 1 - 14) How upset or distressed do you feel about your acquiring habits? 3 - 15) To what extent do you feel unable to control the clutter in your home? 1 - 16) To what extent has your saving or compulsive buying resulted in financial difficulties for you?
3 - 17) How often do you avoid trying to discard possessions because it is too stressful or time-consuming?
2 - 18) How often do you feel compelled to acquire something you see(e.g., when shopping or offered free things)? 2 - 19) How often do you decide to keep things you do not need and have little space for? 3 - 20) How frequently does clutter in your home prevent you from inviting people to visit? 2 - 21) How often do you actually buy (or acquire for free) things for which you have no immediate use or need? 3 - 22) To what extent does the clutter in your home prevent you from using parts of your home for their intended purpose? For example, cooking, using furniture, washing dishes, cleaning, etc. 3 - 23) How often are you unable to discard a possession you would like to get rid of?
Based upon your answers to these 23 questions, you'll tally up three scores: Your clutter score, your difficulty discarding/saving score, and your acquision score. The sum of those three scores will then give you your overall total score.
Scoring is a bit odd, so pay attention:
Score One: Clutter Add together your answers to the following questions: 1, 3, 5, 8, 10, 12, 15, 20, 22 This is your total clutter score. My total was 26.
Score Two: Difficulty Discarding/Saving
Add together your answers for the following questions: 4 (reversed), 6, 7, 13, 17, 19, and 23 This is your total difficulty discarding/saving score. My total was 19. NOTE: your answer to some questions need to be reversed when adding up your total because of the way they're worded. For example, if you answered question 4 with 0, tally a 4. Use the following as a guide: 0=4 ~ 4=0 ~ 1=3 ~ 3=1 ~ 2=2
Score Three: Acquisition
Add together your answers for the following questions: 2 (reversed), 9, 11, 14, 16, 18, and 21 This is your total acquisition score. My total was 7.
To get your grand total, add all three scores together. My grand total was 52.
On average, people who do not have cluttered homes would generally have a total score in and around 24, while those of us who do have issues with clutter consistently score above 40.
My total score is a little bit embarrassing, to be sure. That score is high. Although my acquisition score is lower than average, my clutter and difficulty discarding scores are way up there. I hate to admit it, but this is pretty accurate. Over the years I have accumulated quite a bit of stuff, through purchases, gifts, and hand-me-downs. I have recently made some changes to my habits so that I'm really thinking about why I'm buying what I want to buy, and that is making a difference, but I have, for years, had issues with letting things go. I know they won't sell for much, and I feel they're worth so much more, so I keep them. Or they have sentimental value, even though they don't necessarily fit in with the decor in my home or have a place to live, and still I hold on to them. As with my shopping habits, this problem I have with letting things go will also have to be addressed while I go through my home de-cluttering all the rooms
Did you take the survey? What did you get as a total? If you're not already in the process of de-cluttering, does that score make you think twice about the stuff in your home? Leave a comment and let me know. As always, thanks for reading, glad you're here.
0 Comments

About a week before I got Lose the Clutter, Lose the Weight, I was already taking steps to streamline my life. I am very much a lover of order, of rules, of schedules. But I am also a person of extremes. This is a part of my personality that gets me in the most trouble, I think. A task that should take me 10 minutes must be done 110%, and in the end, it takes me an entire day, and I’m still not done. So I get frustrated and give up. I’m an all-or-nothing kinda gal (as Hubby will attest), and that will be a major hurdle for me in the coming weeks. Because I’m this way, I can get scattered if I don’t have a clear path to the finish line. And so schedules, plans, and lists are my best friend when I’m trying to get myself back on my course.
A few weeks ago, I went to the local discount store and bought myself three large journals. One would be an actual journal that I would take a few minutes before bed each night to jot down some thoughts, feelings, ideas, whatever remained from the day. Journaling has always seemed like something I should do, since I love to write, and my brain never seems to shut down the running commentary, but I have started and failed to continue this activity too many times to count over the course of my almost half-century on this earth. When the program brings us to my closets, you’ll be introduced to a pile of notebooks that tried to be journals over the years and ended up in a box with very little written in them. I tell myself this time will be different, and I am making a very conscious decision each night to make that a reality.
Why journaling? According to Forbes.com, there are no less than five excellent reasons to do it - and none of them necessarily apply only to creative types:
Clears your mind. Helps you de-stress. A tool for self-improvement. Improves memory and problem-solving skills. Facilitates healing. Follow the Forbes link to a wonderful article written by Noma Nazish (@noma_nz)
The second notebook is a place to record my recipes. I cook and bake a lot. I enjoy it immensely. Baking often leaves me exhausted by the end of it, because everything takes so much time and patience, but I feel real satisfaction when I’ve made something delicious. However, I rarely write things down. I’ll find a good recipe and decide to make it. I usually make little (or sometimes large) changes and jot them down on scraps of paper. Can I ever find them the next time I want to make something? Nope. So I have to try to figure out with my Swiss-cheese of a brain which ingredients I removed, changed, added... and it doesn’t turn out tasting the same. Sometimes it’s better, other times not so much. But maybe dinner and dessert shouldn’t be such a crap-shoot in my house. So I’m going to take the time to write down my recipes so that they’re great every time. When I’m too old to spend any time in the kitchen, my kids may be interested in the recipes, and I’ll have something to show them. My brother and I often lament at holidays that I never asked my grandmother before she passed how to make certain things that we loved. I may figure a few out by trial and error, but most I fear, we will never taste again. As an aside, if you're interested in some of the things I've made and posted here, click on the "Recipes" category in the sidebar.
The last notebook is likely the most important. It is for my daily schedule. A full accounting of most of the hours in the day of a modern human being is difficult to do. Plans can sometimes change on a dime when you have kids and a family, but making the effort will give me a leg up, and I suggest that you buy yourself a notebook and sketch out, at the very least, a rudimentary schedule for the week.
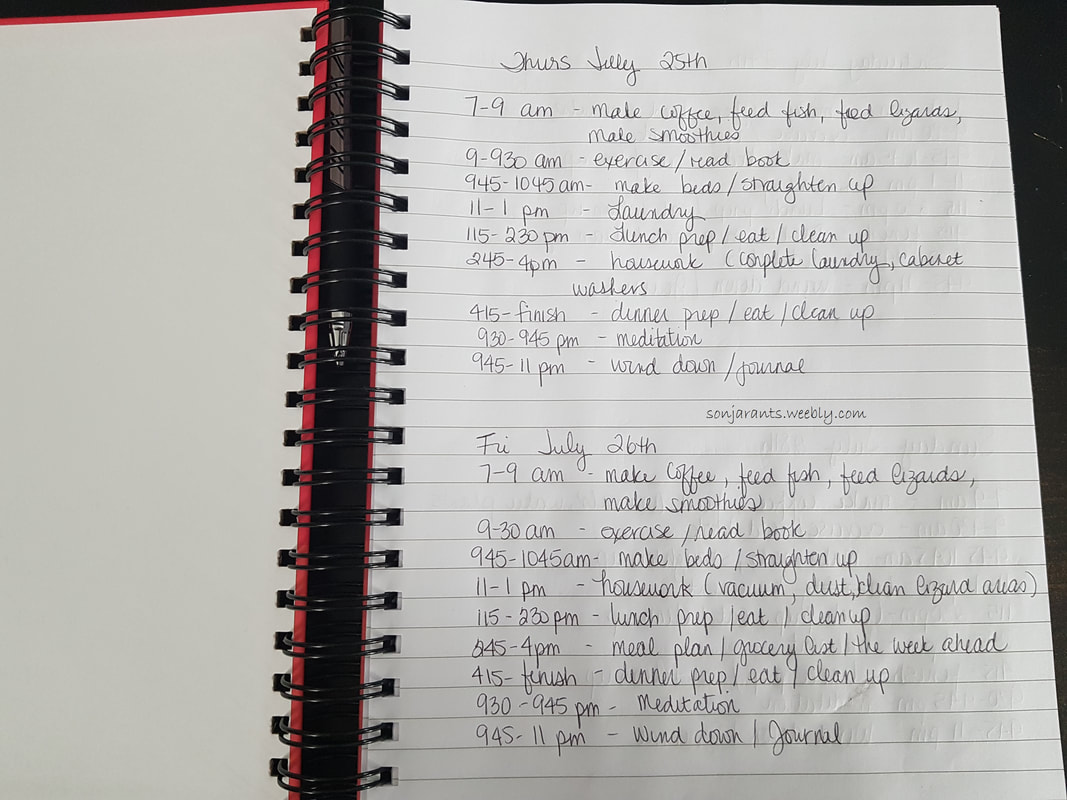
It may seem odd and unnatural at first to schedule almost every moment of your day, but you'll get used to it. What do they say? Do something for thirty days straight and you'll develop a habit. Use that power for good! Not comfortable with this level of anal-retentiveness and/or OCD? That's okay. Don't write down the time, leave out the obvious like "make the bed", you need to find what works for you, because what works for you is what you will stick with. Just find something, even if you purchase a day planner or write it down in an oversized calendar, and stick with it. I promise you this will help you.
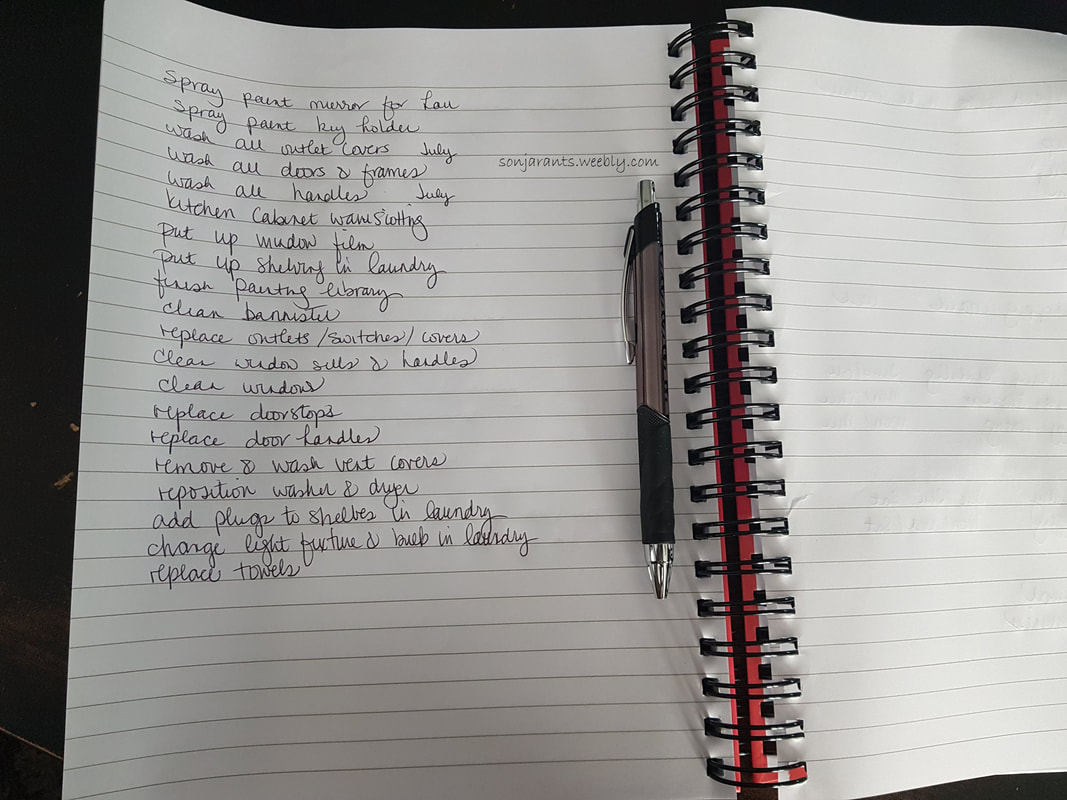
I also made a list of things that wouldn't be done on a weekly basis, maybe bi-weekly, maybe monthly, maybe only once or twice a year. I carry a pen and small notebook with me when I'm working on a room initially, and if I notice something, I make a note of it and add it to this list later. If I complete a task, for example, washing all the door handles, I wrote July next to it. This way I know in a month or so, I should repeat this particular task. Some things like spray painting the mirror, I can check off once complete, since it will be a one-time chore.
The way I went about mine was I started with a list of things that need to be done in my house on a weekly basis; things like laundry, watering the plants, posting items online for sale (during my purge), blogging, planning, my fledgling business, and my husband's business. General housework (once a week stuff like dusting, vacuuming, etc., was a separate category that had it’s own slot, with a subcategory listed.)
Once that list was complete, I wrote a number next to each task indicating how often per week it needed to be done, for example, vacuum 1x, laundry 3x. Next, I staggered as best I could and added days of the week. I wrote out my days with the tasks that happened every day entered and blank spots for the ones that were fluid.
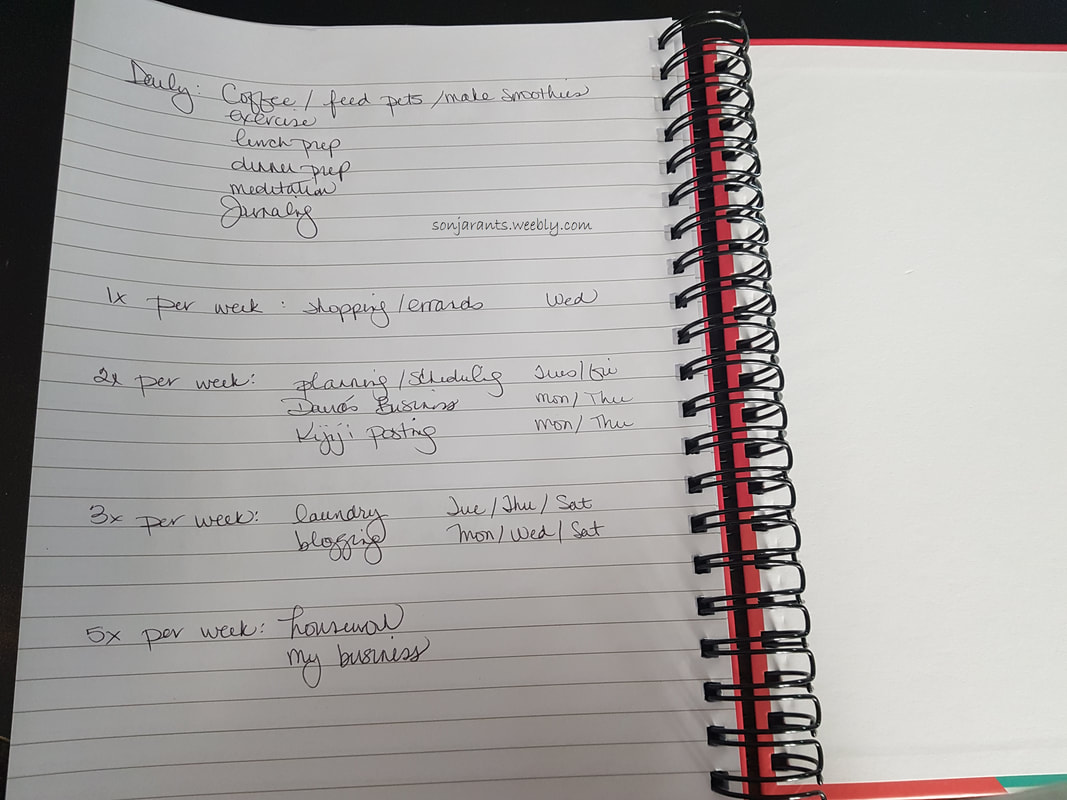
First draft of the "master chore list" as I like to call it. Lots of spacing to add more things. After I took this picture, I remembered that I should add things like taking out the garbage, watering the plants, cleaning the fish tank. It never ends.
Lastly I added in the tasks that changed and set timers on my phone. Now I don’t even have to stress about what time it is and how long I have to complete my current task. I also gave myself permission to go over my allotted time by a few minutes, and if I finished early, I could take a little break before I started the next one.
We’ll get back to the topic of the notebooks a few times over the course of the next few weeks, but I promised we’d get into some questionnaires this post, so we’ll leave the journals for now. Since this post ended up (as usual) much lengthier than I expected, I'll sneak in another post later today with the questions and answers you'll have to think about while completing Peter's program.
Thanks for spending some time with me, I know how valuable it is, especially if you have rooms to de-clutter!

Full disclosure - I am not starting the journey I am about to chronicle from scratch. You're joining up with me about a quarter of the way through. My journey began a few months ago, after I first saw the Minimalism documentary and finally quit working. At that time I did a massive clean up of the "Dump Room", and made quite the dent in the garage, basement, and kitchen. We also made a few upgrades to our home (mainly the kitchen), and so I was forced to do a little cleanup in those areas as well. By no means is my home clutter-free, and in some cases, all I really did was move junk from one room to another.
I'm not going to get too much into my own home today, though. I'd like to keep on track this time and talk about the second, and in some ways more meaningful, motivation for my de-cluttering efforts, and this series of posts.
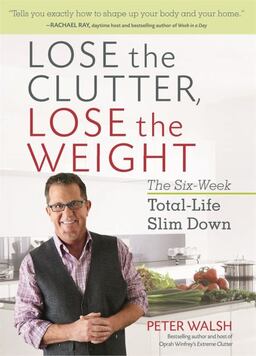
I very recently read a very good book called Lose the Clutter, Lose the Weight by Peter Walsh. I was intrigued by the title, and although I could definitely stand to lose more than a few pounds, I immediately felt the correlation between being overburdened by stuff and being overweight. Before I get too far into it, here are some buying options if you're interested:
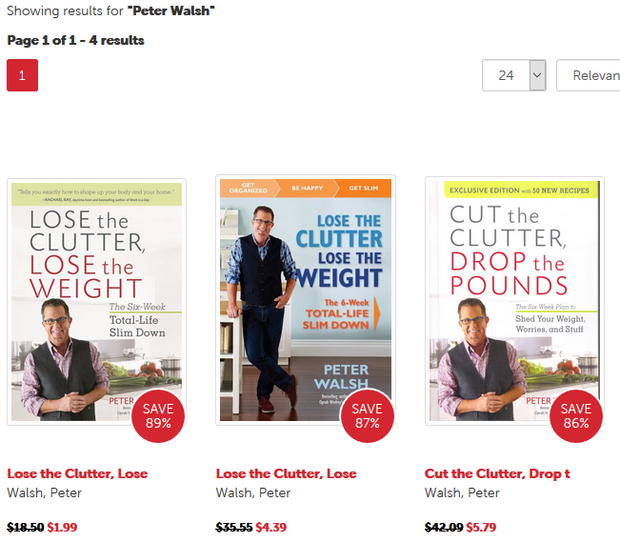
If you're Canadian and love a good deal on books, use my link and get a bargain book copy for only $1.99! The link will also net you $10 off your first order of $25 or more. Once you enter your email, enter 'Peter Walsh' in the search box and you're golden.
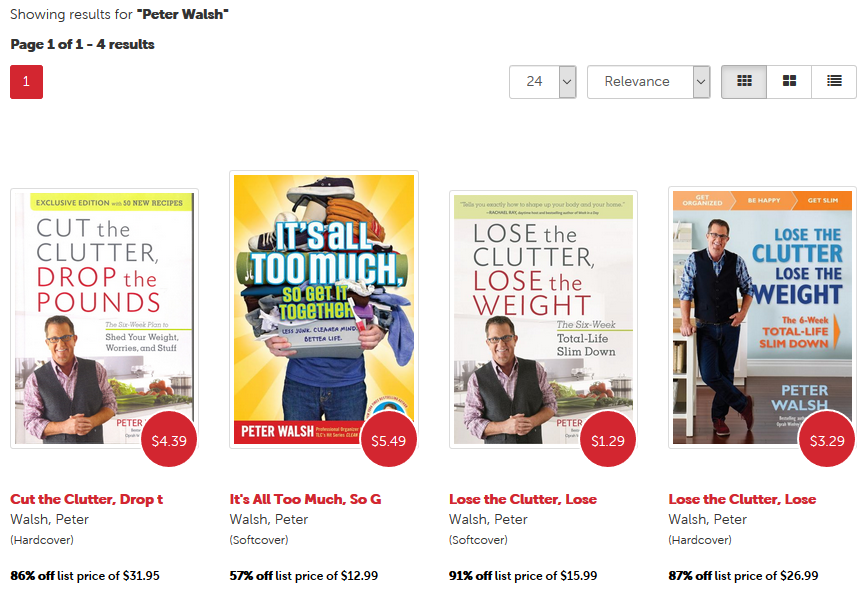
Don't fret, my American friends, I would not leave you out of the bargain book loop. Here's your link to get this book for only $1.29. That link will take you to the Canadian site, but you'll get a pop-up suggesting you shop at their US site. Follow that link and you'll get a discount on your first order. Here's your screenshot:
For those of you who prefer Amazon, here are the direct links to Lose the Clutter:
Canada - amazon.ca - $11.99 US - amazon.com - $9.76 (I do not receive any compensation from Amazon, I offer these links as a courtesy.)
Alright, the commercial break is over. The book seeks to empower you with the tools to take control of your eating habits by giving you simple meal plans that are easy to follow even if you’re a picky eater or have a busy schedule, help you gain some stamina and muscle with the help of simple exercises that can be done almost anywhere with no special equipment or setup, and finally to overcome the mounds of ‘stuff’ that has accumulated around you over the years and is (in many cases) causing mental stress, familial conflict, and is keeping you from living your best life.
It’s a relatively simple premise: eat well (and not too much), move your body, and live in a clutter free environment (both physically and mentally) and you will find that you’re a happier person. Now, I know that his book isn’t called “Lose the Clutter, Find Your Happiness”, but it could be. I think that most people would pick the book up for the opposite reason that I did. Losing the weight would appeal to the masses, which may have been one of the factors in the choice of title. I picked it up because I’m at a place in my life right now where I’m looking for ways to simplify my life, minimize the things in my home, and just be happy. I was already well on my way when I found this book.
Because this post (and this series) is not intended to be a book report, I won’t lay it all out for you here at the outset. As I bring you along with me through the six week program, I’ll share the author’s thoughts and insights, without giving too much away. You will also find precious little in regards to the actual diet plan or exercises for two reasons; I think you should get the book and read it yourself, and also I won’t be following any of his meal plans, and only a few of his recommended exercises. This is not because I don’t think his ideas and suggestions are any good, it’s because our family has our way of eating, and since it rarely includes take out or junky, processed foods since I stopped working, we’re going to stick with our food. I think I already mentioned that I was more into the de-cluttering part of this whole thing, anyway. As for the exercise plan, I have already started my own thing, and may or may not decide to incorporate some of his suggestions in the future. Peter’s advice is, more or less, as long as you’re doing some sort of physical activity that could be classed as exercise and is not a part of your regular routine (i.e. housework is NOT exercise), it’s all good.
Next post, we’ll delve into a few questionnaires you’ll have to fill out to get a better sense of where you stand (yup, I’ll share my answers), and get an overview of Week One. I’ll also share some of the things I’ve been doing to help myself succeed.
Thanks for stopping by, as always, feel free to leave a comment. Have you tried de-cluttering? How far did you get? How long did the process take? How did you feel emotionally while doing it?
It's safe, secure, and only costs you $3. Thank you!
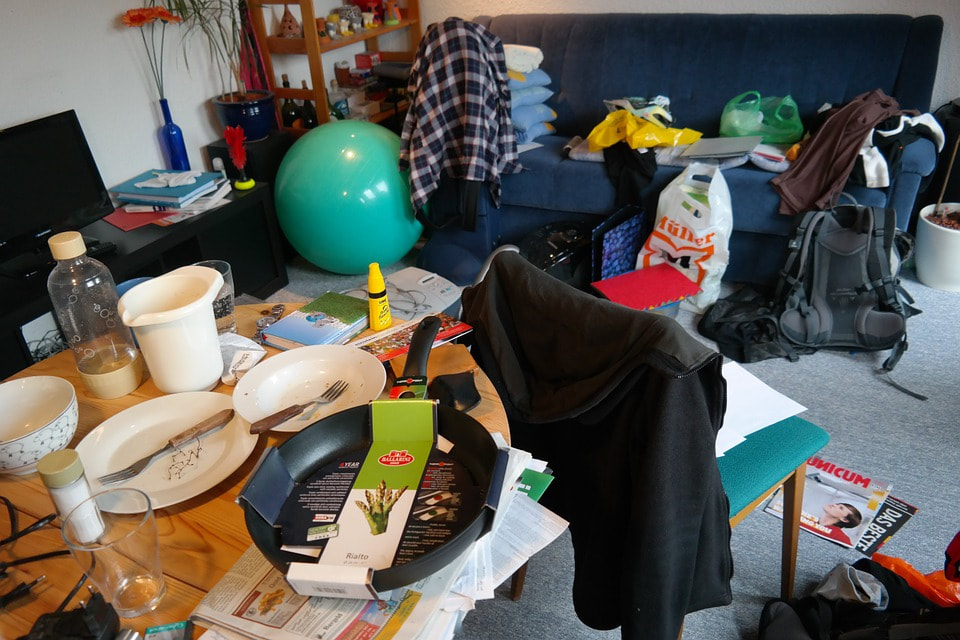
Over the last year I've read some interesting articles and books regarding minimalism. I hate to admit it out loud, but for most of my life I have been surrounded by clutter. I'm just not a very good housekeeper and although I don't really have an impulse buy problem, I do have issues with letting things go. Whether because I think they're bringing some value to my life (even though they've been in a box in the basement for 10 years), or because I think I may find use for them at some point in the future, I always seem to have a ready excuse to hang on to it. Last year was something of a breaking point, though, since an entire bedroom (lovingly labelled "The Dump Room"), my basement, and my garage had become completely unusable because they looked like they belonged on an episode of hoarders. Bags, boxes, papers, and all manner of loose 'stuff' was piled floor to ceiling. And there was always more coming. All I did was open the door, toss it in, and close it again.
The rooms were only part of it. Drawers were filled with junk. Shelves were piled high and covered in dust. Corners became homes to wayward items. My bathtub became an extremely large clothes hamper. Stuff even lived on the stairs.
All of this mess was seriously stressing me out. I was working nights, not sleeping well, exhausted and dealing with a chronic illness. It was a vicious circle and I did not see any way out. I was ashamed. Even though few people knew how we lived (as is often the case), I was always petrified one of the kids would say something and my secret would get out. There was no way in hell that anyone could ever just drop by for a visit. Most times, even when we had lots of advance notice, I would find an excuse to reschedule or cancel because I didn't have the time or the energy to clean up. It was often a sore spot with Hubby, as he is a social creature, and very close to his family. He would ask if someone could come and visit, and it would inevitably start an argument. Even when I relented and we invited people over, it would be a week or two, and I would clean like a mad woman, right up until the time they rang the doorbell. All that work just to get the first floor decent enough. I would still spend most of the visit apologizing because the house was messy and I didn't have time to clean it. With a straight face, no less.
Visitors were banned from going upstairs, which meant the kids couldn't play with their cousins or friends in their bedrooms (where all their toys and video games are), and if the powder room was occupied, well, you had to wait. Which probably seemed odd to some family members, since they are fully aware that I have two full bathrooms upstairs. I'd often tell them that the toilet wasn't working, the seat was broken, or make something else up, just so they wouldn't go upstairs.
Since my house was so full of clutter, I started to let almost everything else slide, too. I tell myself it was the long hours, the exhaustion, the pain, but if I'm being honest (which I will try to be during this series), I think I gave up. I felt despondent looking at all the junk. I didn't know where to start, and so I didn't. I even let the dishes pile up, storing dirty dishes in the oven to make a little counter space the few times a week that I attempted to cook dinner. I rarely even cleaned the bathrooms. We had lived in clutter for years, and now we were beginning to live in filth. I used to always excuse my mess by saying I was messy, not dirty, except that now I was.
By now, some of you may be wondering why my husband or kids never did anything about the mess, or if they got after me about it. The short answer is no, no one helps me clean the house, and no one complains about it, either. The long answer is that my situation is of my own making, and so I am the only one who can change it. This may sound alien to you, but the way both my husband and I grew up was that the man worked and the wife kept house. Those were the roles, and we started our relationship with the understanding that we would continue those roles in our home. I tried, at first, but my mother only worked a few hours a week, leaving plenty of time for the home. I worked full time until about five years ago, and the first five years that we lived in this home I had a ninety minute commute one way. In my husband's eyes, I wasn't keeping up my end of the bargain, and we did fight about it, but that's all we did. We didn't make any changes. I also never taught my kids to pick up after themselves. It's hard to teach skills you don't have.
As with all things, eventually, something has to give. My will to live in squalor finally broke. After a few heated exchanges, some tears, and a lot of pleading, Hubby started helping a little around the house when he could, like doing laundry (sort of), and loading the dishwasher. My kids started helping too, emptying the dishwasher and picking their clothes up off the floor. Not a whole lot of progress, but I was willing to take any help I was offered.
I still felt absolutely paralyzed by my junk. I was doing my best to not be dirty, but we were still messy. I still refused to look into the dumping areas, still pretended they didn't exist. When the neighbor rang the doorbell, I always pretended I couldn't hear it, so that I wouldn't have to open my door and expose my shame.

One day I was scrolling through Netflix, looking for something to watch. I am a sucker for documentaries, and when I came across Minimalism: A Documentary About the Important Things, I hit 'play' without a second thought. This movie was about to change my life. I sat forward, enraptured by the cleanliness of everything. Everything seemed to have strong, clean lines. The sun was shining on all the gloriously smooth, gleaming, clutter-free surfaces. The only dust was by the side of the road, and even that seemed to have a certain order to it.
Don't get me wrong - I may be giving you the sense that everything was sterile. Far from it. The homes looked almost organic. Everyone was living a regular life - only without a crap-ton of stuff. The people making the documentary and being interviewed for it all just seemed content, a calm happiness radiated from them, while the skeptics around them all looked hurried, harried, and well, unhappy. That's what I want for myself, my family and my home, that easy kind of happiness.
The second thing I don't want you to misunderstand is this: I have no intention of going full minimalist like the people in this film. I understand why they did it, I applaud them for it, but within my own life, I need to be realistic. I think a lot of people fail at a lot of their big dreams because they aren't being realistic. I would not be happy in a one room home where there is zero privacy, and I am fully confident that I can say the same about my family. I will definitely do something about the sheer number of t-shirts in my closet, but only 10 or so items of clothing? Maybe not. Will I get rid of my books once I finish reading them? Hard no. I love my books, and there are a great many that have been read over and over. The next time I start Stephen King's The Dark Tower series will be read through #8. I have a kindle full of books (including The Dark Tower!), but when it comes down to it, I need to hold a book in my hand while I read it and will accept no compromise. I also enjoy having some decorative items in my home. They bring me some joy just by looking at them, and I believe that in bringing me this feeling that they have earned their place.
Having said that, I have waaaaaay too much stuff and I am prepared to do something about it. That's where the book, Lose the Clutter, Lose the Weight by Peter Walsh comes in. I had intended this to just be a quick minimalism intro post and spend the bulk of my time with you today talking about Peter's book and it's impact on me, but that obviously didn't go as planned, and so we will leave the book for my next post.
Thanks for stopping by, as always, feel free to leave a comment if you have anything to add or ask.
If you read my "PLEASE NOTE" in the side bar, I wanted to let you know that I'll be systematically going through each post (as time permits) as I have to manually remove the ads. It's a process.
If you haven't read it recently, please do, it has been updated.
It's safe, secure, and only costs you $3. Thank you!
To say I like to go into some form of brumation* during our long, cold, Canadian winters is an understatement. All but essential tasks are put on hold for me. I get up out of my warm bed only to go to work, keep my husband and children alive, and (kind of) keep the house looking like a house and not an episode of hoarders.
Brumation is an example of dormancy in reptiles that is similar to hibernation. They often wake up to drink water and return to "sleep". The brumation period is anywhere from one to eight months depending on the air temperature and the size, age, and health of the reptile. Brumation is triggered by lack of heat and the decrease in the hours of daylight in winter, similar to hibernation. Source: Wikipedia
As you well know if you visit here more than once, blogging is also something that doesn't happen with any sort of frequency during the winter. Yes, something that catches my fancy will make it here (The Black Panther Movie, cracking the code of feeding a family on a budget, a mockumentary I thought was real, and an updated book review because The Terror is coming to AMC). Four posts in a month and a half is kind of sad.
So when I got an email from Ashley Lipman from Seed Needs offering up a guest post for my blog, I jumped at the chance. Okay, I had to come out of my semi-conscious state, be reminded that the offer was there, sleep on it some more... you get the idea. But, I was happy to have something fresh and someone with a new perspective get a voice here at sonjarants.
Stock up on seeds at amazon.com
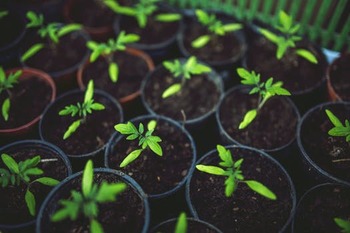
So, although it's February, and no one in Southern Ontario would even be able to dig a hole to start planting anything, it's warm somewhere, and this is a good list of veggies you can start thinking about now, so that you can enjoy them when the fall weather comes around.
And so without further ado, I bring you...
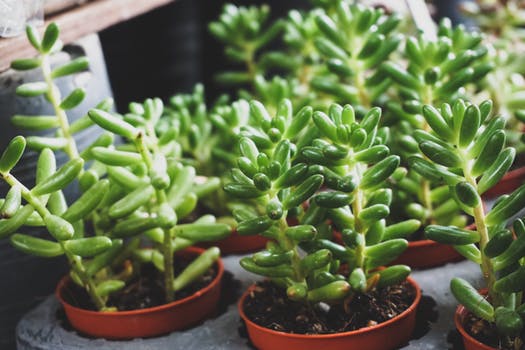
Photo credit/site www.pexels.com
6 Fall Veggies to Plant Now
Guest post by Ashley Lipman from Seed Needs
Many of us think of gardening as exclusive to late summer, and spring. However, there are many places on the planet where summers are cool and winters are harsh, and go on for months. Nature never leaves us on our own. There are many veggies that are grown in colder months.
In the following list of vegetables, you will find a variety of plants. Some have leaves that are editable, and some have roots that provide food for humans, and animals. Most will survive minor frosts. All are nutritious, and delicious.
Arugula (rocket)
Beets Broccoli Brussels sprouts Cabbage Collards Carrots Cauliflower Celery (mild winter climates) Chard Fennel Kale Kohlrabi Lettuce Mizuna Mustard greens Onions (bulbing) Onions (bunching--standard onions harvested before they form bulbs). Pak choi (Bok choy) Peas Potatoes Radishes Spinach Coriander (cilantro)
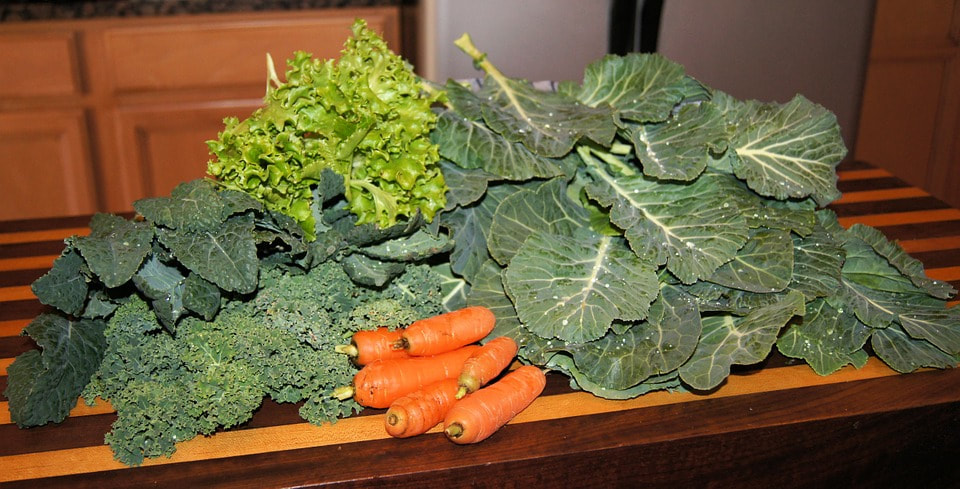
Photo credit/site: pixabay.com
Tips and Hacks for the cold-weather garden
There are some things that you can do to ensure a good cold-weather harvest. We have put together a list to help. If you are confused, there are many free apps you can download to your smartphone to help.
Prepare your soils well
Make sure you clean the soil, removing ant debris from your spring, and summer gardens. Turn the soils well, and add compost or manure to fertilize the ground. Frame your garden Using boards, build a small frame around the garden. If the garden is large, frame sections. This is to help your garden have room to grow, and to allow you easier access to protect the plants from harsh weather. Use slow release fertilizer This is important. In the fall, and winter months, you need a constant supply of fertilizer to your garden. Do not over water your crops You want moist soil, but not heavy, and damp. Too much water can allow freezing to destroy your plants. Protect from frost This is where the frame of the garden comes in handy. Attach a clear shower curtain to the frame of the garden to protect the plants from frost. If you are concerned that it will be a heavy frost, string a string of Christmas lights under the shower curtain. This will generate just enough heat to protect the plants. Experiment The fall crops may not grow as large or exactly the same way you expect in warmer months, but they can still produce. Try planting potatoes. You may not see leaves but dig anyway. Sometimes there will be a bountiful, new potato crop under the ground
Herbs
Herbs are a great way to give your food fresh flavor year-round. The best thing about herbs is you can grow them in almost anything. Use small, plastic coffee cans (with a few nail holes for drainage) or small flower pots. Use lengths of rope to secure them to your fence or grow them on a rolling cart. When the temps drop, just bring them indoors. A few herb plants are a great addition to your cold-weather garden. They make soups, stews, and other foods spring to life.
When you are finished with this garden, repeat the soil preparation that you began with. Cover your clean, and prepared garden with mulch to keep the nutrients in the soil. You will have little work to do on the earth when spring arrives.
Thank you very much Ashley for your great tips! Looking forward to the warmer weather so I can implement some in my own backyard garden.
As always, thank you for stopping by, see you next post!
This post may include affiliate links inserted by the guest author. sonjarants.weebly.com is not affiliated with any company or product that may be mentioned or advertised, nor do I necessarily endorse them.
 I see a lot of these floating around the internet and especially on sites like Facebook and Pinterest. Some are just ok and some seem so amazing I can't imagine not using them. I have scoured hundreds of lifehacks and compiled a list of the ones I think are the most amazing and seem like they would actually work. I say that because some have been debunked and I haven't tested most of these myself, so I can't give you my personal opinion. I have tried to give credit, but quite a few of these are on multiple sites, so who knows who came up with them first? Click on the sitename and it'll take you to the post and maybe even more lifehacks you'll want to test out. From dedalvs: 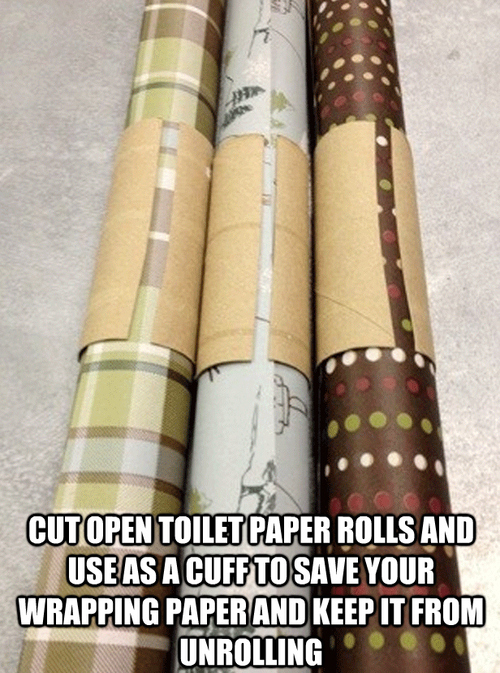 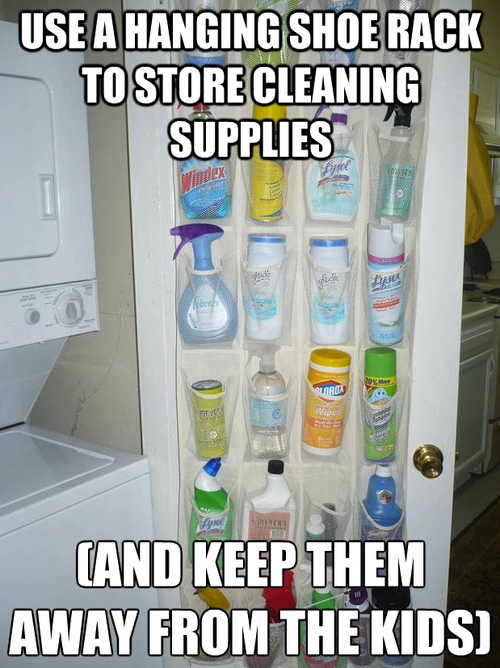 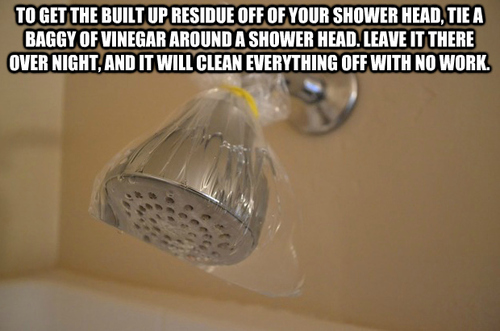 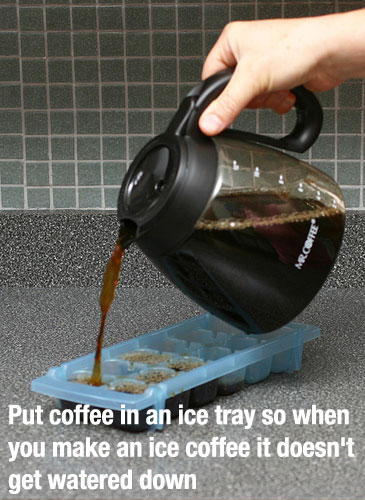 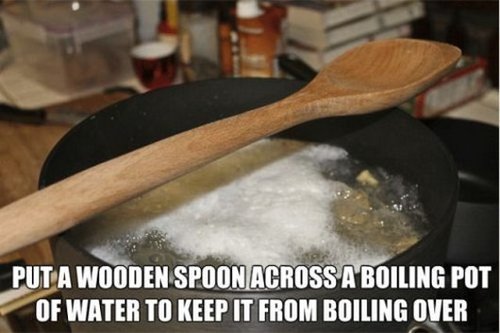 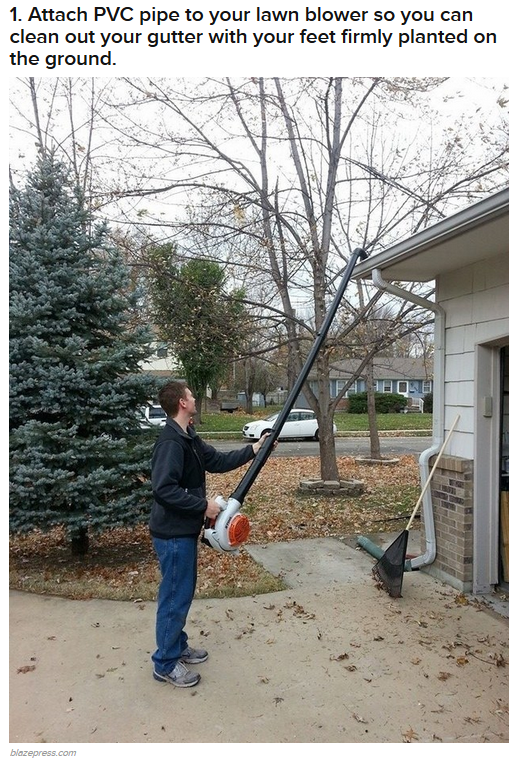 From Buzzfeed:  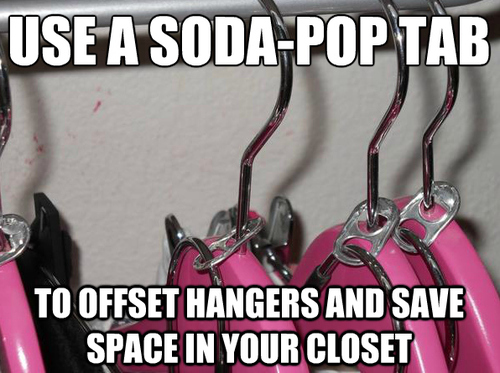 Click here for the how-to. This is absolute genius! I am totally doing this. From How to Nest for Less: 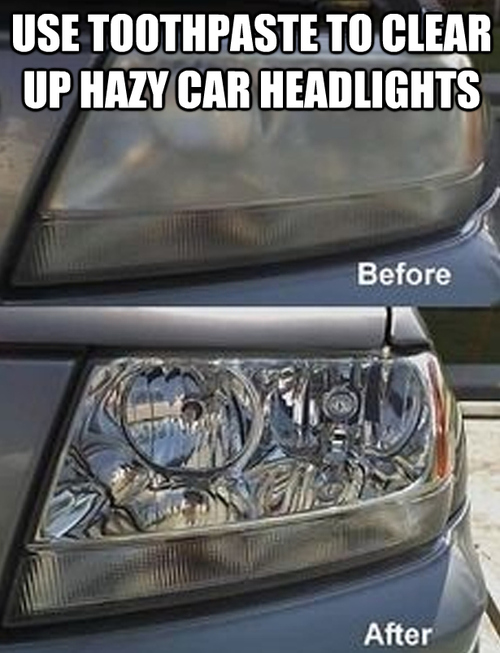 That's bloody brilliant, if you ask me! This lifehack is mentioned on most of the websites I visited. 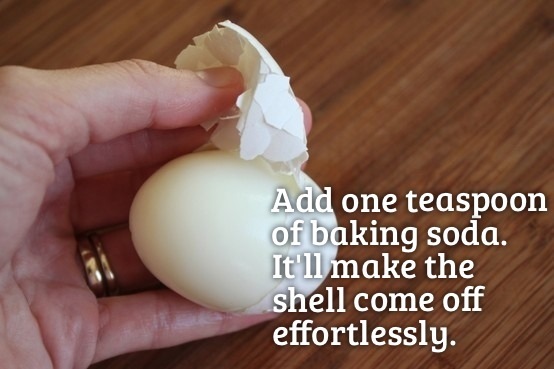 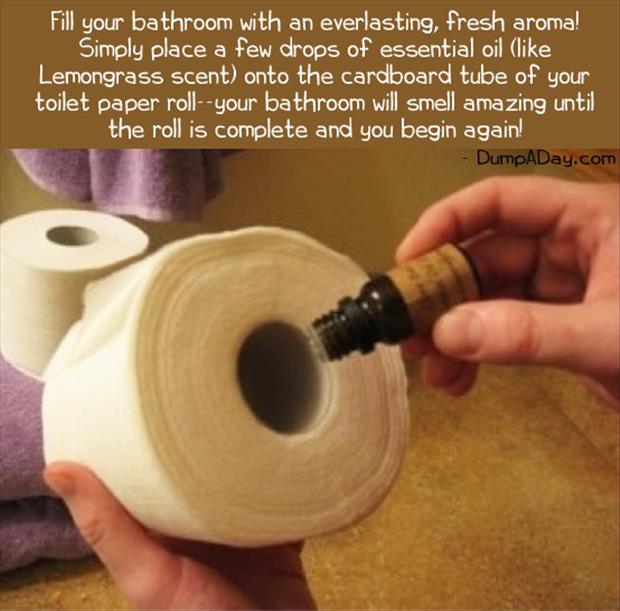 More from Buzzfeed: 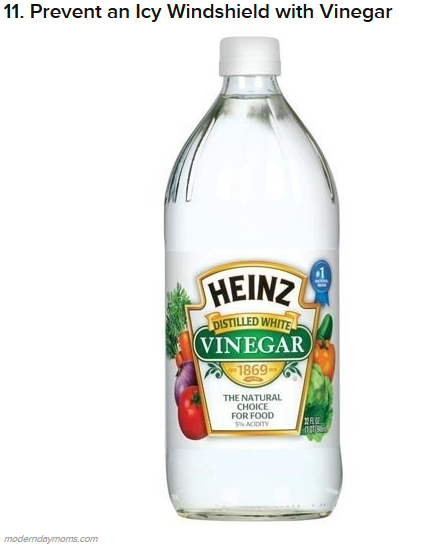 Click here for instructions. 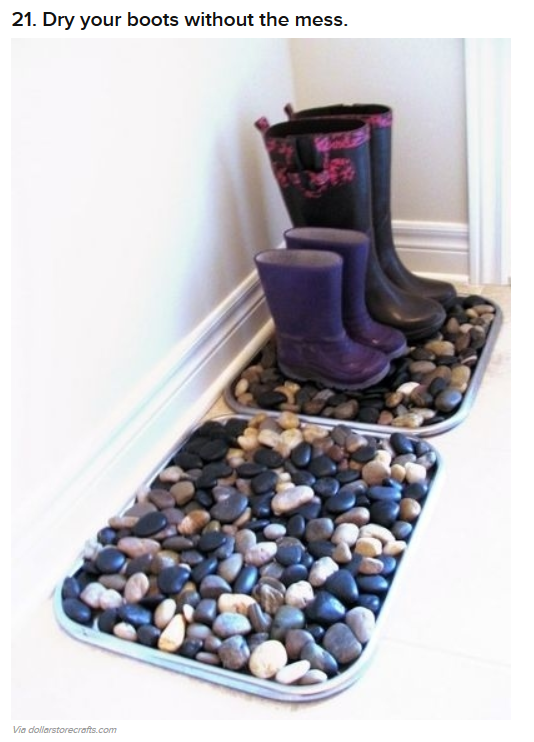 This looks really nice too. Most lifehacks are not visually appealing. Finally, from Life Hack: 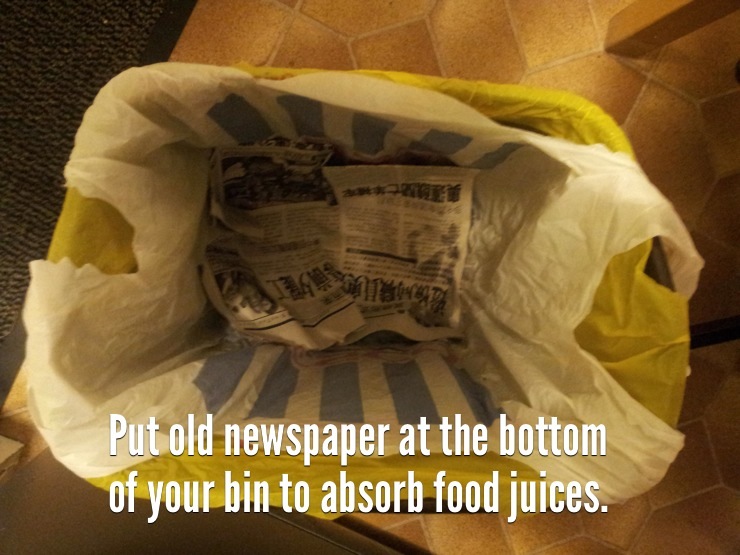 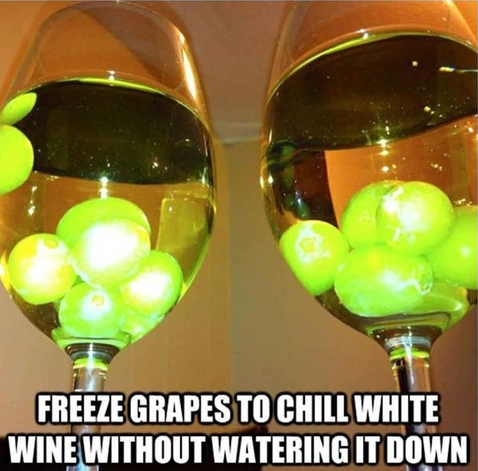 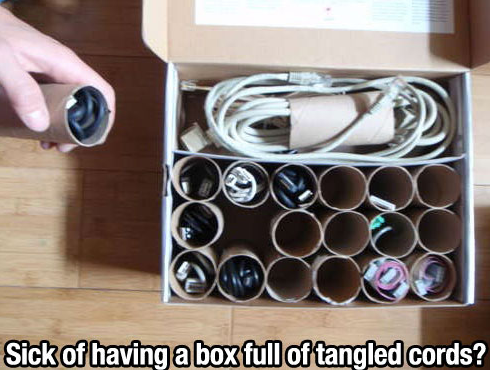 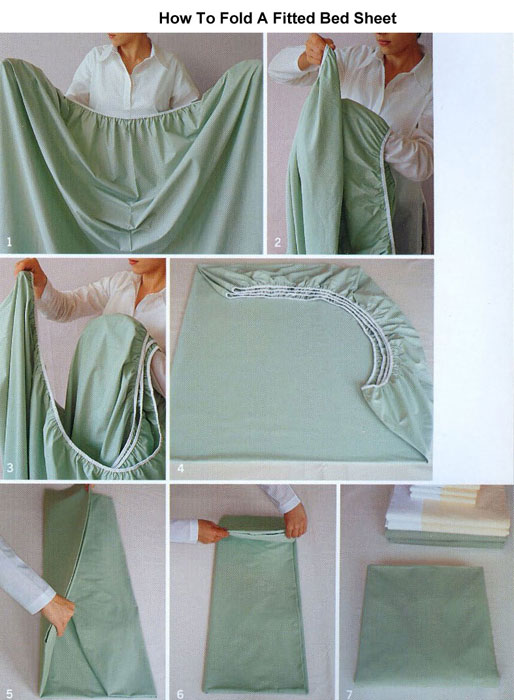 I have seen this many times on the net and on TV - truth be told, I can't do this. My sheets are kinda folded now, but nowhere near the perfection seen here. 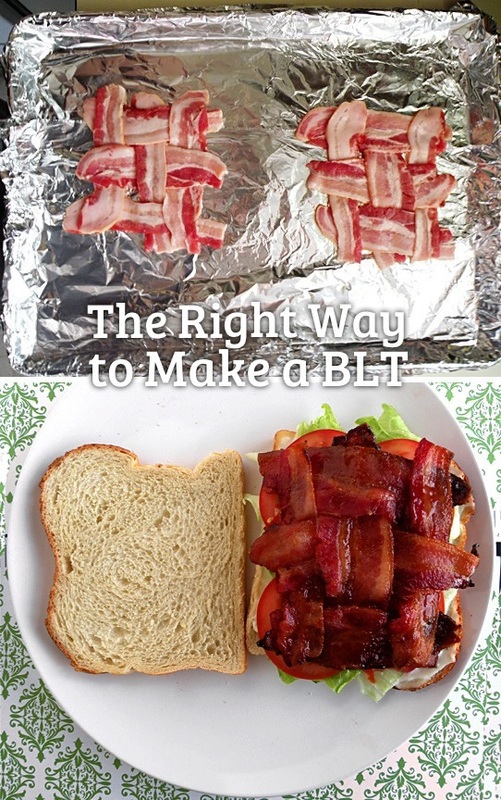 Brilliant! I am so doing this from now on. So there are a few of the most interesting lifehacks I've found. I hope I've made your life a little easier :)
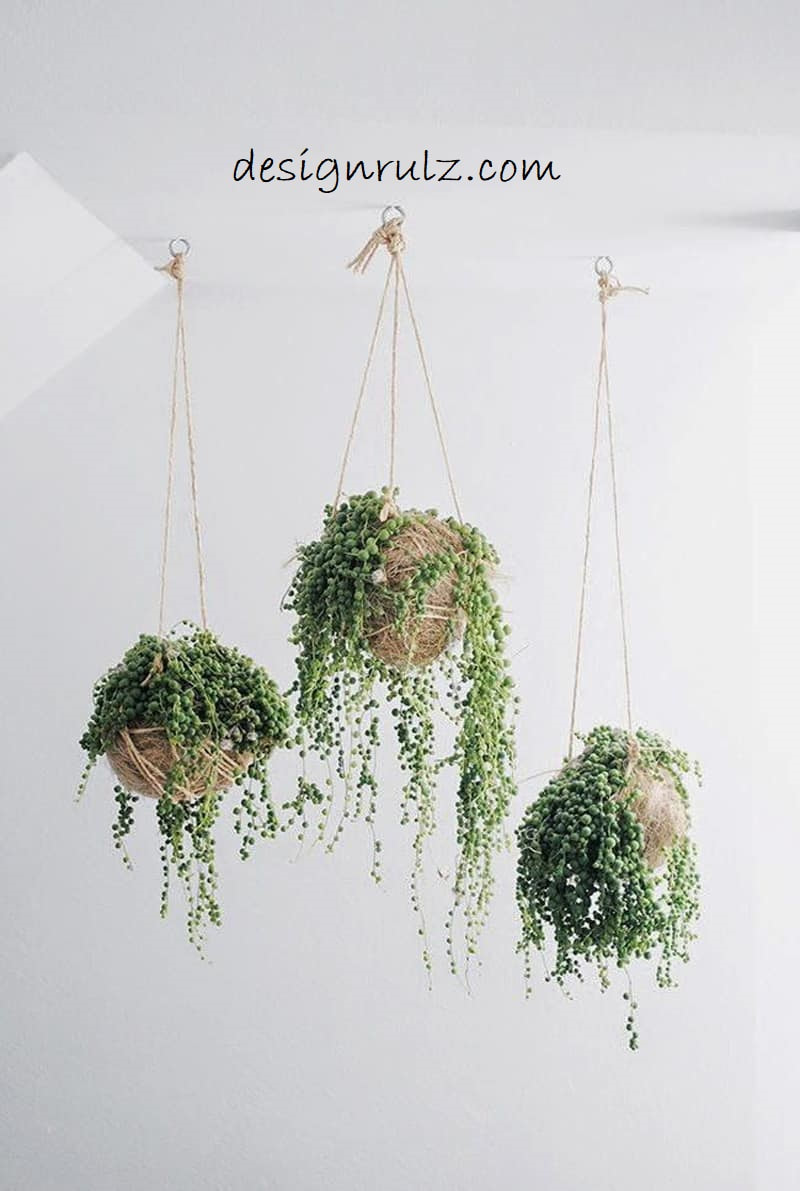
'Till next time... as usual you can leave comments below if you know of any great ideas. 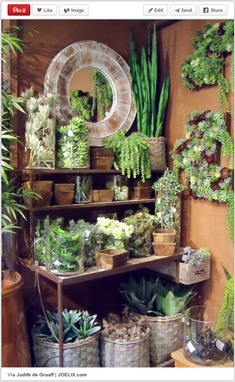 I mentioned in a previous post my recent addiction to Pinterest. Well, one of the boards that I pin to is decor ideas involving plants. I love plants and having them around. I only have a slightly green thumb - I kill a lot of plants, but I do have some survivors. I have a terrible habit of forgetting to water my plants and then way overdoing it. I'm hoping to change that behavior - I have put myself on a schedule, so I'm watering everything every Thursday. I really hope that helps and keeps everyone alive a little longer. Especially within the mini oasis I recently created. So, back to Pinterest. I was so inspired by this pin posted by Judith de Graaff that I decided I had to have something similar myself. I do not have the disposable income to recreate it exactly, but one night I had a lightbulb moment and remembered my old desk and thought maybe I could do something interesting with that.
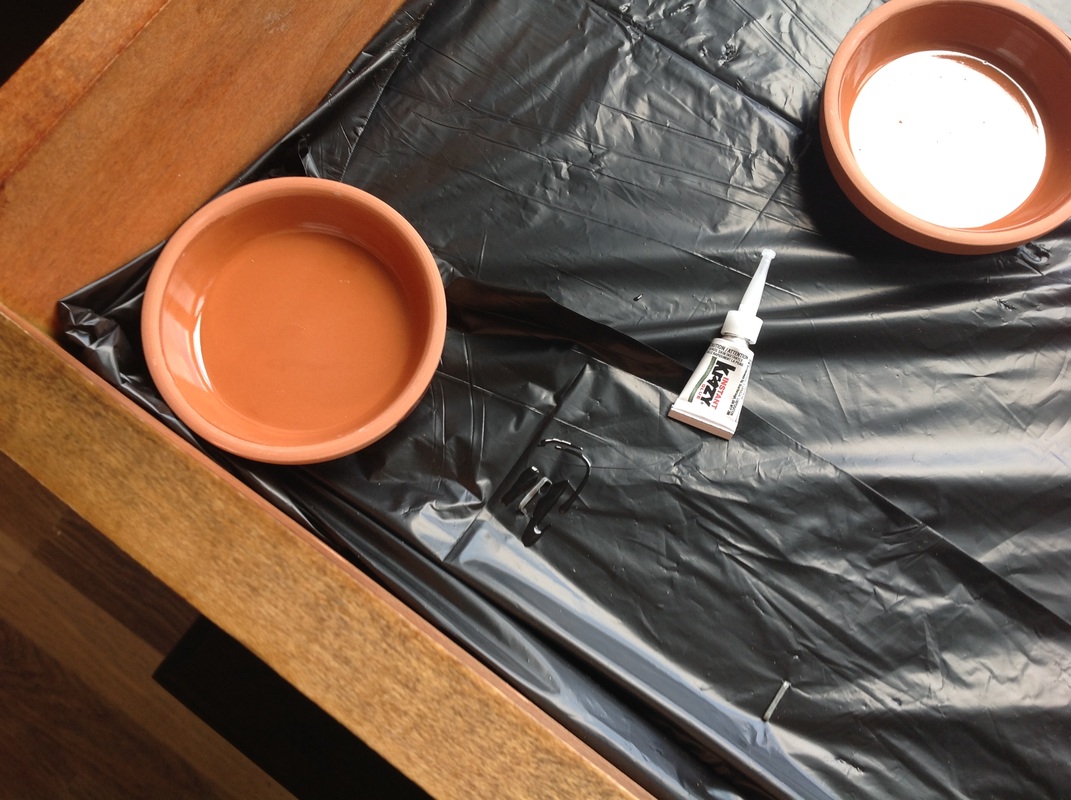
So I decided to turn my old desk into a planter. The irony is that all those beautiful succulents trailing down the wall and desk are what actually made me want to do this, and I was not able to find even one to add to my finished product.  Before - frontview - 23-09-14 - This is how sad and boring this corner looked. 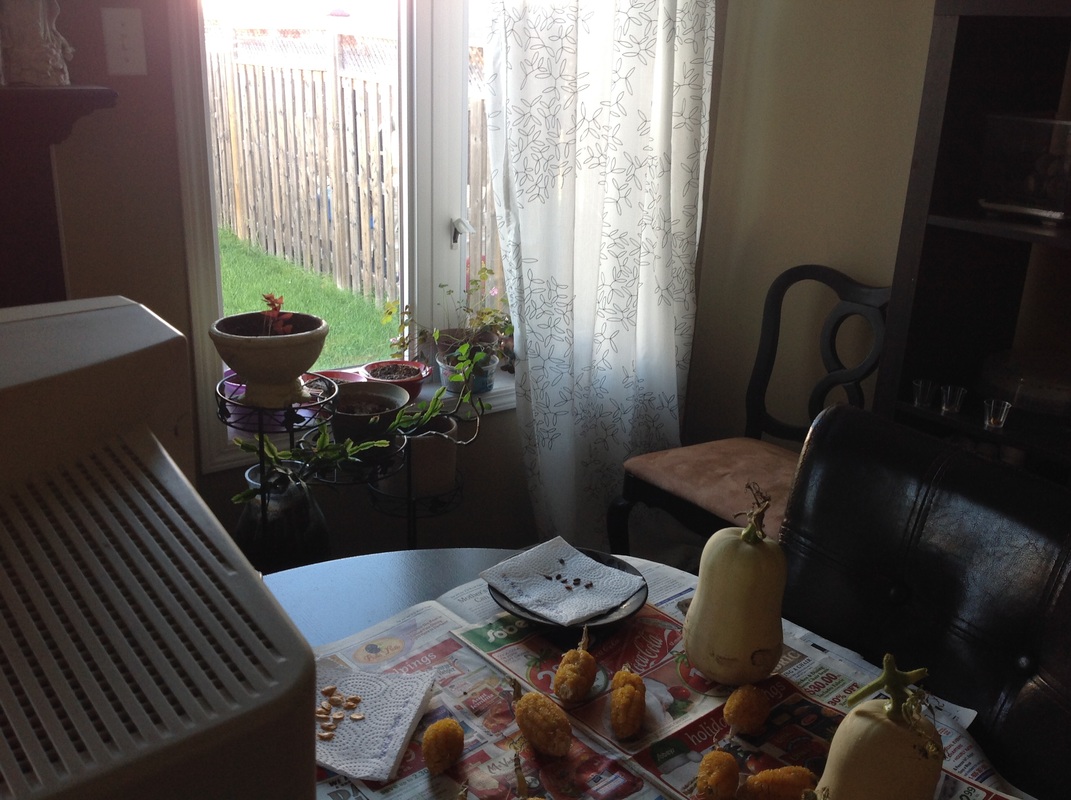 Before - diagonal view - 23-09-14 - ignore my various produce and seeds! 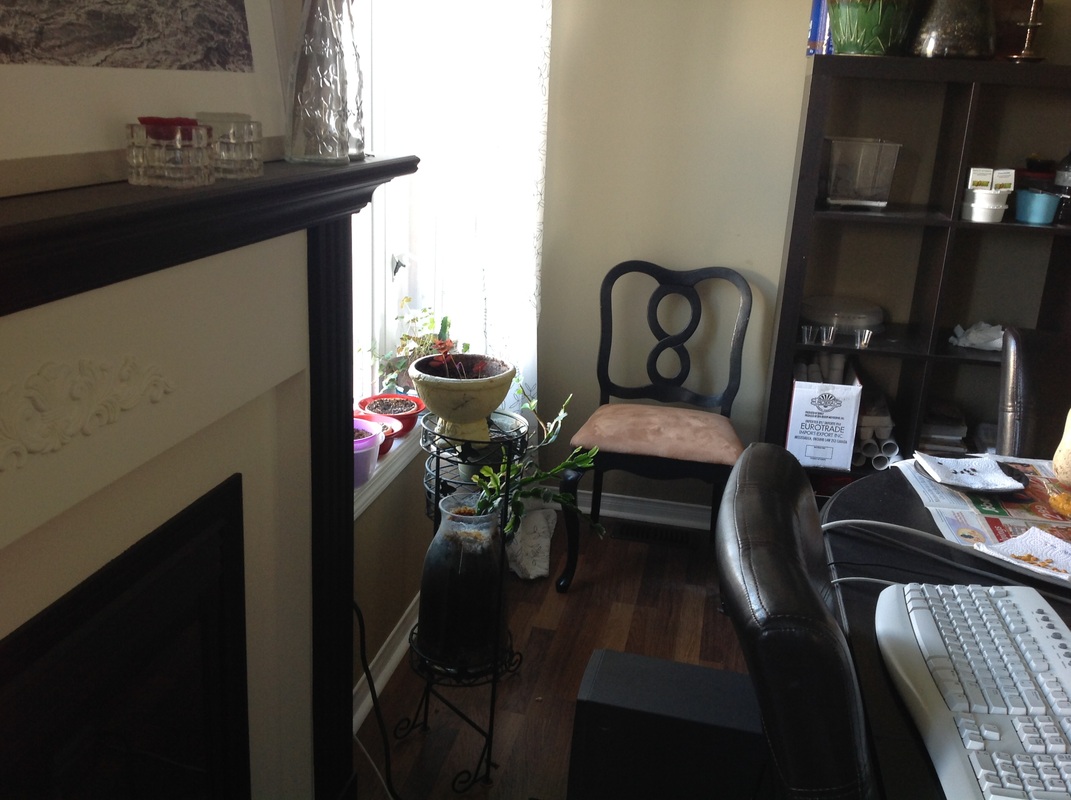 Before - sideview - 23-09-14 - again, very sad and boring. There are my before pictures. As you can see, the corner I was interested in sprucing up was super boring and very, very sad. Ready to find out what I did and how I did it? Here we go: 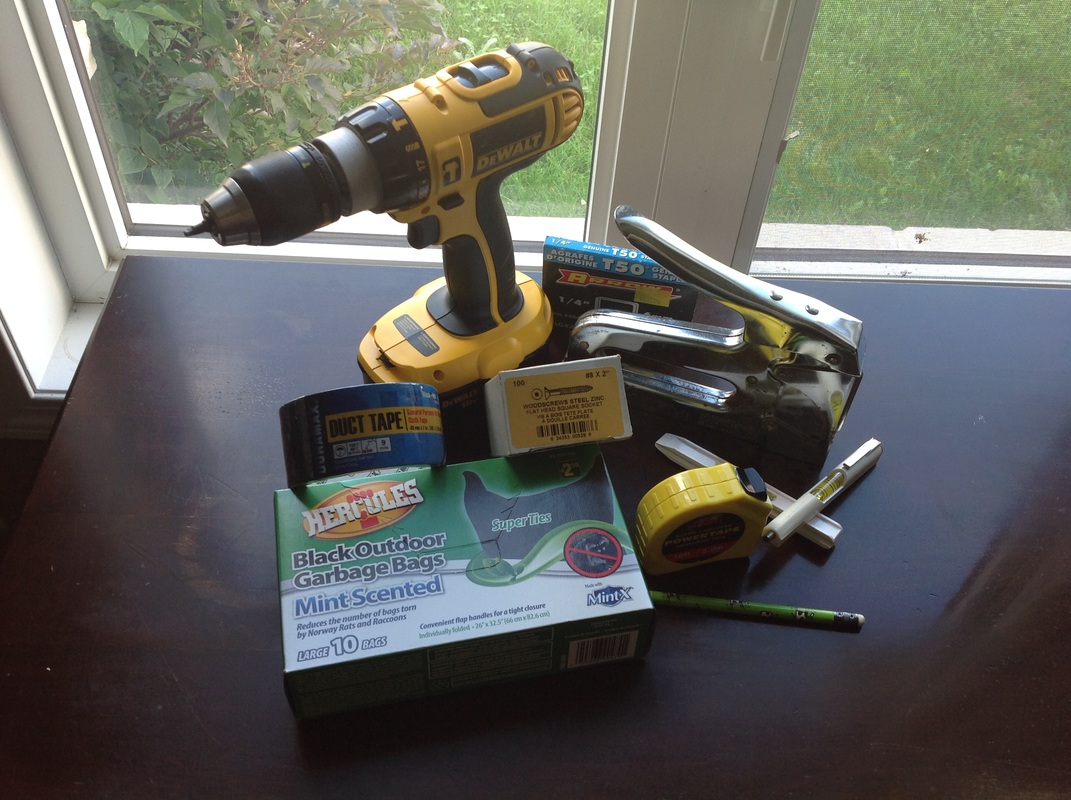 Here are the tools I used: A drill (with bits for screws and for making holes) A staple gun (with staples) Duct tape Measuring tape Level Screws Garbage bags (lol - mint-scented!) (the cow pencil was used for something else but really, really wanted to be in the photo) 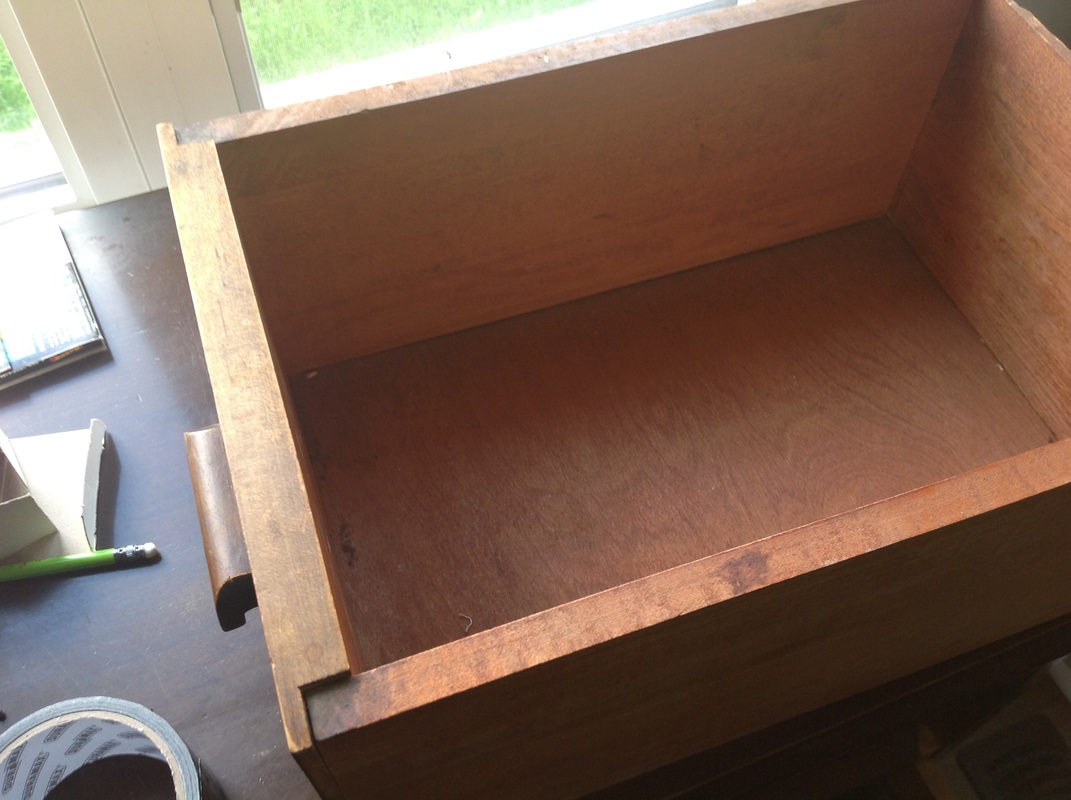 After lugging the desk and three drawers down the stairs (valuable tip: do not wear long yoga pants when moving heavy furniture down the stairs, they are just waiting to trip you to your death), I moved everything from the corner, put up my two guys and a hook to hold back the curtain (which I will paint another time, I didn't want to wait for it to dry), put the desk into place and got to work. Here is one of the drawers. I stapled and then duct-taped the black plastic garbage bags to the inside so that when I inevitably cause spillage when I'm watering the plants, it won't seep into the wood and rot and mold. 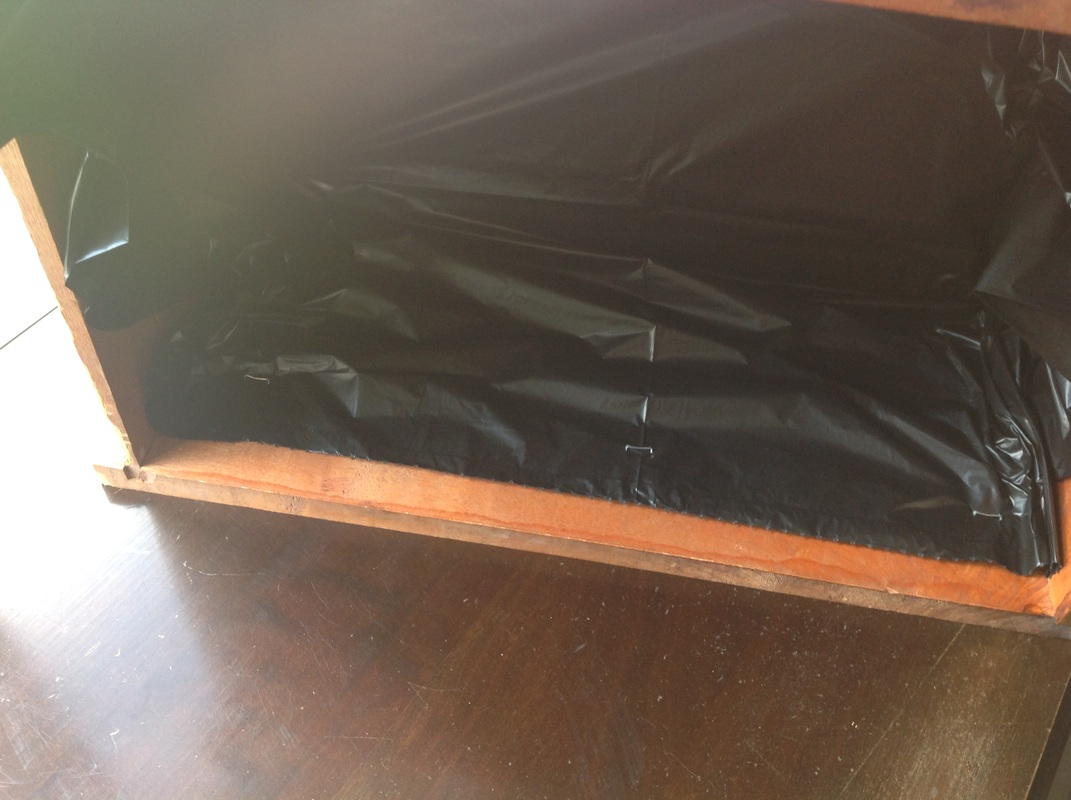 inside of the drawer with staples 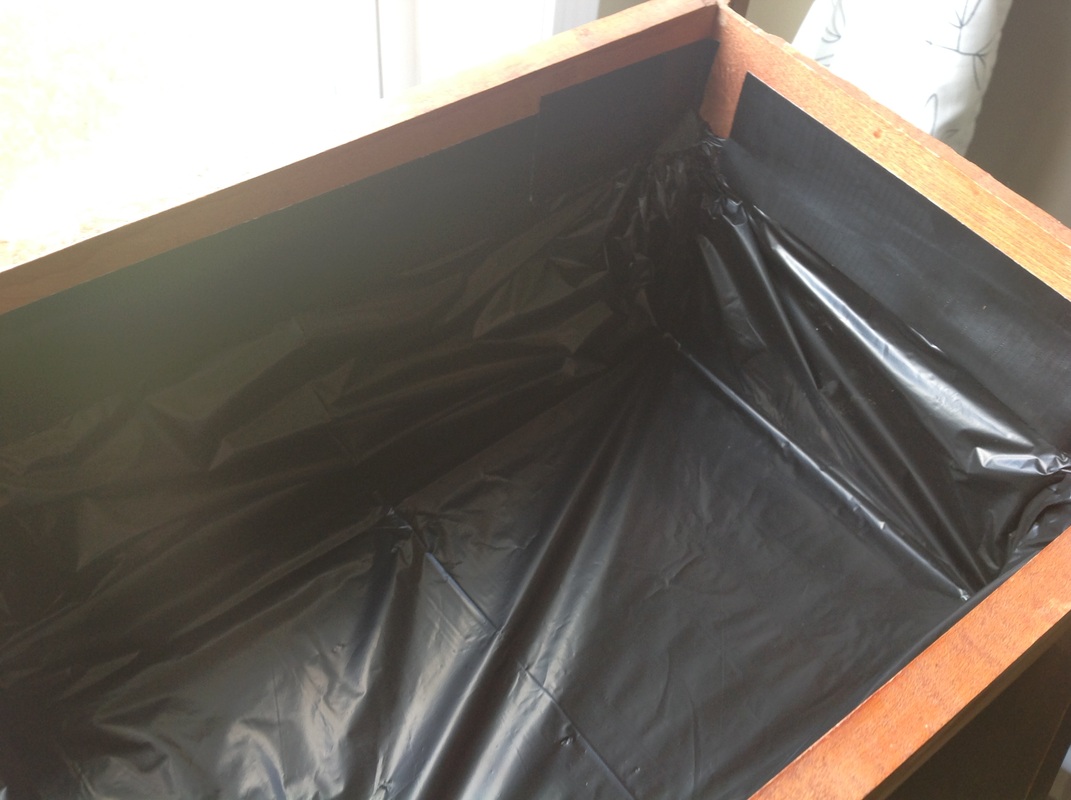 after adding the duct tape After I did this to all three drawers, I placed the lowest one into it's slot, sticking out as far as it would go without toppling over. 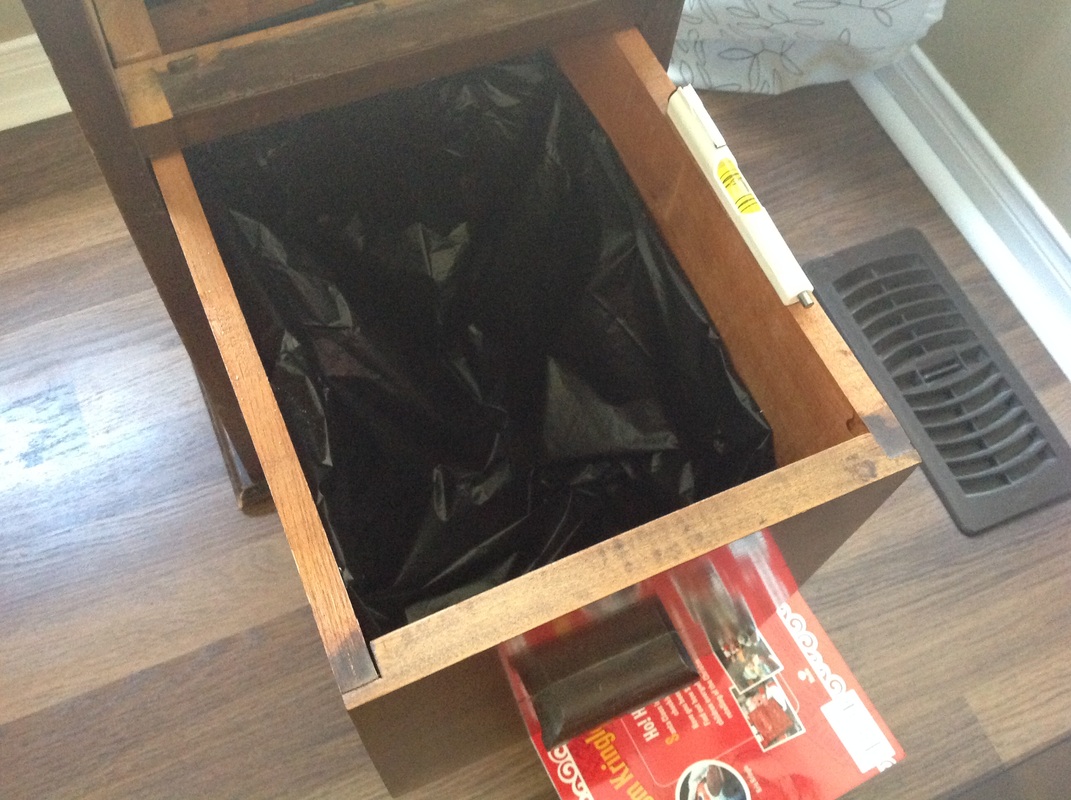 I placed a level on one side to help me out and stacked some books under until it was level. Here is where you'll use the measuring tape; measure both sides along the edge to make sure they're the same and your drawer is straight. I thought I took a pic of this, but I guess not and I'm sure you can picture it in your head right now, I have faith in you. 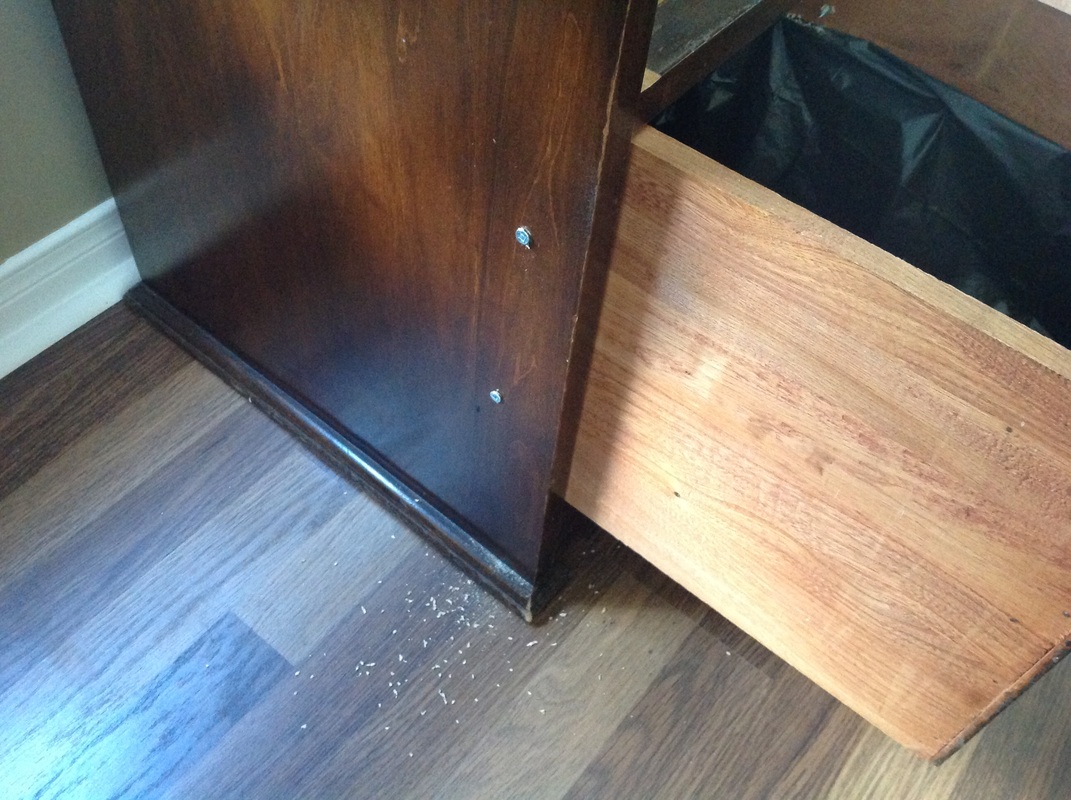 Once my drawer was nice and straight and level, I put four screws to hold it in place, two on each side. Before you start with the second drawer, I would suggest you place the container(s) that will house your plants in first. You may have a difficult time getting them in after. I shoved old newspaper and other packing materials in behind them, just to make sure that they stayed at the front and couldn't travel. I used a high vase and a glass jar that housed nuts in it's former life. It doesn't really matter what you use - the vessels won't be visible once it's done. 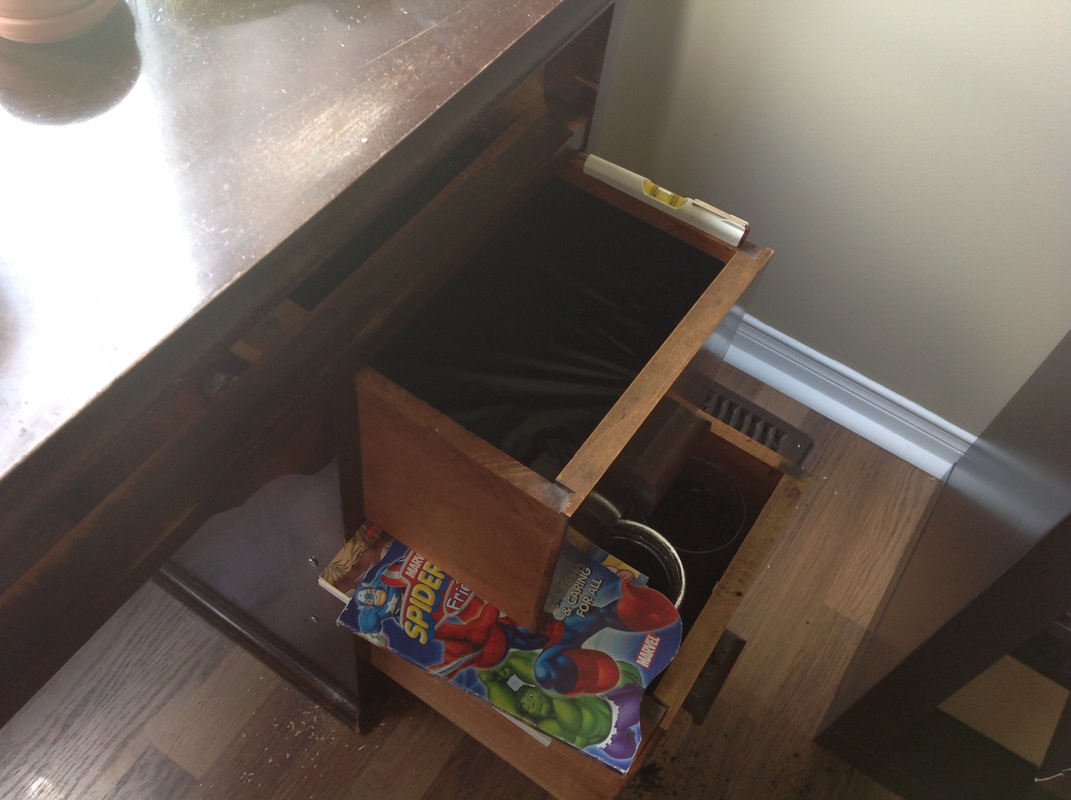 Follow the same process with the second drawer. Just make sure you don't pull it out all the way. Leave as little space as possible for the bottom plants. These drawers were smaller than I expected. 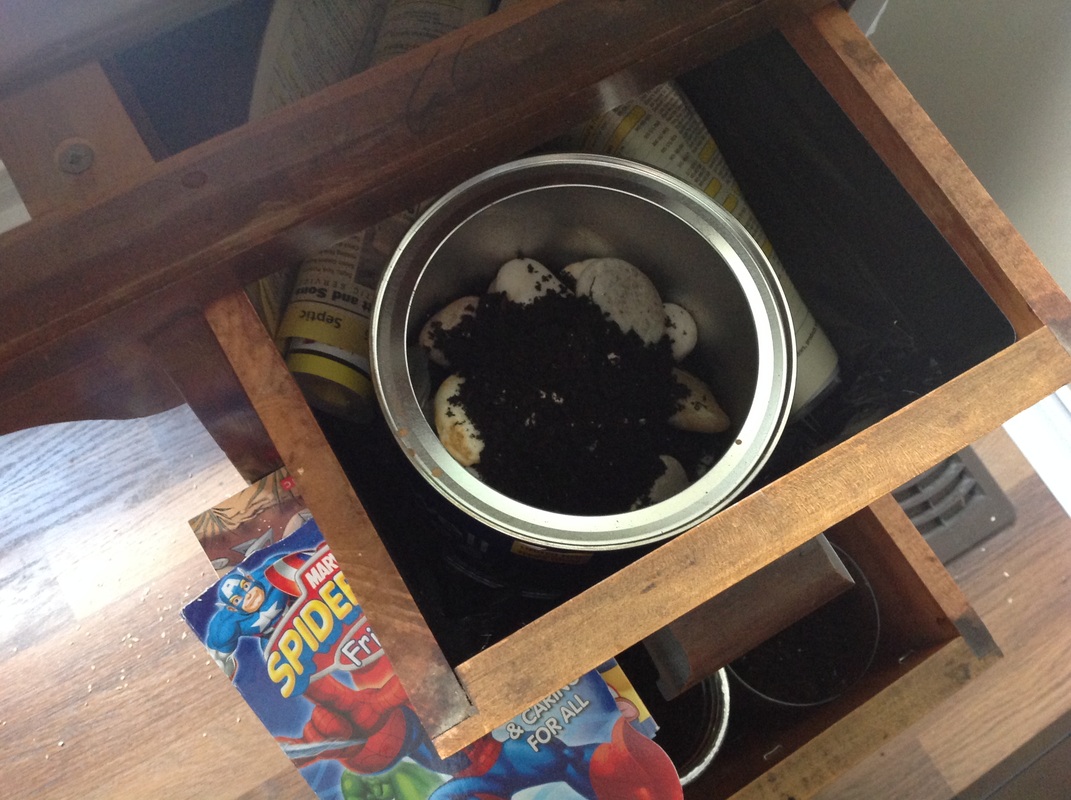 I used an old coffee container, it just happened to be the perfect height and shape. A word of caution: I would suggest you place your container into this drawer before you screw it in. There is less space to work with than the bottom. I almost couldn't squeeze this container in. Then I would have had to unscrew it and pull it out further. I rolled up chunks of phone book and anchored it into place.
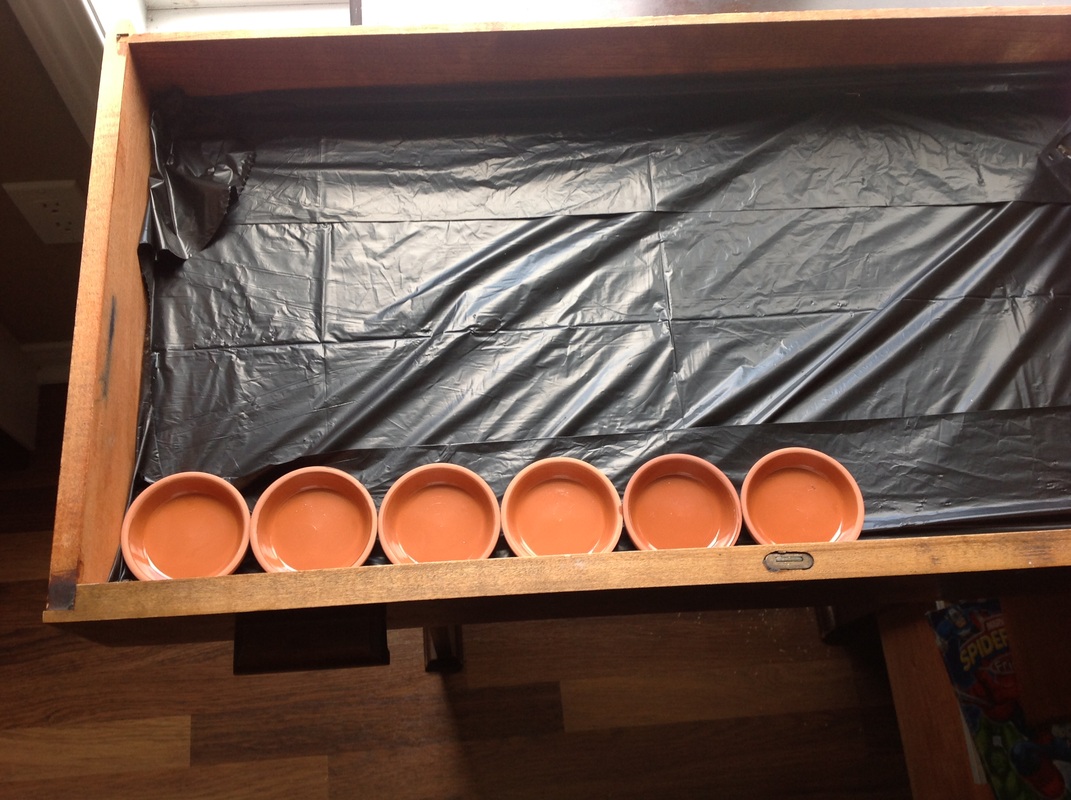
I put these little terra cotta pots in the bottom left hand corner of the top drawer because I wanted those drapey succulents to grow out of here and just hang down into the empty space. You know the ones I was talking about earlier? My whole inspiration... that I could not get my hands on. I didn't put anything on the right side because I figured I'd put a plant that grows upward in the middle drawer, and this would give it the space it needed to grow. I put a staple under each base and a little crazy glue, hoping this will keep them in place. Since this is the top drawer, I did not screw it into place. As it stands, this drawer will be closed until I find the perfect little gems I need. Then I'll only keep it open about an inch to let them grow out and leave space for the other plant below it. 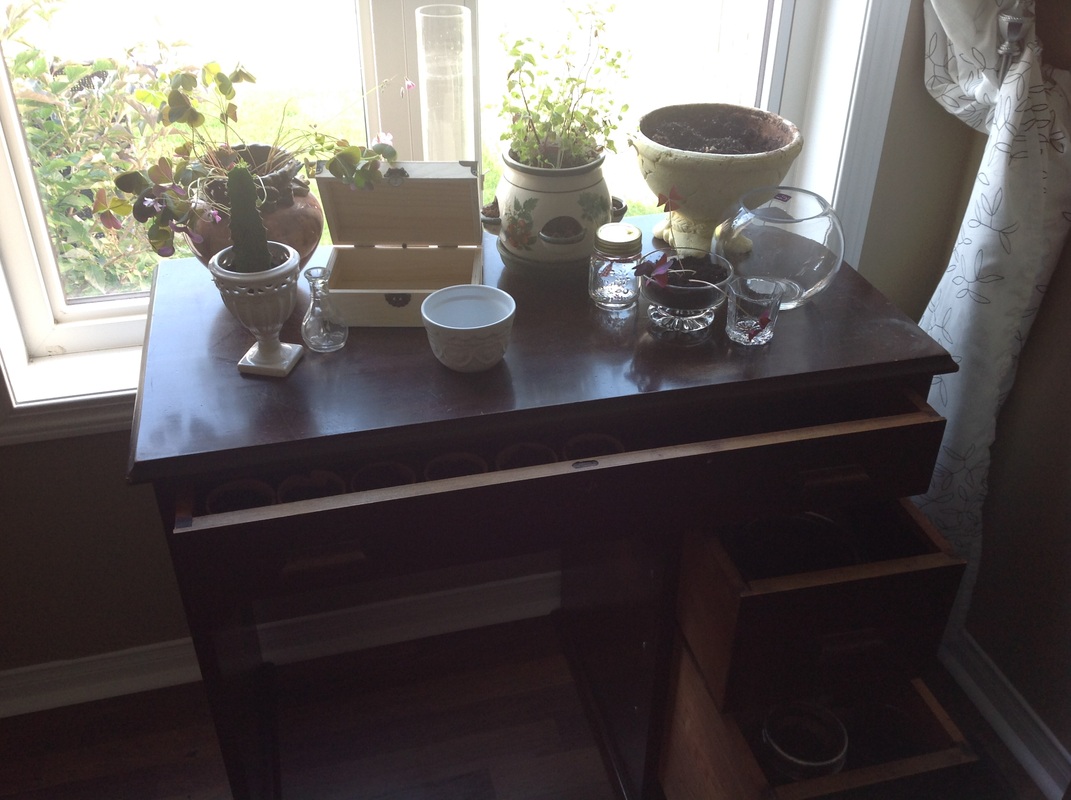 So here's the end of day one. It's pretty much put together and I even had some plants to add. I made a trip to the dollar store and picked up some random things to plant in, including the box. I wanted different heights and sizes and foliage to make this look interesting. 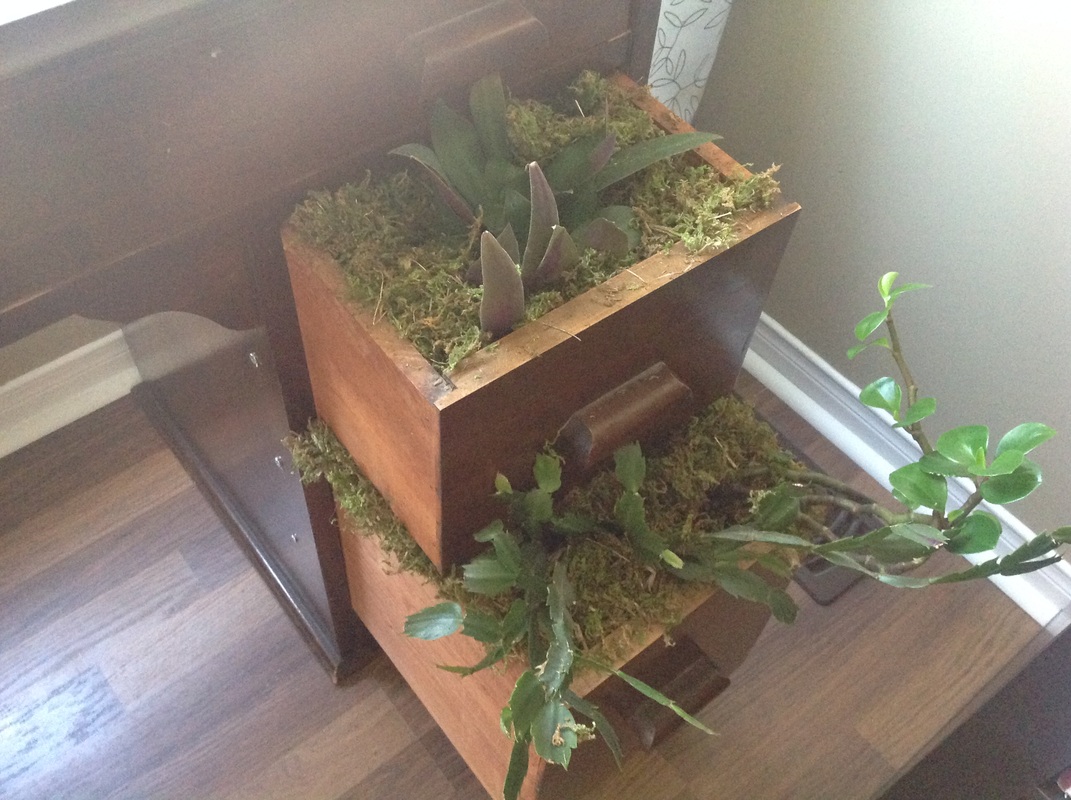 So day two was really just about finishing touches. I went back to the dollar store and bought some decorative moss to cover the tops of the bottom drawers, I think it turned out great, I'm so happy with the result. You'll have to forgive the poor quality of my after pictures. Unfortunately the sun and light did not want to work with the ipad, which is how I take these pictures. Each one was either dark or grainy, so please bear with me! 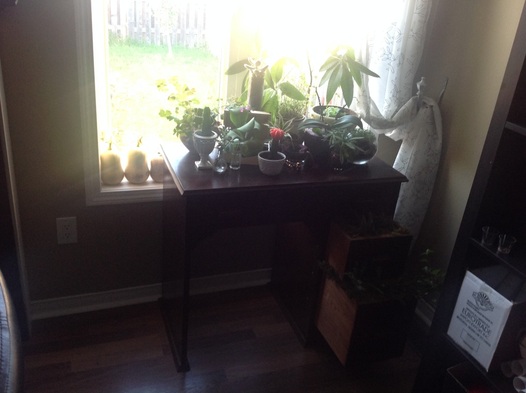 After - frontview - 26-09-14 - Crappy lighting! This corner is definitely improved. 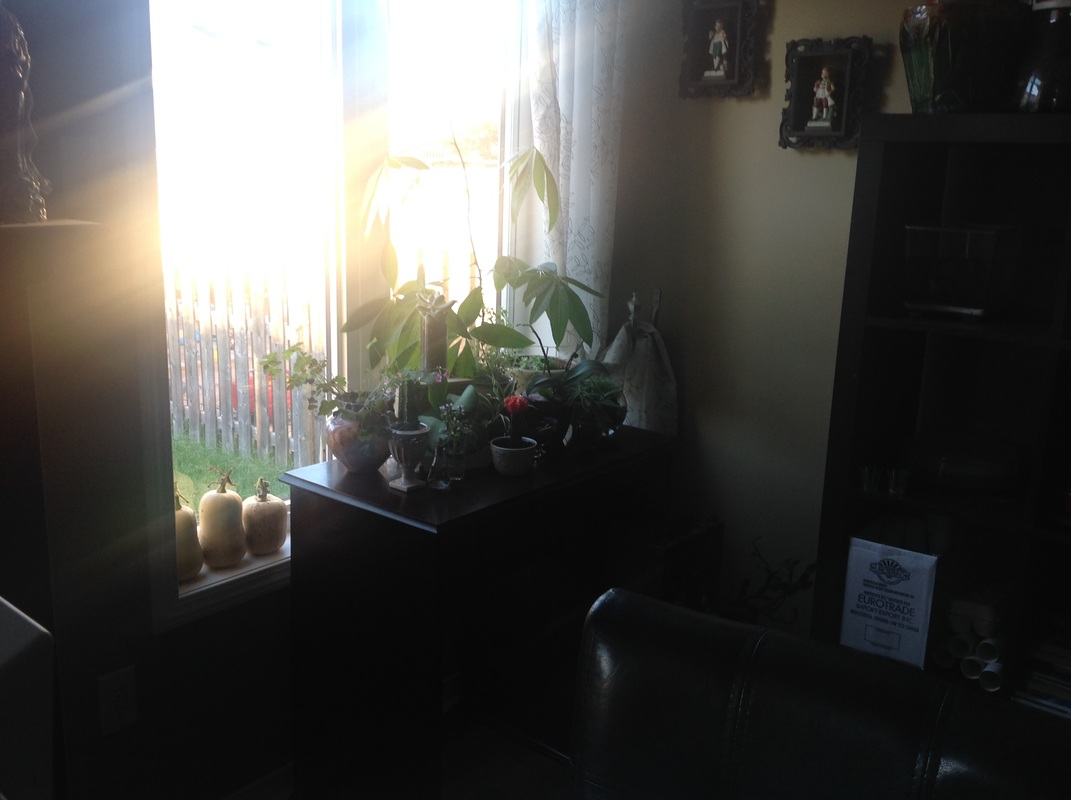 After - diagonal view - 26-09-14 - Let the light shine in! I also took the extra leaves out of my dining table, so there's more space. 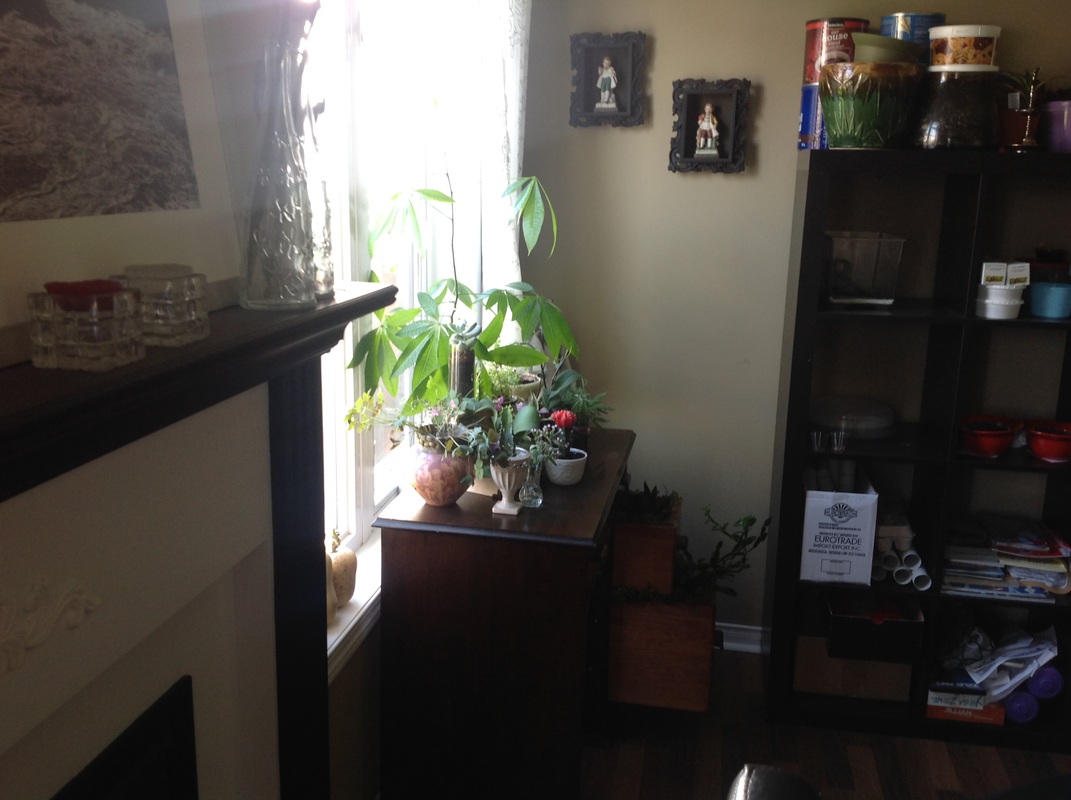 After - sideview - 26-09-14 - at least you can get an idea with this view. Just try to ignore all the junk that requires re-organizing on the right side! All in all, I had a great time re-purposing a forgotten desk that was collecting dust into a unique planter to spruce up a very boring corner of my dining room. I spent about $40 on new plants and maybe $25 at the dollar store for various supplies. Not a bad deal, I'd say. Feel free to leave me any comments... did you love it, hate it, wish the pics were clearer? Feel like trying something like this yourself and there was something I wasn't clear on? Meanwhile, I will leave you with more pics of the plants I used because they're so pretty and I am so happy I have them (except that bloody droopy succulent... I will find you!) 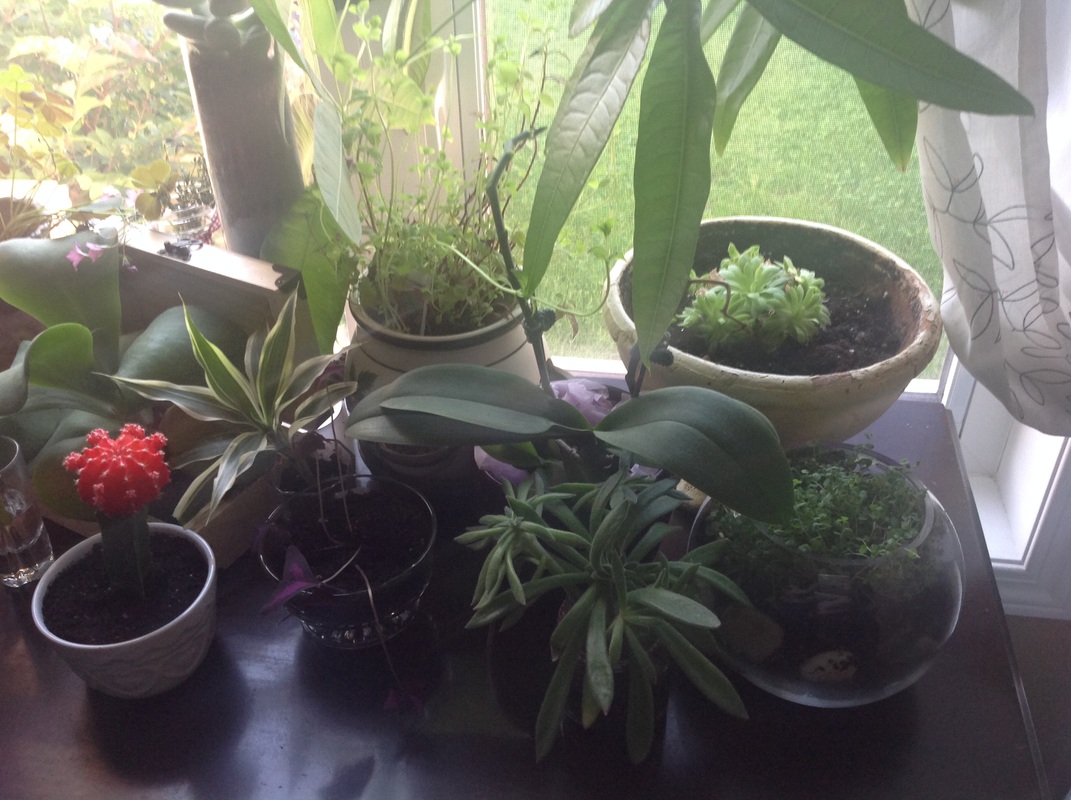 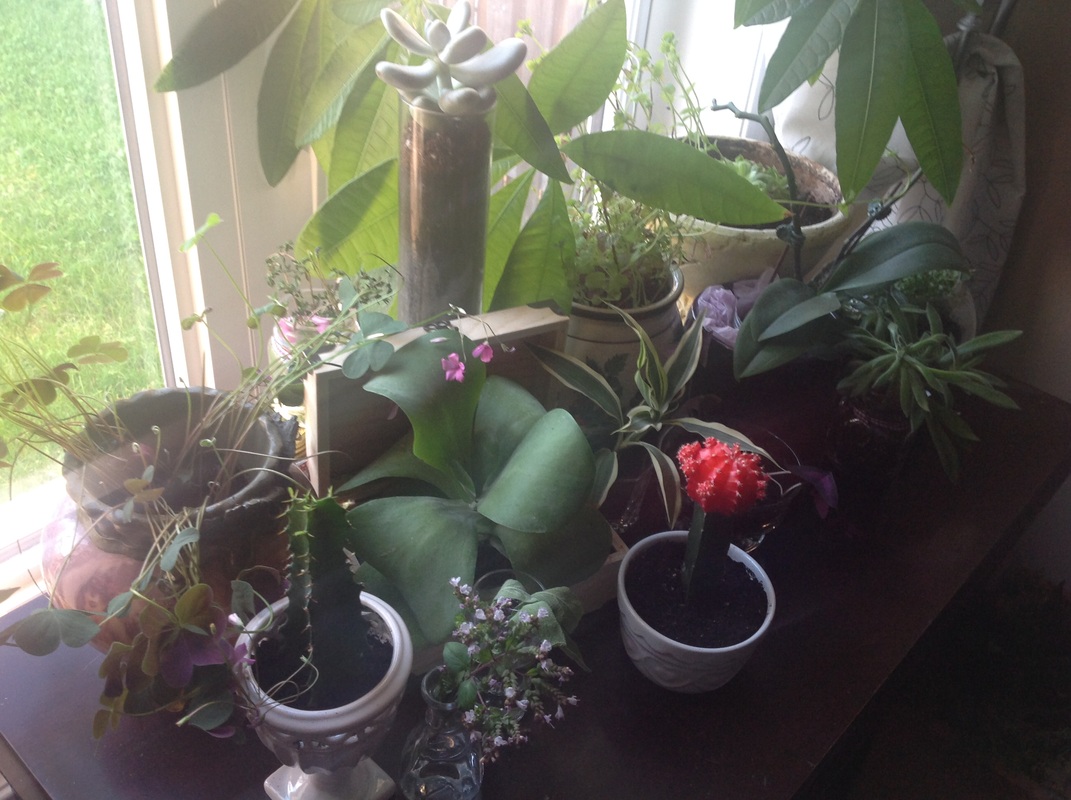 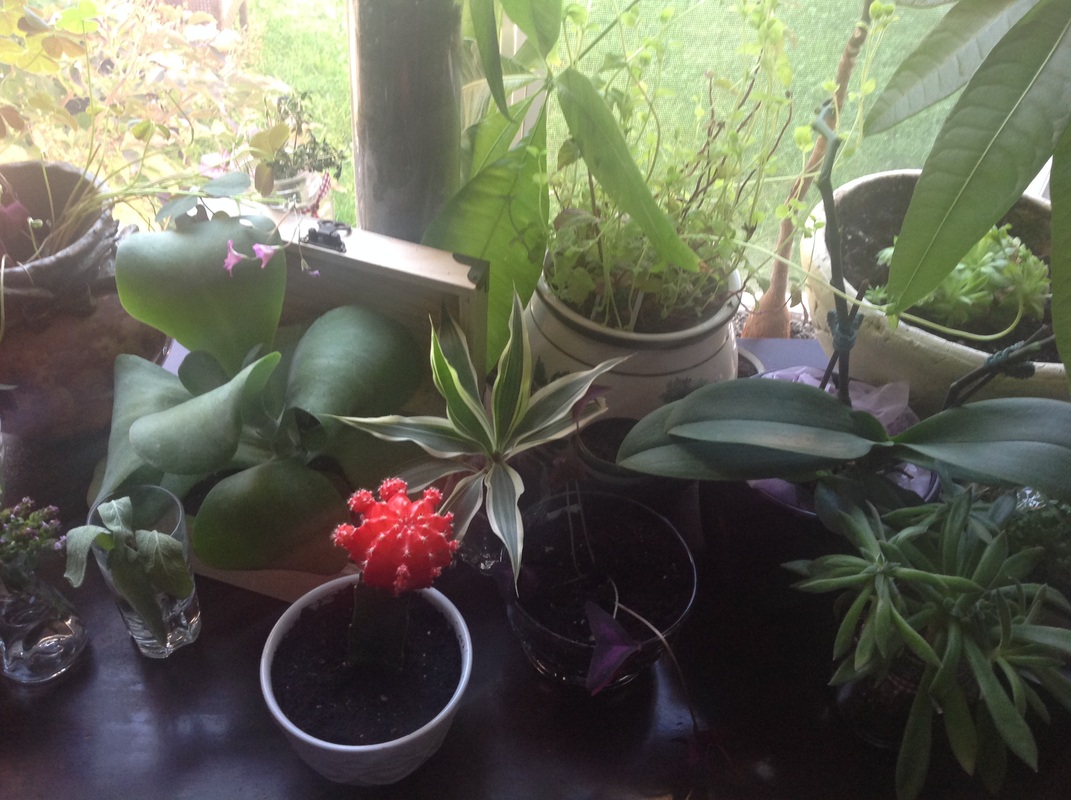 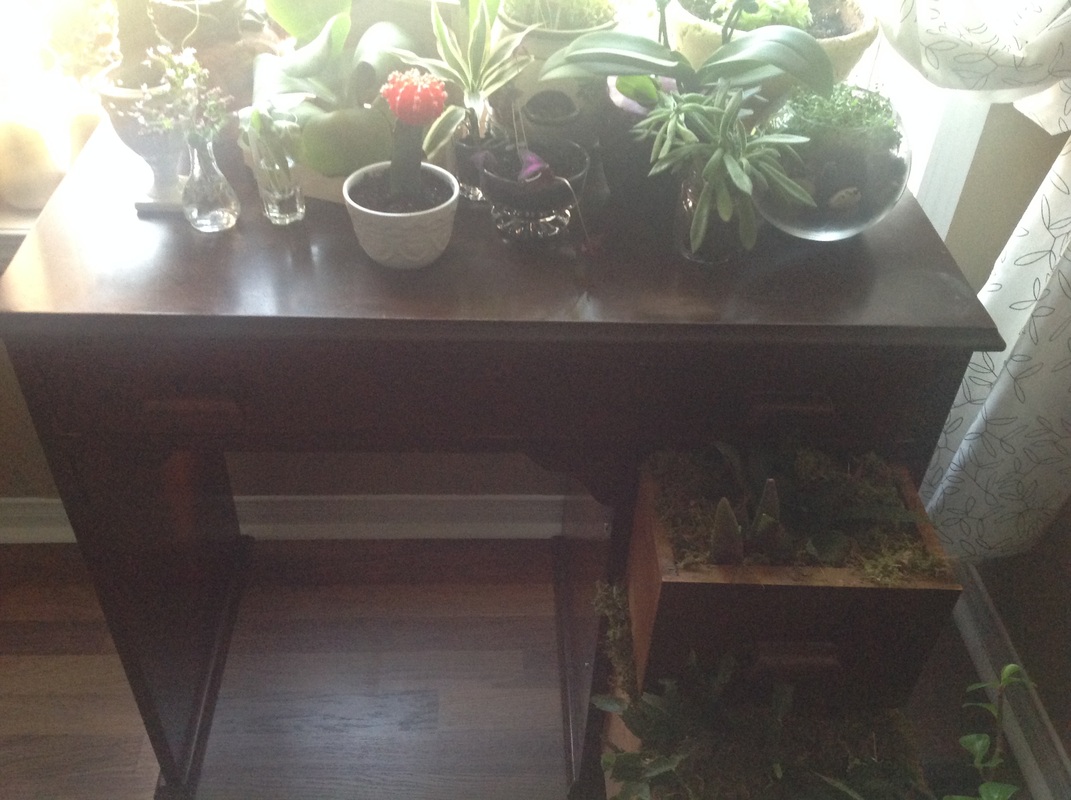 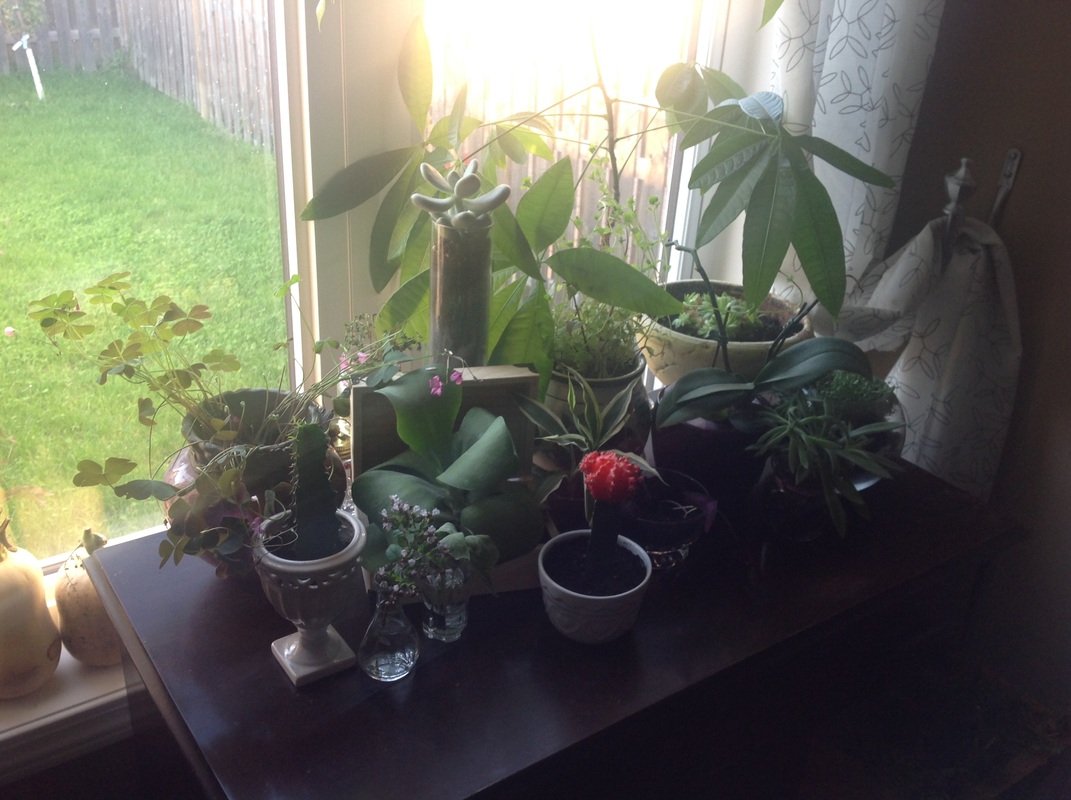 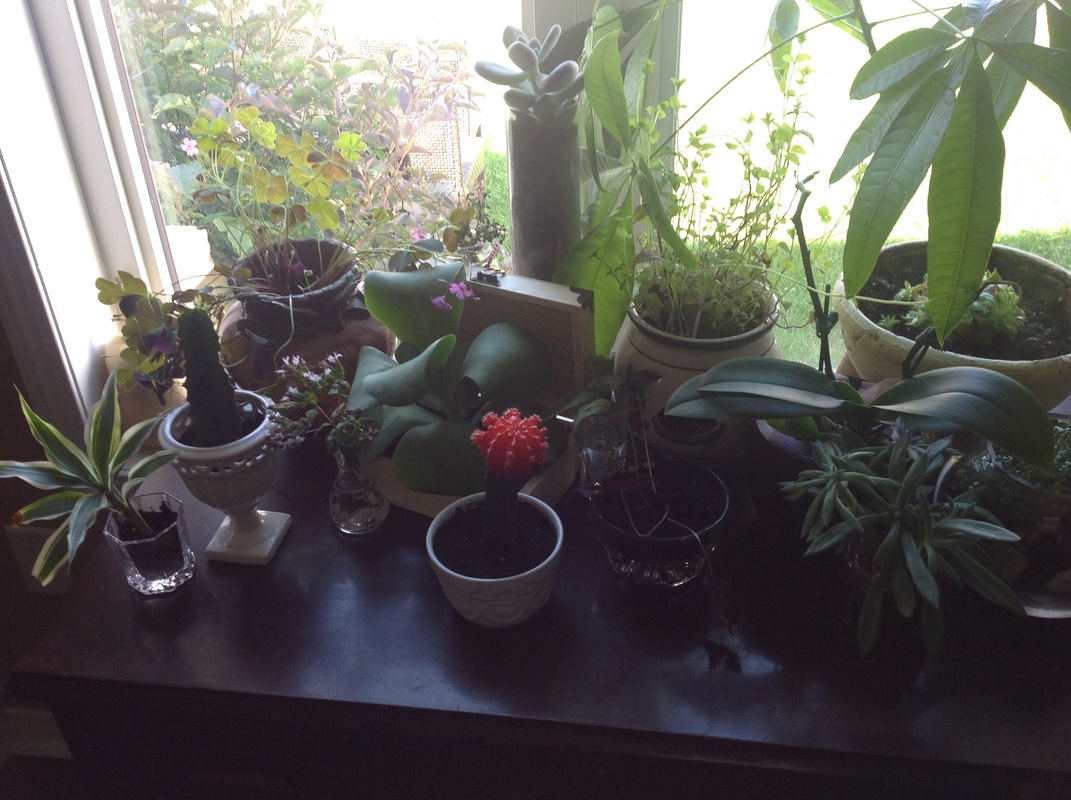 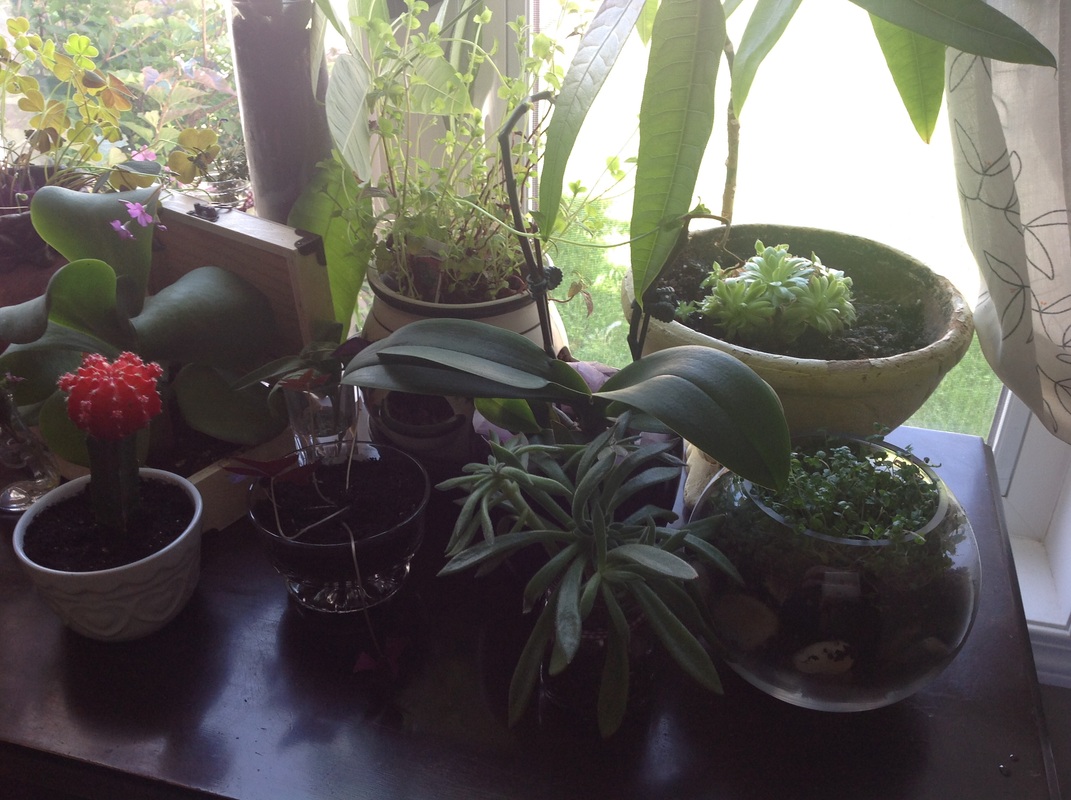
Any & all of my posts may contain ads and/or affiliate links.
I am not sponsored by any of them, and you will not pay anything extra by clicking on them or making a purchase through them.  I love coffee. I don't mean I like it a lot, I mean I LOVE it. So it's only fitting that I write an entry on things you can do with it, other than drink it. So here are some great uses for your grounds (mostly) and one for the whole bean: Used coffee grounds make great fertilizer. They’re full of nutrients such as nitrogen, calcium, magnesium and potassium that are great for plants that thrive in acidic soil. Collect them in a container and use them to fertilize rosebushes, azaleas, rhododendrons, evergreens, and camellias. Drip grounds from a standard coffee maker are richer in nitrogen than those from a percolator. Spread the grounds around your plants right on top of the soil to allow for a slow release of the minerals. Be sure you know which plants like the acid and which ones don't (hint: tomatoes don't). If you're looking to grow vibrantly blue hydrangeas, you're probably adding aluminum to the soil. Work coffee grounds in and they'll absorb the aluminum better and be even bluer! 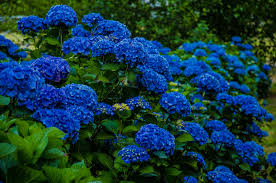 Used coffee grounds make a great composting agent. Mix your used coffee grounds (and even the filters) with lye to make a great composting agent. The grounds and bacteria on it are a food source for your worms and the grit helps them digest better. A theme in many posts is what goes in equates to what comes out. Better worms = better soil. Used coffee grounds make a great repellant. Coffee's strong odor helps to keep insects and animals away. Mosquitoes, ants, slugs and maggots all dislike the acidity of coffee and will stay away from areas where there is high concentration of acidic soil. To help keep cats from using your garden (plant or veggie) as a personal litter box, mix orange peels with coffee grounds and sprinkle around your plants.  Fresh coffee grounds make a great deodorizer. Make a sachet using cheesecloth or (unused!) pantyhose and ground coffee (not used) and leave it in the back of your fridge and freezer to help absorb strong food odors like onions, and makes it smell like fresh coffee. Fresh coffee grounds make a great steak rub. Toast fresh coffee grounds under a hot broiler for about 30 seconds, shaking often to prevent burning. Add the toasted coffee to other steak spices (try salt, pepper, garlic powder and dry mustard) and rub into the steak. Leave it in the fridge for a few hours and cook as desired. It'll give your steak a nice little kick. 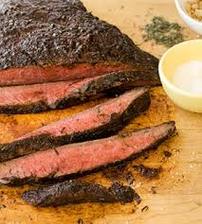 Whole coffee beans make a great breath freshener. Whole coffee beans can be used to freshen your breath! Keep a bag in your purse or desk drawer and pop a bean in your mouth after lunch. Sucking on it will quickly give you fresher breath without aspartame! Used coffee grounds help clean dishes. For grease and grime on your dishes, put a little bit of used grounds on a rag and use to clean your dishes instead of scouring pads and SOS pads. Rinse thoroughly.  Used coffee grounds help clean hands. Rub a scoop of grounds between palms as an exfoliant to remove dead skin and help eliminate smells from foods like fish and garlic. Also helps get the capsaicin off your hands after chopping hot peppers. Here's a great recipe to make your own coffee ground soap: heart-hands-home Used coffee grounds help moisturize skin. Exfoliating with coffee grounds can help stimulate blood flow, promoting healthier and tighter skin. Just add mineral oil or vitamin E oil to old coffee grounds and apply it to your skin with a loofah.  Fresh coffee grounds fight cellulite. All cellulite creams you buy contain caffeine - that's what's fighting the cellulite. You can use used grounds, but fresh has a higher concentration of caffeine, so if you're going to do it - take it all the way! Mix 1/4 cup warm grounds with a tbsp of oil (olive, almond or massage - pretty much anything but cooking oils) and apply to your cellulite zones. Wrap in plastic and wait about five minutes. Take off the plastic, brush off excess grounds and take a warm shower using a loofah. Here's a few great exfoliating recipes: natureshomespa Fresh coffee grounds can give you a facelift. Again - the wonder of caffeine. Mix 1/4 cup of fresh coffee grounds with one egg white, and then spread the mixture over your face. Once it is dry and flakey, rub the mask off and rinse your face. Your face will feel tighter - and no going under the knife or needles involved.  Used coffee grounds help your hair shine. Brunettes and dark redheads can benefit from rinsing their hair in coffee to rejuvenate their color. Just steep your used grounds in two cups of hot water and then rinse this through your hair. Blondes need not apply - this will stain your hair. Do you have any tips? Post in the comments below! Don't forget to follow me on Pinterest, Twitter, retweet my blogs (please!) and never miss a post by subscribing to RSS.
Thanks again for stopping by :)  I'm always interested in ways to save money on and DIY recipes for everyday things. I also consider that we're surrounded by poisons and chemicals all day, so why not use more 'green' options to clean your home? Many people believe that if it isn't filled with things you can't pronounce, then it must be formulated especially to do a great job. And many of them do. Along with the fact of the chemicals and what they're doing to your surfaces (did you know that Magic Eraser is actually an abrasive eraser?), the environment and your health, I have a sensitivity to strong scents. Unless the room is ventilated really well, I can barely breathe when using things like Easy off, Windex and Tilex. So I've been using only plain vinegar mixed with water mostly to clean many things in my house. It does a great job, but it's not the correct thing to use for everything. So I did some research and found some great ideas for cleaning products you can easily make at home for pennies. This post will focus on cleaning your bathroom. First off, we'll start with a list of ingredients you'll need. Stock up on these few essentials and you'll never run out of cleaning supplies.
Now for the good stuff, here are some easy-to-make, effective cleaning products which are safe for your health and your home. Just make sure you head over to your local dollar store before starting to stock up on rags, sponges, spray bottles, jars, measuring cups/spoons and adhesive labels.  Shiny Surfaces (Tub, Tiles, Toilets, Sinks)
 Scouring Powders
 Drain Cleaners
 Soap Scum, Calcium and Lime Removers
 Mold and Mildew Removers
 So there you have it - a sparkling clean, wonderfully scented bathroom that didn't kill your wallet, brain cells or the environment!
If you have any suggestions for additions to the list, feel free to post in the comments. Till next time! |
AuthorHi! I'm Sonja and I'm glad you're here! I'm happy to share some recipes and gardening tips with you while I let you know about great (or not so great) products, services, and media I encounter. Visit my online shop at MysteriousDragonfyre.com
for Crystals, Herbs, Incense, and other Witchy things! Categories
All
Hey look! You're visitor #
Visit my online shop at MysteriousDragonfyre.com
for Crystals, Herbs, Incense, and other Witchy things! |